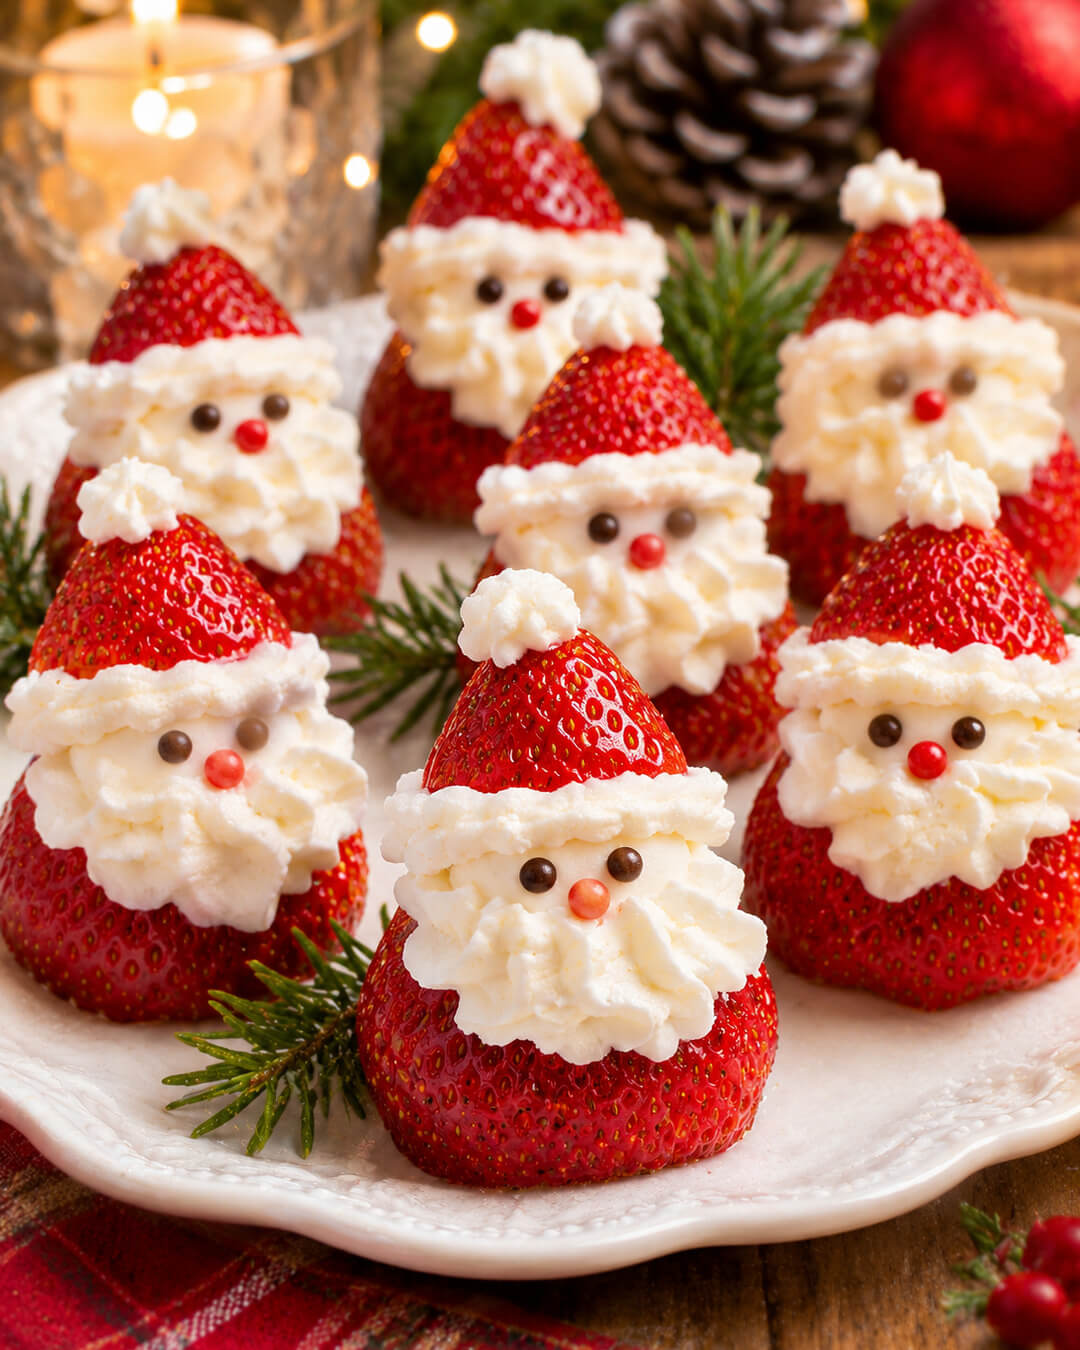
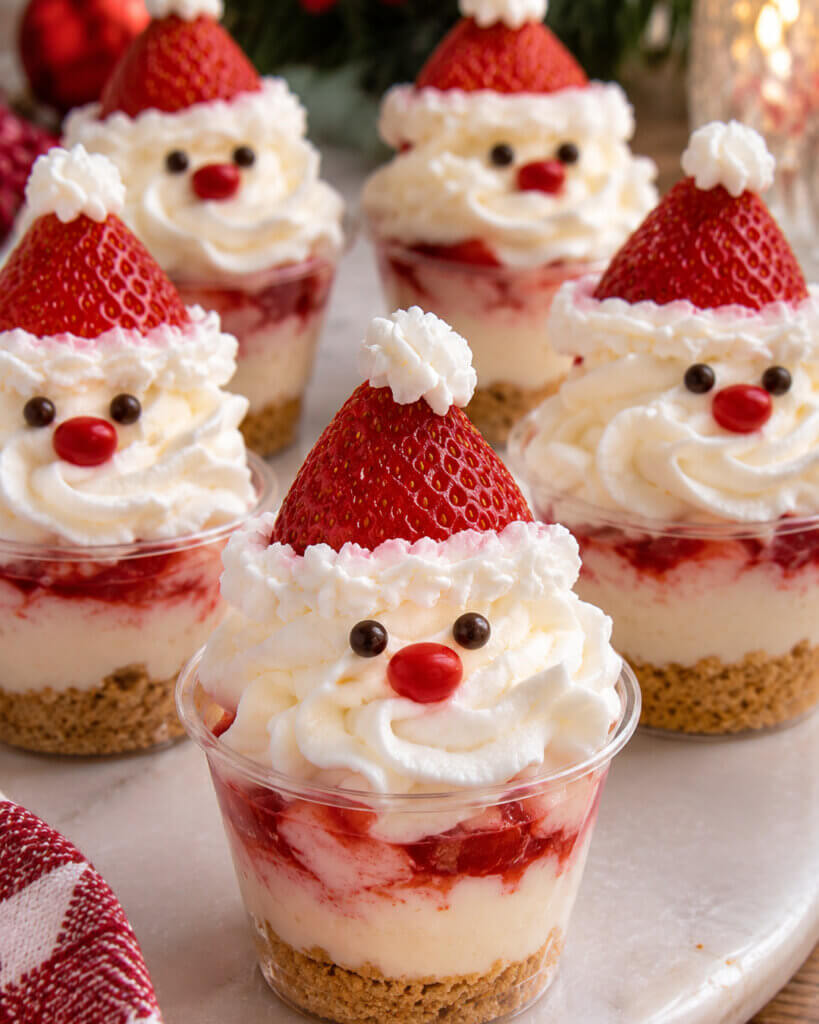
Make the best Santa Strawberry Cheesecake Cups with this easy, delicious no-bake Christmas dessert recipe! Layers of buttery vanilla wafer cookie crumbs, rich and creamy vanilla cheesecake filling, and sweet strawberries are served in individual dessert cups, then topped with adorable Strawberry Santas. Each little Santa is made with a fresh strawberry, fluffy cheesecake cream, miniature chocolate chip eyes, and a tiny white pom-pom on top of his hat.
These festive cheesecake cups are perfect for Christmas parties, holiday gatherings, Christmas Eve celebrations, or a fun dessert to make with the family!
If you love strawberry cheesecake and adorable Christmas desserts, you’re going to fall in love with these Santa Strawberry Cheesecake Cups!
We’re talking a buttery vanilla wafer crust, fluffy no-bake cheesecake cream, and a sweet strawberry filling layered together in little clear dessert cups.
And on top? The cutest little strawberry Santa!
So delicious!
I love making individual desserts for Christmas because they’re easy to prepare ahead of time and look beautiful arranged on a holiday dessert table.
These cheesecake cups are especially fun because they combine two of my favorite things: creamy strawberry cheesecake and festive Christmas treats.
The bottom of each cup starts with a layer of crushed vanilla wafer cookies mixed with melted butter.
Next comes a generous spoonful of smooth vanilla cheesecake cream.
A layer of fresh strawberries mixed with strawberry preserves adds a sweet, fruity flavor.
Then another layer of cheesecake cream finishes the dessert.
But we’re not done yet!
Each cup gets its own little Strawberry Santa made with a fresh strawberry that’s cut into two pieces.
The larger piece becomes Santa’s body, while the pointed strawberry tip becomes his hat.
A swirl of cheesecake cream creates his fluffy white face and beard, two miniature chocolate chips become the eyes, and a tiny dot of cream finishes the hat.
They’re almost too cute to eat!
One of my favorite things about this recipe is the combination of textures.
The vanilla wafer crumbs add a buttery crunch, the cheesecake filling is rich and fluffy, and the strawberries bring a fresh, juicy sweetness.
Every spoonful tastes like a delicious little strawberry cheesecake.
And because this recipe is completely no-bake, you don’t need to turn on the oven!
You can prepare the cheesecake cups a few hours before your holiday party and keep them in the refrigerator.
I recommend decorating them with the Strawberry Santas shortly before serving so the fruit looks its best.
They’re perfect for Christmas dessert trays, school holiday celebrations, family gatherings, or an easy dessert for Christmas dinner.
Why you’ll love this recipe
There are so many reasons to love these Santa Strawberry Cheesecake Cups! They’re creamy, fruity, festive, and incredibly easy to prepare.
- They’re completely no-bake. You don’t need an oven or stovetop to prepare these delicious little desserts. Just mix, layer, chill, and decorate.
- They look adorable for Christmas. Each cheesecake cup is topped with a fresh strawberry decorated to look like a tiny Santa, complete with a red hat and little chocolate eyes.
- The cheesecake filling is rich and fluffy. Full-fat cream cheese and freshly whipped heavy cream create a smooth vanilla filling that pairs perfectly with fresh strawberries.
- They’re perfect for individual servings. Everyone gets their own dessert cup, making them easy to serve at parties and family celebrations.
- You can prepare them ahead of time. Make the cheesecake cups in advance, refrigerate until firm, and add the Santa decorations shortly before serving.
I also love that you can customize the cookie layer, cheesecake filling, and fruit topping.
You can use graham crackers instead of vanilla wafers, add a little white chocolate, or make the strawberry layer with fresh raspberries.
For Christmas, though, the classic vanilla cheesecake and strawberry combination is definitely one of my favorites!
What are Santa Strawberry Cheesecake Cups?
Santa Strawberry Cheesecake Cups are individual no-bake cheesecake desserts layered with cookie crumbs, creamy cheesecake filling, and sweet strawberries.
They’re served in clear dessert cups so you can see the pretty layers from the outside.
The finished cups are decorated with miniature Santa figures made from fresh strawberries.
Unlike traditional baked cheesecake, this recipe doesn’t require eggs or baking.
The cheesecake filling is made with softened cream cheese, powdered sugar, vanilla, and whipped cream.
It has a rich cheesecake flavor, but a lighter, fluffier texture.
The cookie layer is inspired by a classic cheesecake crust.
Instead of pressing the crumbs into a springform pan, they’re spooned into the bottoms of individual serving cups.
Fresh strawberries mixed with a little strawberry preserves create a sweet fruit layer.
I like using preserves because they add extra strawberry flavor and help the chopped fruit hold together.
The real finishing touch is the Strawberry Santa topper.
Each Santa is assembled from one large strawberry and a little of the cheesecake filling.
The result is a beautiful Christmas dessert that’s easy to serve and fun to decorate.
Ingredients
Here I explain the best ingredients for these Santa Strawberry Cheesecake Cups, what each one does, and substitution options. For the exact ingredient measurements, see the recipe card at the bottom of this post.
For the vanilla wafer cookie layer
Vanilla wafer cookies – you’ll need 1½ cups of finely crushed vanilla wafer crumbs. I love using vanilla wafers because their sweet, buttery flavor pairs beautifully with the creamy cheesecake filling.
Unsalted butter – you’ll need 4 tablespoons of melted butter. This helps the cookie crumbs hold together and gives the layer a delicious richness.
You can substitute graham cracker crumbs if you prefer a more traditional cheesecake flavor.
For the vanilla cheesecake filling
Cream cheese – you’ll need 16 ounces of full-fat brick-style cream cheese, softened. Cream cheese gives the filling its rich, slightly tangy flavor and helps it hold its shape.
I recommend using full-fat cream cheese instead of whipped cream cheese from a tub.
Powdered sugar – you’ll need ½ cup. Powdered sugar adds sweetness and blends smoothly into the cream cheese without creating a grainy texture.
Vanilla extract – you’ll need 1 teaspoon. Vanilla gives the filling a delicious flavor that works perfectly with strawberries and cookie crumbs.
Heavy whipping cream – you’ll need 1 cup of cold heavy whipping cream. Whipping the cream separately makes the cheesecake filling light and fluffy.
Make sure the cream is cold before whipping for the best results.
For the strawberry layer
Fresh strawberries – you’ll need 1½ cups of finely diced strawberries. Choose berries that are ripe, sweet, and firm.
Strawberry preserves – you’ll need 3 tablespoons. Strawberry preserves add sweetness and help create a thicker fruit layer.
I recommend using thick strawberry preserves rather than a thin strawberry syrup.
Fresh lemon juice – you’ll need 1 teaspoon. Lemon juice brightens the strawberry flavor and balances the sweetness.
For the Strawberry Santa toppers
Large fresh strawberries – you’ll need 12 additional large strawberries. Look for firm berries with pointed tips so they create recognizable little Santa hats.
Reserved cheesecake filling – you’ll use ½ cup of the prepared cheesecake cream to make the Santa faces, beards, and hat pom-poms.
Miniature chocolate chips – you’ll need 24 miniature semisweet chocolate chips, two for each Santa.
Regular chocolate chips are usually too large, so I recommend using miniature chips.
Optional Christmas decorations
You can also decorate the serving cups with:
- Extra crushed vanilla wafer cookies
- Fresh mint leaves
- White chocolate curls
- Christmas sprinkles
- Additional strawberry slices
I love keeping the decorations simple so the little Strawberry Santas remain the centerpiece of the dessert!
What’s the best cheesecake filling for these dessert cups?
For this recipe, I recommend making a no-bake vanilla cheesecake filling with cream cheese and freshly whipped heavy cream.
I love this combination because it’s rich and creamy without being too heavy.
The cream cheese provides the familiar tangy cheesecake flavor, while the whipped cream creates a lighter texture.
Powdered sugar adds just enough sweetness, and vanilla brings everything together.
Another reason I love this filling is that it works for both the cheesecake layers and the Santa decorations.
You don’t have to prepare a separate frosting!
Simply reserve ½ cup of the finished cheesecake cream before assembling the dessert cups.
Use that reserved filling to pipe Santa’s little white face and beard, along with the pom-pom on top of his strawberry hat.
The filling is thick enough to hold its shape when chilled, making it perfect for decorating.
If you want a stronger strawberry cheesecake flavor, you can also add 2 tablespoons of finely ground freeze-dried strawberry powder to the filling.
However, I recommend keeping the original filling white for this Christmas version.
The white cheesecake cream looks beautiful against the red strawberries and makes the Santa faces easy to recognize.
What’s the best strawberry to use?
Fresh, firm strawberries are the best choice for these cheesecake cups.
I recommend choosing berries that are bright red, sweet, and fragrant.
For the strawberry layer, you can use medium or large strawberries.
Since they’ll be chopped into small pieces, their shape isn’t especially important.
The berries should be ripe enough to taste sweet but still firm enough to hold their texture.
For the Santa decorations, I recommend choosing large strawberries with pointed tips.
The pointed portion becomes Santa’s hat, so naturally shaped berries make decorating much easier.
Try to choose 12 strawberries that are relatively similar in size.
This helps the finished dessert cups look neat when arranged together on a platter.
Avoid strawberries that are overly soft, bruised, or leaking juice.
Very ripe strawberries can become mushy when cut, making the Santa toppers difficult to assemble.
I also recommend drying the strawberries thoroughly after washing.
Excess moisture can make the cheesecake filling slide off the fruit.
What size dessert cups should you use?
For this recipe, I recommend using 12 clear dessert cups that hold approximately 6 ounces each.
The clear cups allow you to see the beautiful cookie, cheesecake, and strawberry layers.
I especially love using small, straight-sided dessert cups because they’re easy to fill.
They’re also perfect for serving at Christmas parties.
You can find disposable clear dessert cups or use small reusable glass dessert dishes.
If you’re making these for a large gathering, lightweight individual dessert cups are especially convenient.
I recommend choosing cups with a relatively wide opening.
This gives you enough room to add the Strawberry Santa decorations without crushing the fruit.
You can also make smaller portions using 4-ounce dessert cups.
If you do, use a little less cookie crumb mixture and cheesecake filling in each cup.
The recipe may make a few additional smaller servings, depending on how generously you fill them.
How to make Santa Strawberry Cheesecake Cups
I’ve included detailed step-by-step instructions below to make this recipe easy to prepare at home. For the full recipe instructions and exact ingredient quantities, scroll to the recipe card at the bottom of this post.
You’ll need mixing bowls, an electric hand mixer, a rubber spatula, a piping bag, a sharp knife, and 12 clear dessert cups.
Step 1. Crush the vanilla wafers
Start by placing vanilla wafer cookies in a food processor.
Pulse until they become fine crumbs.
Measure 1½ cups of crushed cookies and transfer them to a medium mixing bowl.
If you don’t have a food processor, place the cookies in a zip-top bag.
Seal the bag and use a rolling pin to crush them.
I recommend making the crumbs fairly fine so they create a neat layer in the bottom of each dessert cup.
Step 2. Make the cookie crumb mixture
Add 4 tablespoons of melted unsalted butter to the crushed vanilla wafers.
Use a spoon to stir until the crumbs are evenly coated.
The mixture should resemble damp sand.
When pressed between your fingers, the crumbs should hold together slightly.
I love how the melted butter gives the cookie layer that delicious cheesecake crust flavor.
Set the mixture aside while preparing the filling.
Step 3. Beat the cream cheese
Place 16 ounces of softened full-fat cream cheese in a large mixing bowl.
Use an electric hand mixer to beat for approximately 1-2 minutes.
You want the cream cheese completely smooth.
Scrape down the sides of the bowl with a rubber spatula.
This helps make sure there aren’t any lumps remaining.
I recommend allowing the cream cheese to soften before mixing because cold cream cheese can be difficult to beat smoothly.
Step 4. Add the powdered sugar and vanilla
Add ½ cup of powdered sugar and 1 teaspoon of vanilla extract to the cream cheese.
Beat on medium-low speed until smooth and creamy.
The mixture should be thick and slightly fluffy.
Scrape down the sides of the bowl again.
I recommend tasting a small amount at this point.
If you prefer a sweeter cheesecake filling, you can add another tablespoon of powdered sugar.
The strawberry preserves will also add sweetness, so the original amount is usually enough.
Step 5. Whip the heavy cream
Pour 1 cup of cold heavy whipping cream into a separate chilled mixing bowl.
Use an electric mixer to whip until stiff peaks form.
The cream should hold its shape when the beaters are lifted.
This generally takes approximately 2-4 minutes, depending on the mixer.
Be careful not to overwhip.
You want the cream smooth and fluffy rather than grainy.
Step 6. Combine the cheesecake filling
Add approximately one-third of the whipped cream to the sweetened cream cheese mixture.
Use a rubber spatula to gently fold it in.
This helps loosen the cream cheese.
Add the remaining whipped cream in two additions.
Continue folding until the filling is smooth, fluffy, and evenly combined.
I recommend folding gently rather than stirring aggressively.
This helps preserve the air in the whipped cream.
The finished cheesecake filling should be thick enough to hold a piped swirl.
Step 7. Reserve the Santa decorating cream
Before assembling the cups, measure out ½ cup of the cheesecake filling.
Transfer it to a small piping bag fitted with a round piping tip.
Refrigerate until you’re ready to make the Strawberry Santas.
This reserved filling will be used for the little faces, beards, and pom-poms.
I love this shortcut because you don’t need to prepare a separate cream cheese frosting!
Transfer the remaining cheesecake filling to a larger piping bag or leave it in the mixing bowl for layering.
Step 8. Prepare the strawberry layer
Wash and thoroughly dry the strawberries.
Remove the green tops and finely dice enough berries to measure 1½ cups.
Place the chopped strawberries in a mixing bowl.
Add 3 tablespoons of strawberry preserves and 1 teaspoon of fresh lemon juice.
Stir gently until the berries are evenly coated.
The mixture should look glossy and thick, with little pieces of fresh strawberry throughout.
I recommend using thick preserves so the fruit layer doesn’t become too watery.
If the strawberries release a lot of juice, drain away any excess liquid before assembling.
Step 9. Add the cookie layer
Arrange the 12 clear dessert cups on a large baking sheet or tray.
Spoon approximately 2 tablespoons of the vanilla wafer crumb mixture into the bottom of each cup.
Use the back of a spoon to gently press the crumbs into an even layer.
You don’t need to press them as firmly as you would for a traditional cheesecake crust.
A slightly loose cookie layer is delicious in individual dessert cups.
I love how the golden crumbs look through the clear sides!
Step 10. Add the first cheesecake layer
Pipe or spoon approximately 2 tablespoons of cheesecake filling over the cookie crumbs in each cup.
Use a small spoon to spread it into an even layer.
I recommend keeping the filling away from the upper sides of the cups as much as possible.
This helps the finished layers look neat and distinct.
If you’re using a piping bag, pipe around the outside edge first, then fill the center.
This makes it easier to create a smooth layer.
Step 11. Add the strawberry layer
Spoon approximately 2 tablespoons of the strawberry mixture over the cheesecake filling in each cup.
Spread the fruit gently.
You want the strawberry layer visible through the clear cups.
I love the bright red color against the white cheesecake filling!
Avoid adding extra liquid from the bottom of the strawberry bowl.
Too much juice can soften the cookie crumbs and make the layers run together.
Step 12. Add the final cheesecake layer
Pipe another approximately 2 tablespoons of cheesecake filling over the strawberries.
Smooth the top gently with a spoon or create a pretty swirl using a star piping tip.
I recommend leaving a little room at the top of each cup for the Strawberry Santa decoration.
The cheesecake cups should have beautiful layers of golden cookie crumbs, white cheesecake cream, and bright red strawberries.
Step 13. Refrigerate the cheesecake cups
Place the filled dessert cups in the refrigerator.
Chill for at least 2 hours.
This allows the cheesecake filling to become firmer and gives the flavors time to come together.
I recommend covering the cups once the filling has firmed enough that the covering won’t touch the surface.
You can also prepare the cups several hours before serving.
Keep the Santa decorations separate until closer to serving time for the freshest appearance.
How to make the Strawberry Santa toppers
The little Strawberry Santas are what make these cheesecake cups so special!
And they’re surprisingly easy to create.
Each Santa only needs one strawberry, a little cheesecake filling, and two miniature chocolate chips.
Step 1. Wash and dry the strawberries
Start by washing 12 large fresh strawberries under cool running water.
Gently pat them dry with paper towels.
I recommend drying them thoroughly, especially around the cut surfaces.
Excess moisture can make the cream filling slide.
Step 2. Create the Santa bodies
Use a small, sharp knife to remove the green leafy top from each strawberry.
Trim a very thin slice from the wide end to create a flat base.
This allows each strawberry to sit upright.
I recommend removing only enough fruit to make it stable.
Place each strawberry on your work surface and check that it stands without tipping.
Step 3. Cut the Santa hats
Position a strawberry with the pointed end facing up.
Cut horizontally approximately one-third of the way down from the tip.
The smaller pointed piece will become Santa’s hat.
The larger bottom section will become his body.
Keep the two pieces together so the hat fits naturally on its matching base.
Repeat with the remaining strawberries.
Step 4. Pipe Santa’s face and beard
Remove the reserved cheesecake filling from the refrigerator.
Pipe approximately 1 teaspoon of cream onto the cut surface of each strawberry base.
You want enough cream to create a little white face and beard.
I recommend making a rounded swirl that’s slightly wider at the bottom.
Don’t pipe too much cream, or the hats may slide off.
The cheesecake filling should be thick enough to hold the strawberry tops in place.
Step 5. Add the Santa hats
Gently place the pointed strawberry pieces over the cheesecake filling.
Press very lightly so the hats sit securely.
The white cream should remain visible between the strawberry body and hat.
I love how the little Santa figures begin taking shape during this step!
If a hat leans to one side, gently adjust it.
Step 6. Add the chocolate chip eyes
Take two miniature chocolate chips for each Santa.
Gently press them into the front of the white cheesecake filling.
I recommend placing the pointed ends into the cream so the flatter sides face outward.
This gives the little Santas neat, round-looking eyes.
If needed, use the tip of a toothpick to help position the chocolate chips.
Step 7. Add the white pom-poms
Use the piping bag to add a tiny dot of cheesecake filling to the pointed top of each strawberry hat.
This creates Santa’s fluffy white pom-pom.
You only need a small amount.
I love this little finishing touch because it makes the strawberry hats instantly recognizable!
Step 8. Chill briefly
Transfer the finished Strawberry Santas to a parchment-lined tray.
Refrigerate for approximately 15-20 minutes.
This helps the cheesecake filling firm up and keeps the hats secure.
Once chilled, they’ll be ready to place on top of the dessert cups.
How to assemble the finished Santa Strawberry Cheesecake Cups
Once the cheesecake cups have chilled and the Santa decorations are ready, it’s time to finish the desserts.
Step 1. Remove the cups from the refrigerator
Take the chilled cheesecake cups out of the refrigerator.
Arrange them on a large serving tray or platter.
The cheesecake filling should be slightly firmer than when it was first piped.
This helps support the Strawberry Santa decorations.
Step 2. Add the Strawberry Santas
Carefully place one Strawberry Santa on top of each cheesecake cup.
Position the figure near the center.
Gently press the flat strawberry base into the top layer of cheesecake just enough to help it stand securely.
Don’t press too hard!
You don’t want to crush the cream or make the Santa sink too far into the dessert.
Step 3. Add extra Christmas decorations
If you’d like, sprinkle a little crushed vanilla wafer cookie around the Strawberry Santa.
You can also add a tiny fresh mint leaf or a few Christmas sprinkles.
I love keeping the decorations simple so the cute little Santa remains the main focus.
Step 4. Serve chilled
Serve the finished cheesecake cups chilled.
I recommend providing small dessert spoons so guests can enjoy all the delicious layers.
Every spoonful has buttery cookie crumbs, fluffy vanilla cheesecake, and sweet strawberries.
And the little Strawberry Santa on top makes the dessert extra special for Christmas!
Recipe tips
These Santa Strawberry Cheesecake Cups are easy to prepare, but I’ve included a few helpful tips to make them look beautiful every time.
Use full-fat cream cheese. Brick-style cream cheese creates a thick, creamy filling that holds its shape when layered and piped.
Soften the cream cheese before mixing. This helps create a smooth cheesecake filling without lumps.
Keep the heavy cream cold. Cold heavy whipping cream whips more easily and creates a fluffier filling.
Whip the cream to stiff peaks. This helps the cheesecake cream stay thick enough for the layers and Santa decorations.
Use thick strawberry preserves. Thin strawberry syrup can make the fruit layer watery.
Dry the strawberries thoroughly. Excess moisture can cause the Santa faces to slide and make the dessert cups watery.
Choose large strawberries for the toppers. Bigger berries are easier to cut and decorate.
Reserve the decorating cream first. Set aside ½ cup of cheesecake filling before assembling the cups so you have enough for the Santa faces and pom-poms.
Use miniature chocolate chips. Regular chocolate chips are usually too large for the little faces.
Chill the cheesecake cups before decorating. This helps the filling firm up so it can support the Strawberry Santas.
Add the Santa toppers close to serving time. Freshly decorated strawberries look best when they haven’t been sitting for too long.
How to make the cheesecake filling thick and fluffy
One of my favorite things about these dessert cups is the rich, fluffy cheesecake filling.
And there are a few simple steps that will help you get the best texture.
First, use full-fat brick-style cream cheese.
I recommend avoiding whipped cream cheese or spreadable varieties from a tub.
Those products may create a softer filling that doesn’t hold its shape as well.
Next, make sure the cream cheese is softened before mixing.
Cold cream cheese can leave little lumps in the filling, even when using an electric mixer.
Once the cream cheese is smooth, add the powdered sugar and vanilla.
Then whip the heavy cream separately until stiff peaks form.
This is important!
If the whipped cream is too soft, the finished cheesecake filling may not hold a piped swirl.
Fold the whipped cream into the cream cheese gently.
You want to keep the filling light and fluffy.
Finally, refrigerate the dessert cups for at least 2 hours.
The cream cheese becomes firmer as it chills, helping the layers hold their shape.
I love how smooth and creamy the filling becomes after chilling!
How to keep the strawberry layer from becoming watery
Fresh strawberries contain quite a bit of natural juice.
That’s what makes them so delicious!
But when you’re making layered cheesecake cups, too much strawberry juice can cause the layers to become messy.
I recommend starting with fresh, firm strawberries.
Very ripe berries may release more liquid after they’re chopped.
Next, wash and dry the strawberries before cutting them.
Don’t leave the chopped fruit soaking in water.
After dicing, gently pat away any excess moisture if needed.
For the fruit layer, combine the strawberries with thick strawberry preserves.
The preserves add sweetness and help coat the fruit.
I recommend using only a small amount of lemon juice.
One teaspoon is enough to brighten the flavor without making the mixture too thin.
If the strawberries release a lot of liquid while sitting, drain away the excess juice before layering.
This helps keep the cheesecake cups looking beautiful through the clear sides.
How to make the Strawberry Santas stand upright
One of the most common challenges when decorating Strawberry Santas is getting them to stand without tipping.
Luckily, there’s an easy trick!
Start by trimming the wide end of each strawberry.
You want a small, flat surface that can rest securely on the cheesecake cream.
Don’t cut away too much fruit.
The wider the base, the more stable the Santa will be.
I also recommend using strawberries that are relatively straight.
Very curved berries may lean slightly after decorating.
When adding the cheesecake filling between the strawberry pieces, keep the swirl fairly short.
If the cream is piled too high, the hat can become top-heavy and slide.
Once assembled, refrigerate the little Santas briefly.
The cheesecake cream will firm up slightly and help hold everything in place.
When you’re ready to serve, gently press the strawberry base into the top layer of cheesecake.
That little bit of support helps keep Santa standing upright!
Recipe variations
One of my favorite things about these Santa Strawberry Cheesecake Cups is how easy they are to customize.
The original version with vanilla cheesecake and fresh strawberries is delicious, but there are plenty of fun variations to try.
Chocolate Strawberry Santa Cheesecake Cups
If you love chocolate and strawberries together, this variation is for you!
Add 3 tablespoons of unsweetened cocoa powder to the cream cheese mixture along with the powdered sugar.
Beat until smooth, then fold in the whipped cream.
I recommend reserving a little plain white cheesecake cream before adding the cocoa powder if you want white faces for the Strawberry Santas.
Layer the chocolate cheesecake filling with the vanilla wafer crumbs and fresh strawberries.
Finish with the Santa decorations.
The combination of chocolate and strawberry is so delicious!
White Chocolate Strawberry Cheesecake Cups
For an extra creamy dessert, add 3 ounces of melted and cooled white chocolate to the cream cheese mixture before folding in the whipped cream.
Reduce the powdered sugar slightly if you prefer a less sweet filling.
The white chocolate adds a rich flavor that pairs beautifully with fresh strawberries.
I love decorating this version with white chocolate curls around the little Santa figures.
Graham Cracker Strawberry Cheesecake Cups
If you prefer a more traditional cheesecake flavor, replace the vanilla wafer crumbs with graham cracker crumbs.
Use the same amount of crumbs and melted butter.
The graham cracker layer has a delicious lightly toasted flavor that pairs wonderfully with the cheesecake cream.
This is a great variation if you don’t have vanilla wafers available.
Strawberry Cheesecake Cups with Lemon
For a refreshing citrus flavor, add 1 teaspoon of finely grated lemon zest to the cheesecake filling.
The lemon adds a bright flavor that complements the strawberries.
I recommend using zest rather than extra lemon juice because too much liquid can soften the filling.
You can also add a little lemon zest to the strawberry layer.
Strawberry Raspberry Cheesecake Cups
For a different fruit combination, replace half of the diced strawberries with fresh raspberries.
Gently fold the raspberries into the strawberry preserves.
The raspberries add a delicious tart flavor and make the fruit layer even more colorful.
Keep the fresh strawberries for the Santa decorations.
Strawberry Cheesecake Cups with Chocolate Cookie Crumbs
For a rich chocolate version, replace the vanilla wafers with chocolate sandwich cookie crumbs.
Mix the crumbs with melted butter and divide them between the dessert cups.
Add the vanilla cheesecake and strawberry layers as directed.
I love how the dark chocolate crumbs contrast with the white filling and red strawberries!
Mini Strawberry Santa Cheesecake Cups
If you’re preparing dessert for a large Christmas party, you can make smaller portions.
Use 3-ounce or 4-ounce dessert cups instead of 6-ounce cups.
Add a little less of each layer.
You may be able to make approximately 16-18 smaller cups, depending on how generously they’re filled.
For the Santa toppers, choose smaller strawberries so they fit the cups.
These mini versions are especially cute for holiday dessert tables!
Frequently asked questions
Can you make Santa Strawberry Cheesecake Cups ahead of time?
Absolutely!
I recommend preparing the cheesecake cups several hours before serving.
The cookie, cheesecake, and strawberry layers can be assembled and refrigerated.
For the best appearance, make the Strawberry Santa toppers closer to serving time.
You can also prepare the cheesecake filling a day ahead and keep it refrigerated separately.
How long do the cheesecake cups need to chill?
I recommend refrigerating the assembled cheesecake cups for at least 2 hours.
This gives the filling time to become firmer and helps the layers hold their shape.
You can also refrigerate them overnight if needed.
If making them overnight, I recommend waiting to add the Santa toppers until shortly before serving.
Can you use frozen strawberries?
I don’t recommend frozen strawberries for the Santa decorations.
Frozen strawberries become soft and watery after thawing.
They won’t hold their shape well enough to create the little Santa bodies and hats.
For the strawberry layer inside the cups, thawed frozen strawberries could be cooked into a thick sauce, but fresh strawberries provide the best texture for this recipe.
Can you use whipped topping instead of heavy cream?
Yes!
You can replace the 1 cup of heavy whipping cream with approximately 2 cups of thawed whipped topping.
Fold it into the sweetened cream cheese mixture.
The filling will have a slightly different flavor and texture.
For the richest homemade cheesecake cream, I recommend freshly whipped heavy cream.
Why is my cheesecake filling runny?
The cream cheese may have been too warm, or the heavy cream may not have been whipped long enough.
I recommend using full-fat brick-style cream cheese and whipping the heavy cream until stiff peaks form.
If the finished filling feels too soft, refrigerate it for approximately 20-30 minutes before assembling the cups.
Also make sure you’re not adding extra liquid to the filling.
Can you make these without cream cheese?
You can use vanilla pudding or sweetened whipped cream for a different dessert, but it won’t have the same cheesecake flavor or thick texture.
For the classic version, I recommend using cream cheese.
If you prefer a milder filling, mascarpone cheese is another option.
Can you make the recipe gluten free?
Yes, with a few substitutions.
Replace the vanilla wafer cookies with gluten-free cookies or gluten-free graham crackers.
Make sure your strawberry preserves and other packaged ingredients are also suitable for your dietary needs.
The cheesecake filling itself doesn’t require flour.
Can you make these without chocolate chips?
Absolutely!
You can use tiny chocolate sprinkles, small pieces of dark chocolate, or little dots of melted chocolate for the Santa eyes.
Miniature chocolate chips are my favorite because they’re easy to handle and look cute on the little faces.
Can you double the recipe?
Yes!
These dessert cups are perfect for doubling when you’re preparing a Christmas party.
Simply double all of the ingredients.
Use 24 clear dessert cups and 24 large strawberries for the Santa toppers.
I recommend preparing the cheesecake filling in a large mixing bowl and assembling the cups in batches.
A double batch makes 24 delicious individual desserts.
Can you freeze the cheesecake cups?
I don’t recommend freezing the fully assembled dessert cups.
Fresh strawberries may become soft and release moisture after thawing.
The cheesecake filling can also change texture.
For the best results, prepare the cups fresh and store them in the refrigerator until serving.
How to decorate a Christmas dessert platter
One of my favorite ways to serve these Santa Strawberry Cheesecake Cups is on a large Christmas dessert platter.
Since each dessert is already in its own clear cup, it’s easy to create a beautiful display.
Start by arranging the cups in neat rows on a large serving tray.
I like using a white or wooden tray because the bright red Strawberry Santas stand out beautifully.
Make sure all the Santa faces are pointing toward the front of the platter.
You can also add a few fresh mint leaves around the edges for a little green color.
If you’re serving several desserts together, arrange Christmas cookies or chocolate truffles around the cheesecake cups.
I especially love pairing these with no-bake cheesecake bites and fresh chocolate-dipped strawberries.
The red, white, and green colors make the dessert table look festive without requiring complicated decorations.
For a large gathering, I recommend keeping the cups refrigerated until just before serving.
You can bring out smaller batches as needed so the cheesecake filling stays cold and the Strawberry Santas look fresh.
How to make Santa Strawberry Cheesecake Cups with kids
These cheesecake cups are a fun Christmas recipe to prepare with kids!
Since there’s no baking required, younger helpers can enjoy several parts of the decorating process.
I recommend having an adult prepare the cheesecake filling and cut the strawberries.
Once those steps are finished, arrange the dessert cups and Santa decorations on a large work surface.
Older children can help spoon the cookie crumbs and cheesecake filling into the cups.
Younger children may enjoy placing the strawberry hats on top of the cream.
Adding the chocolate chip eyes is another fun decorating step.
I recommend putting the miniature chocolate chips in a small bowl so they’re easy to reach.
The finished Strawberry Santas don’t need to look identical.
Some will have taller hats, others will have extra fluffy beards, and a few may lean slightly.
They’ll all taste delicious!
Once everything is decorated, refrigerate the cups until serving.
It’s a simple Christmas kitchen activity that ends with a delicious homemade dessert.
How to make them ahead of time
These Santa Strawberry Cheesecake Cups are a great make-ahead dessert for Christmas.
I recommend preparing the cheesecake filling first.
Beat the cream cheese with powdered sugar and vanilla, then fold in the whipped cream.
Transfer the filling to an airtight container or piping bag and refrigerate.
You can prepare it up to 24 hours in advance.
Next, crush the vanilla wafers.
Store the dry crumbs in an airtight container until you’re ready to mix them with melted butter.
For the strawberries, wash and dry them ahead of time, but keep the berries whole until closer to assembly.
This helps prevent them from releasing too much juice.
You can assemble the cheesecake cups several hours before serving.
Once layered, cover and refrigerate.
I recommend making the Strawberry Santa toppers the same day.
Cut the strawberries, pipe the cream, add the hats and eyes, then chill briefly.
Place one Santa on each cheesecake cup shortly before serving.
This method gives you the convenience of preparing ahead while keeping the fresh strawberries looking their best.
How to store leftovers
Leftover Santa Strawberry Cheesecake Cups are easy to store in the refrigerator.
Because the dessert contains cream cheese, heavy cream, and fresh strawberries, refrigeration is important.
How to refrigerate
Place the finished cheesecake cups in an airtight container or cover each cup carefully.
Store in the refrigerator at 40°F or below.
For the best quality, I recommend enjoying the desserts within 24 hours after adding the fresh strawberry decorations.
The cheesecake filling will stay creamy, but the strawberries may release juice as they sit.
The cookie crumbs can also become softer after absorbing moisture.
If you’ve prepared the cheesecake cups without the Santa toppers, they can be refrigerated for up to 2 days for the best texture.
How long can the dessert cups sit out?
Since the cheesecake filling contains cream cheese and heavy whipping cream, the cups should stay refrigerated until serving.
Don’t leave them at room temperature for more than 2 hours.
If you’re serving them outdoors or in temperatures above 90°F, refrigerate within 1 hour.
For holiday parties, I recommend bringing out smaller batches and keeping the remaining cups cold.
Can you freeze leftovers?
I don’t recommend freezing the assembled dessert cups.
The fresh strawberries become soft after thawing, and the cheesecake filling may lose some of its fluffy texture.
For the best results, store the desserts in the refrigerator and enjoy them fresh.
More easy Christmas dessert ideas
If you love these Santa Strawberry Cheesecake Cups, there are so many other delicious Christmas treats to make!
Strawberry Santas are perfect if you want a simple fruit-based Christmas dessert. Fresh strawberries are filled with sweet cheesecake cream and decorated with chocolate chip eyes.
No-Bake Christmas Cheesecake Bites are another wonderful option. Creamy cheesecake filling is shaped into little treats and decorated with festive holiday colors.
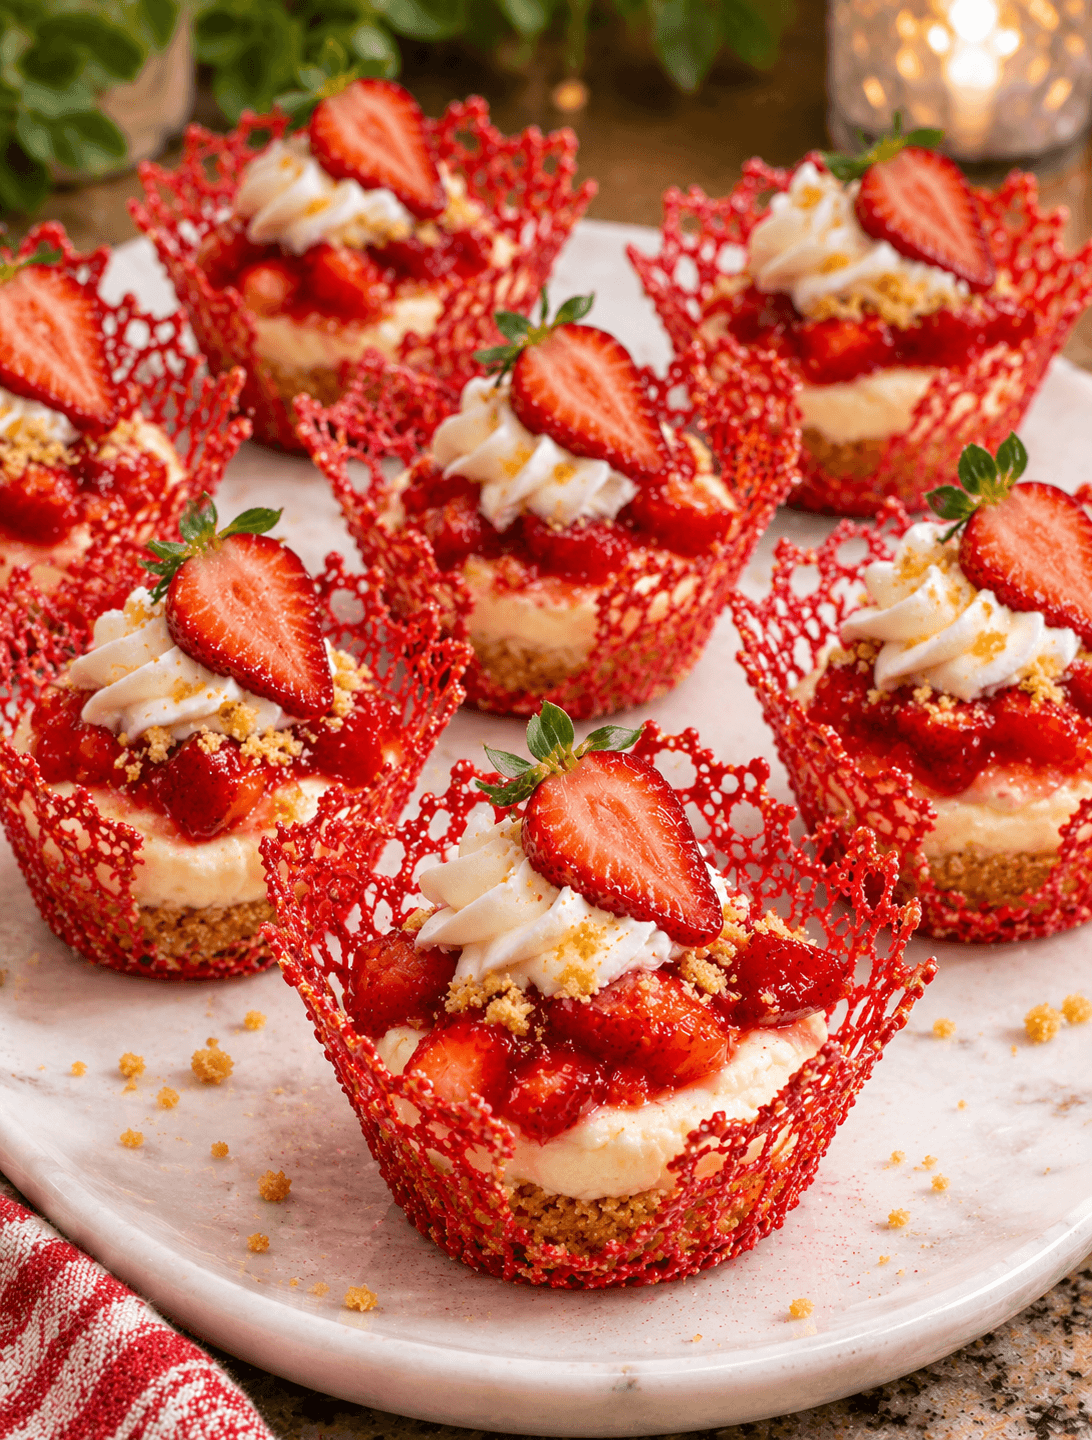
Christmas Strawberry Cheesecake Cups combine layers of cookie crumbs, fluffy cheesecake filling, and fresh strawberries for an easy individual dessert.
Christmas Fruit Salad is perfect when you want something fresh and colorful. Strawberries, grapes, kiwi, and pineapple create a beautiful holiday fruit bowl.
White Chocolate Strawberry Truffles are delicious for parties. A creamy white chocolate filling is combined with strawberry flavor and finished with a sweet coating.
Mini Christmas Cheesecakes are perfect for dessert trays. Little cheesecakes are decorated with whipped cream, berries, and festive sprinkles.
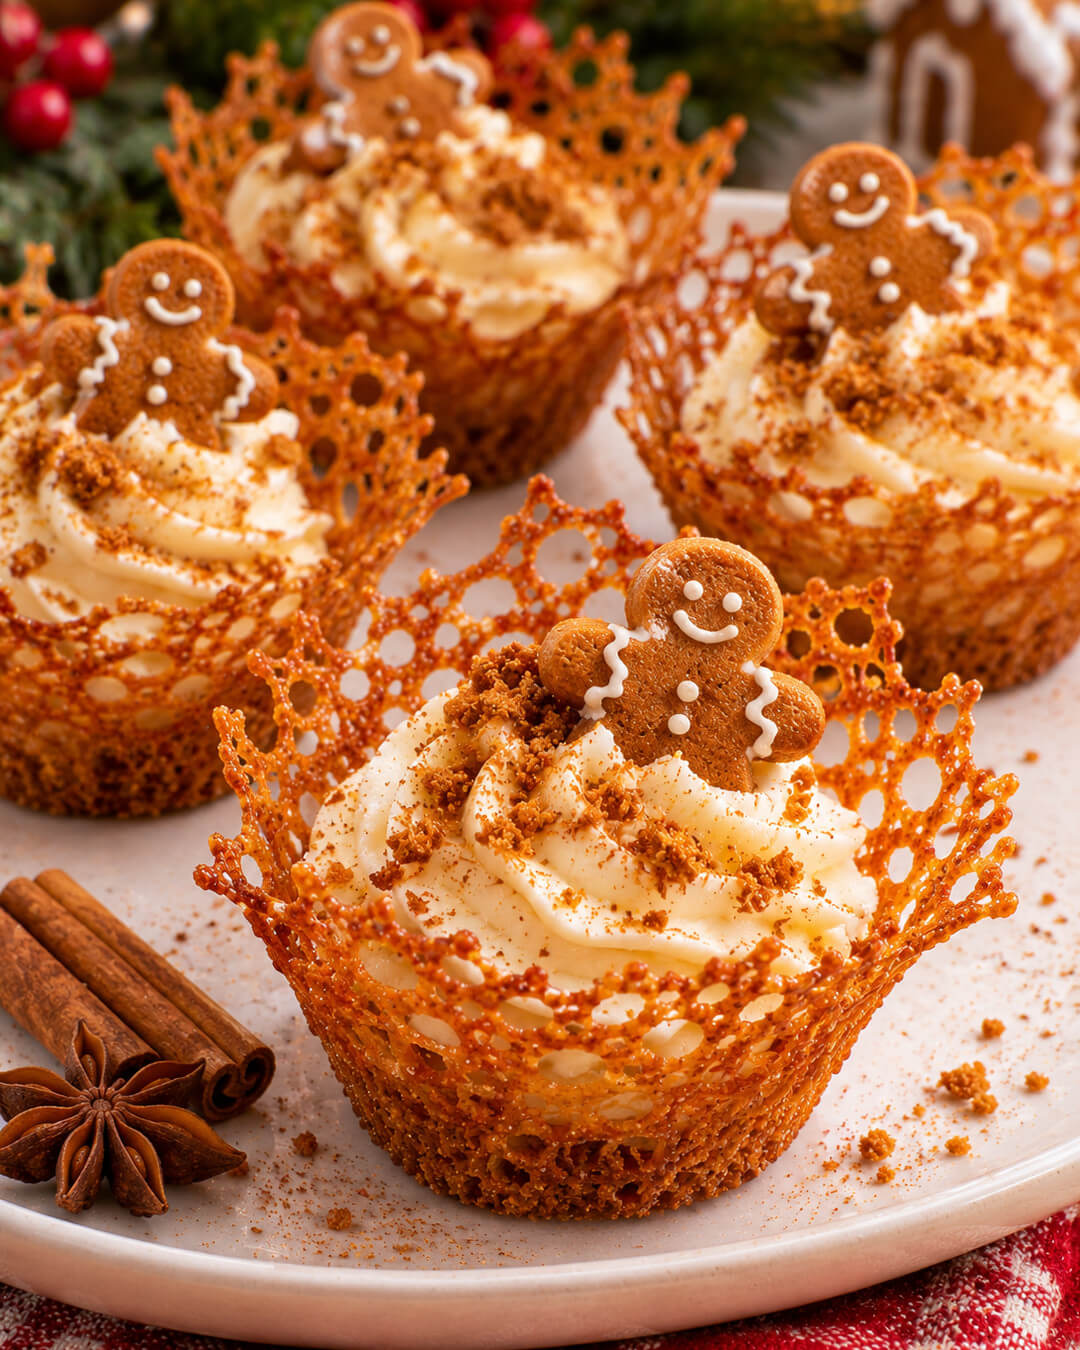
Gingerbread Cheesecake Cups are another holiday favorite. Crushed gingerbread cookies and fluffy spiced cheesecake cream create a delicious Christmas dessert.
I love having a collection of easy Christmas recipes that can be prepared ahead of time.
They’re especially helpful when the kitchen is already busy with cookies, pies, and Christmas dinner.
These Santa Strawberry Cheesecake Cups are definitely one to save!
With buttery vanilla wafer crumbs, rich vanilla cheesecake filling, sweet strawberries, and adorable little Strawberry Santas, they’re a delicious combination of creamy, fruity, and festive flavors.
Prepare the cups ahead of time, decorate with the little Santas shortly before serving, and enjoy every delicious strawberry cheesecake bite!
Santa Strawberry Cheesecake Cups
Ingredients
For the vanilla wafer cookie layer
- 1½ cups finely crushed vanilla wafer cookie crumbs
- 4 tablespoons unsalted butter melted
- For the vanilla cheesecake filling
- 16 ounces full-fat brick-style cream cheese softened
- ½ cup powdered sugar
- 1 teaspoon vanilla extract
- 1 cup cold heavy whipping cream
For the strawberry layer
- 1½ cups fresh strawberries finely diced
- 3 tablespoons thick strawberry preserves
- 1 teaspoon fresh lemon juice
- For the Strawberry Santa toppers
- 12 large fresh strawberries washed and thoroughly dried
- ½ cup cheesecake filling reserved from the prepared filling above
- 24 miniature semisweet chocolate chips
Optional decorations
- Additional crushed vanilla wafer cookies
- Fresh mint leaves
- White chocolate curls
- Christmas sprinkles
Instructions
- Prepare the dessert cups. Arrange 12 clear 6-ounce dessert cups on a large tray or baking sheet.
- Make the cookie crumbs. In a medium mixing bowl, combine finely crushed vanilla wafer cookies and melted butter. Stir until the crumbs are evenly coated.
- Beat the cream cheese. In a large mixing bowl, beat softened cream cheese with an electric hand mixer for 1-2 minutes, until smooth and creamy.
- Add sugar and vanilla. Mix in powdered sugar and vanilla extract until smooth and evenly combined.
- Whip the heavy cream. In a separate chilled mixing bowl, whip cold heavy whipping cream until stiff peaks form.
- Combine the cheesecake filling. Gently fold the whipped cream into the cream cheese mixture in several additions until smooth and fluffy.
- Reserve decorating cream. Transfer ½ cup of the cheesecake filling to a small piping bag fitted with a round tip. Refrigerate for decorating the Strawberry Santas later.
- Prepare the strawberries. In a medium bowl, combine 1½ cups of finely diced strawberries, strawberry preserves, and lemon juice. Stir gently until evenly coated. Drain away any excess liquid if needed.
- Add the cookie layer. Spoon approximately 2 tablespoons of vanilla wafer crumbs into the bottom of each dessert cup. Press gently into an even layer.
- Add cheesecake filling. Pipe or spoon approximately 2 tablespoons of cheesecake filling over the cookie crumbs in each cup.
- Add the strawberry layer. Spoon approximately 2 tablespoons of the strawberry mixture over the cheesecake filling.
- Add the final cheesecake layer. Pipe approximately 2 more tablespoons of cheesecake filling over the strawberries, leaving room for the Santa topper.
- Chill. Refrigerate the cheesecake cups for at least 2 hours, until the filling is slightly firmer.
- Prepare the Santa strawberries. Remove the green tops from the 12 large strawberries. Trim the wide ends to create flat bases.
- Cut the Santa hats. Slice the pointed top one-third off each strawberry, keeping the tops with their matching bases.
- Pipe the Santa faces. Using the reserved cheesecake filling, pipe approximately 1 teaspoon of cream onto each strawberry base.
- Add the hats. Gently place the pointed strawberry tops over the cheesecake cream to create Santa's red hats.
- Make the eyes. Press two miniature chocolate chips into the front of each white cheesecake face.
- Add the pom-poms. Pipe a tiny dot of reserved cheesecake cream onto the tip of each strawberry hat.
- Chill the Santas. Refrigerate the decorated strawberries for approximately 15-20 minutes to help the cream firm up. This can be done during the cheesecake cups' chilling time.
- Assemble. Carefully place one Strawberry Santa on top of each chilled cheesecake cup, gently pressing the flat base into the cream for support.
- Decorate and serve. Add extra cookie crumbs, mint leaves, white chocolate curls, or Christmas sprinkles if desired. Serve chilled.