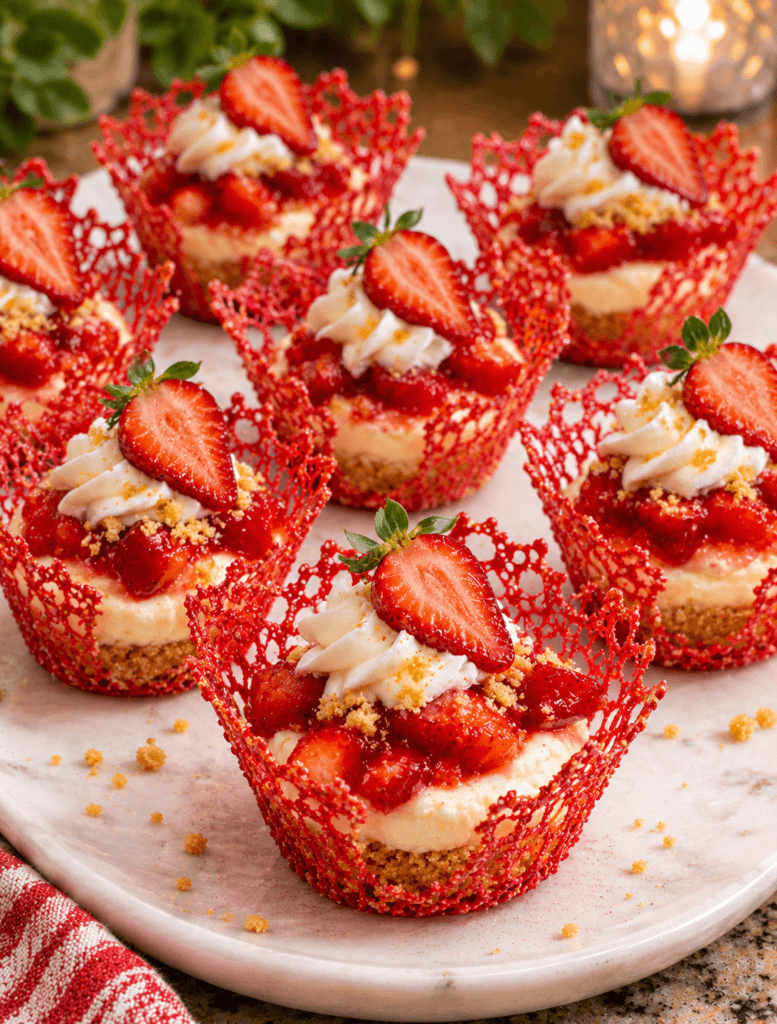
Make the best Strawberry Cheesecake Coral Lace Dessert Cups with this beautiful, delicious homemade dessert recipe! Delicate coral-pink lace cookie shells are filled with fluffy strawberry cheesecake cream, topped with sweet homemade strawberry sauce, and decorated with fresh strawberries. Every bite has the perfect combination of crispy, buttery cookie, rich cheesecake filling, and juicy strawberry flavor.
If you love strawberry cheesecake and elegant individual desserts, you’re going to fall in love with these little dessert cups!
We’re talking thin, crispy almond lace cookies shaped into beautiful cups, then filled with the most delicious strawberry cream cheese filling.
And that pretty coral-pink color? Perfect for special occasions!
I love making desserts that look impressive without requiring complicated decorating techniques. These Strawberry Cheesecake Coral Lace Dessert Cups are a wonderful example of how a few simple ingredients can come together to create something beautiful.
The delicate cookie shells have a slightly caramelized flavor, with little openings throughout the surface that create a beautiful lace pattern.
Inside each cup is a generous swirl of smooth strawberry cheesecake cream.
Then comes my favorite part!
A spoonful of homemade strawberry sauce and a fresh strawberry slice on top.
So good!
For this recipe, I like making the lace cookie shells with butter, sugar, finely ground almond flour, and a little freeze-dried strawberry powder.
As the cookies bake, they spread into thin circles with a delicate lacy appearance.
While they’re still warm, they’re carefully shaped into small cups.
Once cooled, they become wonderfully crisp!
The cheesecake filling is made with full-fat cream cheese, powdered sugar, freeze-dried strawberries, vanilla extract, and freshly whipped heavy cream.
It has that delicious tangy cheesecake flavor, but the whipped cream gives it a lighter, fluffier texture.
And because we’re using freeze-dried strawberries, the filling has plenty of strawberry flavor without becoming watery.
I especially love serving these dessert cups for Valentine’s Day, Mother’s Day, bridal showers, baby showers, birthday parties, or spring celebrations.
The combination of coral-pink shells, pale strawberry cream, and bright red fruit looks beautiful arranged on a white serving platter.
You can also prepare the individual components ahead of time!
Bake the shells, make the strawberry sauce, and prepare the cheesecake filling before your party.
Then assemble everything shortly before serving.
This is important because the crispy lace shells can soften when they sit against the cream for too long.
For the best texture, fill the cups just before you’re ready to enjoy them.
Every bite will have that delicious contrast between crispy cookie, fluffy cheesecake, and sweet strawberry topping!
Why you’ll love this recipe
There are so many reasons to love these Strawberry Cheesecake Coral Lace Dessert Cups! They’re beautiful, packed with fresh fruit flavor, and perfect for sharing.
- They’re perfect for special occasions. The coral-pink cookie shells and pretty strawberry filling make these little desserts beautiful for bridal showers, baby showers, Valentine’s Day, and Mother’s Day.
- The texture is delicious. Thin, crispy almond lace cookies surround a rich, fluffy cheesecake filling, creating the perfect combination of crunchy and creamy.
- They’re packed with strawberry flavor. Freeze-dried strawberry powder adds fruit flavor to the shells and cheesecake cream, while fresh strawberries create a delicious homemade topping.
- They’re easy to serve. Each guest gets their own little dessert cup, so there’s no need to slice a cheesecake or cut individual portions.
- You can prepare the components ahead of time. Make the shells and filling separately, then assemble shortly before serving for the crispiest texture.
I also love that you can customize the toppings.
Add white chocolate curls, fresh raspberries, finely chopped pistachios, or a little lemon zest for a different flavor.
The original strawberry version is definitely one of my favorites!
What are coral lace dessert cups?
Coral lace dessert cups are delicate, thin cookies that develop an open, lacy pattern during baking.
The little openings in the cookies create a beautiful appearance that resembles delicate coral.
After baking, the cookies are shaped into small cups while they’re still warm and flexible.
As they cool, the sugar hardens and the shells become crispy.
Unlike traditional tart shells, coral lace cups don’t have a thick pastry crust.
Instead, they’re thin and lightly crunchy, with a sweet, buttery flavor.
For this recipe, the shells are made using an almond lace cookie batter with a little freeze-dried strawberry powder and coral-colored food coloring.
The almond flour adds a mild nutty flavor, while the butter and sugar create a delicious caramelized taste.
The strawberry powder gives the cookies a subtle fruity flavor that pairs beautifully with the cheesecake filling.
I like filling the cups with strawberry cheesecake cream because the soft filling creates such a wonderful contrast with the delicate shell.
The finished desserts are light enough for an individual serving but rich enough to feel like a special treat.
And they’re beautiful without needing complicated decorations!
Ingredients
Here I explain the best ingredients for this Strawberry Cheesecake Coral Lace Dessert Cups recipe, what each one does, and substitution options. For the exact ingredient measurements, see the recipe card at the bottom of this post.
For the coral lace cookie shells
Unsalted butter – you’ll need 6 tablespoons of unsalted butter. Butter adds richness and helps the cookie batter spread into thin, delicate circles as it bakes. I recommend using unsalted butter so you can control the amount of salt.
Granulated sugar – you’ll need ½ cup. Sugar creates the sweetness and helps give the lace cookies their signature crispy texture once they cool.
Light corn syrup – you’ll need 2 tablespoons. Corn syrup helps create a smooth sugar mixture and contributes to the delicate, crisp texture of the finished cookies.
Blanched almond flour – you’ll need ⅔ cup. I recommend using finely ground blanched almond flour rather than coarse almond meal. Fine almond flour creates a more delicate cookie texture and helps the batter spread evenly.
All-purpose flour – you’ll need 3 tablespoons. This provides a little structure to the thin cookie shells and helps them hold their shape after cooling.
Freeze-dried strawberry powder – you’ll need 1 tablespoon. It adds strawberry flavor without adding moisture to the cookie batter. You can make your own powder by processing freeze-dried strawberries until finely ground.
Vanilla extract – ½ teaspoon adds a delicious flavor that pairs perfectly with butter, almonds, and strawberries.
Salt – ⅛ teaspoon helps balance the sweetness of the cookies.
Coral or pink gel food coloring – a small amount gives the lace cookies their beautiful coral-pink appearance. I recommend gel food coloring because it provides color without adding much extra liquid.
For the strawberry cheesecake filling
Cream cheese – you’ll need 8 ounces of full-fat brick-style cream cheese, softened. Cream cheese creates the rich, tangy cheesecake flavor. I recommend using full-fat cream cheese because it holds its shape better when piped.
Powdered sugar – you’ll need ⅓ cup. It adds sweetness and blends smoothly into the cream cheese without creating a grainy texture.
Freeze-dried strawberry powder – you’ll need 2 tablespoons. This gives the cheesecake filling a delicious strawberry flavor and natural pink color without making it runny.
Vanilla extract – you’ll need 1 teaspoon. Vanilla adds a wonderful flavor that complements the strawberries.
Heavy whipping cream – you’ll need ¾ cup of cold heavy whipping cream. Whipping the cream separately makes the cheesecake filling light and fluffy.
For the homemade strawberry sauce
Fresh strawberries – you’ll need 1 cup of finely chopped strawberries. I recommend using ripe, sweet strawberries for the best flavor.
Granulated sugar – you’ll need 2 tablespoons. Sugar helps release the strawberry juices and adds sweetness to the sauce.
Fresh lemon juice – you’ll need 1 teaspoon. Lemon juice brightens the strawberry flavor and balances the sweetness.
Cornstarch – you’ll need 1 teaspoon. It helps thicken the sauce so it stays on top of the cheesecake filling.
Cold water – you’ll need 1 teaspoon to mix with the cornstarch before adding it to the sauce.
For decorating
Fresh strawberries – you’ll need approximately 8 medium strawberries, sliced, for decorating the dessert cups.
You can also use tiny fresh mint leaves, white chocolate curls, or chopped pistachios.
I love keeping the original version simple with fresh strawberries so the beautiful pink filling and coral lace shells stand out!
What’s the best strawberry ingredient for cheesecake filling?
For this recipe, I recommend using freeze-dried strawberry powder.
I love adding fresh strawberries to desserts, but fresh strawberry puree contains quite a bit of moisture.
If you mix too much puree into cheesecake cream, the filling can become soft and difficult to pipe.
That’s not ideal when you’re filling delicate cookie cups.
Freeze-dried strawberries are a wonderful alternative.
They have a concentrated strawberry flavor and contain very little moisture.
When blended into a fine powder, they mix smoothly with cream cheese and create a beautiful natural pink color.
I recommend using plain freeze-dried strawberries without added sugar.
Place the freeze-dried fruit in a food processor and blend until finely ground.
If the powder contains larger pieces, sift it before adding it to the filling.
For this recipe, you’ll need 2 tablespoons of strawberry powder for the cheesecake cream and 1 tablespoon for the lace shells.
I also recommend making a separate strawberry sauce using fresh berries.
That way, you get concentrated strawberry flavor in the cream and a sweet, juicy strawberry topping.
It’s a delicious combination!
How to make the perfect coral-pink color
The coral-pink shells are one of the prettiest parts of this dessert!
Coral is a warm shade of pink with a little orange.
It looks beautiful alongside the pale pink cheesecake filling and bright red strawberry sauce.
I recommend using coral gel food coloring if you can find it.
You can also combine a tiny amount of pink gel coloring with a very small amount of orange.
Start with one or two small drops.
Mix thoroughly, then add more if needed.
I recommend keeping the color slightly lighter than you think you need because the cookies will develop golden edges as they bake.
The sugar naturally begins to caramelize, which may give the finished shells a warmer peach or coral appearance.
That’s completely normal!
I also recommend baking one test cookie before preparing the full batch.
This allows you to see how the color changes during baking.
If you prefer not to use food coloring, you can leave it out.
The strawberry powder will give the cookies a subtle pink tint, although the finished shells will look more golden than coral.
They’ll still taste delicious.
How to make Strawberry Cheesecake Coral Lace Dessert Cups
I’ve included detailed step-by-step instructions below to make this recipe super easy to follow at home. For the full recipe instructions and ingredient quantities, scroll to the recipe card at the bottom of this post.
You’ll need two large baking sheets, silicone baking mats, mixing bowls, a saucepan, a thin spatula, and small molds for shaping the cookies.
I also recommend using a piping bag with a large star tip for the cheesecake filling.
Step 1. Preheat the oven
Start by preheating the oven to 350°F.
Line two large baking sheets with silicone baking mats.
I recommend using silicone baking mats because lace cookies contain melted sugar and can be difficult to remove from some baking surfaces.
Prepare several small, heat-safe metal ramekins or the bottoms of small metal cups for shaping.
You can also use suitable silicone molds.
I recommend having everything ready before baking because the cookies need to be shaped while they’re still warm.
Step 2. Melt the butter and sugar
In a small saucepan over medium-low heat, combine 6 tablespoons of unsalted butter, ½ cup of granulated sugar, and 2 tablespoons of light corn syrup.
Stir gently as the butter melts.
Continue heating until the mixture becomes smooth and the butter has completely melted.
You don’t need to bring it to a rolling boil.
Remove the saucepan from the heat.
Allow the mixture to cool for approximately 2 minutes before adding the remaining ingredients.
Step 3. Combine the dry ingredients
In a small mixing bowl, combine ⅔ cup of blanched almond flour, 3 tablespoons of all-purpose flour, 1 tablespoon of freeze-dried strawberry powder, and ⅛ teaspoon of salt.
Use a spoon or whisk to mix until evenly combined.
Add the dry ingredients to the warm butter and sugar mixture.
Use a rubber spatula to stir until a smooth batter forms.
The batter will be soft and slightly sticky.
It won’t look like traditional cookie dough.
That’s exactly what you want!
The butter and sugar will help it spread into thin circles during baking.
Step 4. Add the vanilla and coloring
Stir ½ teaspoon of vanilla extract into the batter.
Add a small amount of coral or pink gel food coloring.
Mix until the color is evenly distributed.
I recommend starting with a light pink shade.
You can add another tiny drop of coloring if needed.
Keep in mind that the cookies will become thinner as they bake, so the finished shade may look a little different.
Step 5. Scoop the cookie batter
Use a measuring spoon to drop approximately 1 level tablespoon of batter onto the prepared baking sheet.
Leave at least 4 inches between each portion.
These cookies spread quite a bit!
I recommend baking only 2-3 cookies per baking sheet at first.
This gives you enough room for spreading and enough time to shape the warm cookies.
Gently flatten each portion with the back of a spoon.
Don’t worry about making a perfectly round circle.
The batter will spread naturally in the oven.
Step 6. Bake until lacy
Place the baking sheet in the preheated oven.
Bake for approximately 7-10 minutes.
The batter will begin bubbling and spreading into thin circles.
As the cookies continue baking, small openings will develop throughout the surface.
This creates the delicate coral lace appearance.
The cookies are ready when the bubbling slows and the edges look set.
I recommend watching them carefully after 7 minutes.
The sugar can brown quickly during the final few minutes.
You want lightly golden edges without allowing the cookies to become too dark.
Step 7. Allow the cookies to cool briefly
Remove the baking sheet from the oven.
Allow the cookies to cool for approximately 30-60 seconds.
They should begin setting around the edges but remain flexible enough to bend.
Don’t try to lift them immediately if they’re extremely soft.
They may stretch or tear.
But don’t wait until they’re completely cool!
Once the sugar hardens, the cookies become crispy and may crack when shaped.
Use a thin spatula to carefully lift one cookie.
If it feels too soft, allow it to cool for another few seconds.
Step 8. Shape the coral lace cups
Carefully drape the warm cookie over the bottom of an inverted, heat-safe metal ramekin or small metal cup.
Allow the edges to fall gently down the sides.
Use a heat-safe spatula to adjust the shape if necessary.
You can also gently press the warm cookie into a suitable silicone mold to create a small cup.
I recommend working with one cookie at a time.
The cookies become brittle quickly as they cool.
And be careful!
The melted sugar is extremely hot, so use heat-safe tools instead of touching the cookies directly with your fingers.
Step 9. Cool until crispy
Leave the shaped cookies on their molds for approximately 5 minutes, or until completely firm.
As the sugar cools, the shells will become crispy and hold their shape.
Carefully remove each shell from its mold.
Transfer to a wire rack and allow to cool completely.
Repeat with the remaining batter.
The recipe makes approximately 16 dessert cups, depending on their size, with the possibility of a few extra shells.
I love making an extra shell or two in case one cracks during assembly.
How to make the homemade strawberry sauce
The strawberry sauce adds a delicious fresh fruit flavor to the cheesecake cups.
It’s sweet, slightly tangy, and incredibly easy to prepare!
Step 1. Prepare the strawberries
Wash 1 cup of fresh strawberries.
Remove the green tops and cut the berries into small pieces.
I recommend using ripe strawberries for the sweetest flavor.
Place the chopped strawberries in a small saucepan.
Step 2. Add sugar and lemon juice
Add 2 tablespoons of granulated sugar and 1 teaspoon of fresh lemon juice.
Stir until the strawberries are evenly coated.
Place the saucepan over medium-low heat.
As the strawberries warm, they’ll begin releasing their natural juices.
Step 3. Cook the strawberry mixture
Cook for approximately 5-7 minutes, stirring occasionally.
The strawberries should become soft and begin forming a thick sauce.
I like leaving a few small pieces of strawberry in the mixture.
They add delicious texture and make the topping look beautiful.
If you prefer a smoother sauce, gently mash the berries with a spoon.
Step 4. Thicken the sauce
In a small bowl, combine 1 teaspoon of cornstarch with 1 teaspoon of cold water.
Stir until smooth.
Pour the cornstarch mixture into the saucepan.
Continue cooking for approximately 1 minute, stirring constantly, until the sauce thickens.
It should become glossy and thick enough to coat a spoon.
Remove the saucepan from the heat.
Step 5. Cool completely
Transfer the strawberry sauce to a shallow bowl.
Allow it to cool, then refrigerate until cold.
I recommend preparing the sauce before making the cheesecake filling.
This gives it plenty of time to chill.
Don’t add warm strawberry sauce to the cheesecake cream.
The heat can soften the filling and cause the delicate lace shells to become soggy.
How to make the strawberry cheesecake filling
The strawberry cheesecake cream is one of my favorite parts of this dessert!
It’s smooth, fluffy, and full of delicious berry flavor.
And because it’s a no-bake filling, you don’t need any eggs or baking time.
Step 1. Beat the cream cheese
Place 8 ounces of softened full-fat cream cheese in a large mixing bowl.
Beat with an electric hand mixer for approximately 1-2 minutes.
You want the cream cheese completely smooth.
Scrape down the sides of the bowl with a rubber spatula.
This helps remove any lumps before adding the other ingredients.
Step 2. Add the strawberry powder and sugar
Add ⅓ cup of powdered sugar, 2 tablespoons of freeze-dried strawberry powder, and 1 teaspoon of vanilla extract.
Beat on low speed until everything is smooth and evenly combined.
The mixture should become light pink.
I love how the strawberry powder gives the cream a delicious flavor without adding extra moisture.
Step 3. Whip the heavy cream
In a separate chilled mixing bowl, pour ¾ cup of cold heavy whipping cream.
Use an electric mixer to whip until medium-stiff peaks form.
The cream should hold its shape when the beaters are lifted.
Be careful not to overwhip.
You want smooth, fluffy cream rather than a grainy texture.
Step 4. Combine the cheesecake cream
Add approximately one-third of the whipped cream to the strawberry cream cheese mixture.
Use a rubber spatula to gently fold it in.
This helps loosen the cream cheese.
Add the remaining whipped cream in two additions.
Continue folding until the mixture is smooth and fluffy.
I recommend using gentle folding motions rather than stirring quickly.
You want to preserve the air in the whipped cream.
This creates that delicious light cheesecake texture!
Step 5. Fill the piping bag
Transfer the strawberry cheesecake filling to a piping bag fitted with a large star tip.
You can also use a round piping tip or a sturdy zip-top bag with one corner snipped off.
I love using a star tip because it creates beautiful swirls inside the coral lace shells.
Refrigerate the filling until you’re ready to assemble.
If it feels a little soft, chill for approximately 15-20 minutes before piping.
How to assemble the dessert cups
For the best results, assemble the Strawberry Cheesecake Coral Lace Dessert Cups shortly before serving.
The delicate shells are crispy, while the filling and sauce contain moisture.
Keeping the components separate until the last minute gives you the best combination of textures.
Step 1. Arrange the cookie shells
Place the completely cooled coral lace cups on a large serving platter.
I recommend using a white platter because the coral-pink shells look especially beautiful against it.
Make sure each shell sits securely.
If some are slightly rounded on the bottom, place them in shallow dessert dishes for support.
Step 2. Pipe in the strawberry cheesecake filling
Remove the cheesecake filling from the refrigerator.
Pipe approximately 2 tablespoons of filling into each lace cup.
Start near the bottom and work upward in a circular motion.
I recommend creating a small swirl that rises just above the edge of the shell.
Don’t overfill.
The delicate cookies can be difficult to pick up if they’re filled too heavily.
Step 3. Add the strawberry sauce
Spoon approximately 1 teaspoon of chilled strawberry sauce over each cheesecake swirl.
I like adding the sauce slightly off-center so some of the pretty pink filling remains visible.
You want enough sauce to add delicious strawberry flavor without making the cups overflow.
Step 4. Decorate with fresh strawberries
Slice approximately 8 fresh strawberries.
Place a small strawberry slice on top of each dessert cup.
You can also add a tiny mint leaf or a few white chocolate curls.
I love the combination of coral shells, pink cheesecake cream, and bright red strawberries!
Step 5. Serve immediately
Once all the cups are filled and decorated, serve them right away.
The lace shells should be crispy and delicate.
Inside, the cheesecake filling will be smooth and fluffy.
The strawberry sauce adds a wonderful sweet-tart flavor.
Every bite is delicious!
Recipe tips
These Strawberry Cheesecake Coral Lace Dessert Cups are beautiful, but the thin cookie shells require a little extra attention. Here are my favorite tips to help you get the best results.
Use finely ground almond flour. Blanched almond flour creates the most delicate cookie texture.
Use freeze-dried strawberry powder. It adds concentrated strawberry flavor without extra moisture.
Choose gel food coloring. Gel coloring gives the shells a beautiful coral shade without changing the batter consistency very much.
Bake one test cookie first. This helps you check the spreading, baking time, and finished color.
Leave plenty of room between cookies. Lace cookies spread significantly while baking.
Prepare your molds before baking. You’ll need to shape the cookies while they’re still warm.
Don’t lift the cookies too early. Allow them to cool briefly until firm enough to transfer.
Don’t wait until they’re completely cool. Once the cookies harden, they’ll crack if you try to shape them.
Cool the shells completely before filling. Warm shells can soften the cheesecake cream.
Use full-fat cream cheese. It creates a rich filling that holds its shape when piped.
Keep the heavy cream cold. Cold cream whips more easily and creates a fluffier filling.
Chill the strawberry sauce. Warm sauce can soften the cheesecake filling and crispy shells.
Assemble just before serving. This keeps the lace shells as crispy as possible.
How to keep coral lace dessert cups crispy
One of the best things about these desserts is the delicate crunch of the cookie shells.
And there are a few simple ways to keep that texture!
First, make sure the cookies are baked long enough.
The batter needs time to spread into thin circles and develop the lace pattern.
When the bubbling begins to slow and the edges look set, they’re usually ready.
I recommend allowing the shaped shells to cool completely before storing.
If you stack warm cookies, steam can become trapped between them.
That moisture can soften the shells.
Once completely cool, place the empty cookie cups in an airtight container.
Store them at room temperature in a cool, dry place.
I don’t recommend refrigerating the empty shells because humidity can make the sugar-based cookies sticky.
Another important tip is waiting to add the filling.
The cheesecake cream and strawberry sauce both contain moisture.
Once they’re added, the shells will gradually begin softening.
That’s completely normal, but it’s why I recommend assembling the dessert cups shortly before serving.
For the crispiest texture, fill and serve them right away.
How to shape lace cookies without breaking them
Shaping the lace cookies is the most delicate part of this recipe.
But once you get the timing right, it becomes much easier!
The secret is working with the cookies while they’re warm and flexible.
Immediately after baking, the sugar mixture is extremely hot and the cookies are soft.
If you try to lift them too soon, they may stretch or tear.
After approximately 30-60 seconds, the cookies begin setting.
At this point, you should be able to slide a thin spatula underneath each cookie.
Carefully lift it and drape it over an inverted mold.
Allow the edges to fall naturally down the sides.
I recommend using small metal ramekins because their rounded shape works beautifully for forming little cups.
You can also use suitable silicone molds.
Don’t press too hard!
The cookies are thin and delicate.
A gentle touch is enough to create the shape.
If a cookie becomes too stiff before you can mold it, return it to the warm oven for approximately 10-15 seconds.
This may soften it enough to shape.
And don’t worry if every cup looks a little different.
The delicate shapes and irregular lace patterns are part of what makes these desserts beautiful.
Why did my lace cookies spread too much?
Lace cookies are supposed to spread into thin circles.
That’s what creates their beautiful open pattern.
But if the batter spreads into very large puddles, there are a few things you can adjust.
First, make sure you’re using the correct amount of batter.
I recommend approximately 1 level tablespoon per cookie.
A small amount can spread into a surprisingly large circle.
Next, leave at least 4 inches between each portion.
I also recommend baking just a few cookies at a time.
This gives you enough space and makes shaping much easier.
Another possible reason is that the batter was too warm when scooped.
If your test cookie spreads excessively, allow the batter to cool slightly before baking the next batch.
You should also use a cool baking sheet.
Placing batter onto a hot baking sheet can cause the butter to melt before the cookies even reach the oven.
For the most consistent results, alternate between two baking sheets.
Recipe variations
One of my favorite things about this recipe is how easy it is to change the flavors!
The original strawberry cheesecake version is delicious, but you can create several different variations.
White chocolate strawberry cheesecake cups
If you love white chocolate and strawberries, this variation is for you!
Melt 2 ounces of white chocolate and allow it to cool until just slightly warm.
Beat the melted chocolate into the cream cheese mixture before folding in the whipped cream.
Reduce the powdered sugar slightly if you prefer a less sweet filling.
The white chocolate adds a delicious creamy flavor that pairs beautifully with fresh strawberries.
Top with white chocolate curls for an elegant finish.
Chocolate strawberry coral lace cups
For a chocolate version, add 2 tablespoons of unsweetened cocoa powder to the cheesecake filling.
Mix it into the cream cheese along with the powdered sugar and vanilla.
Then fold in the whipped cream.
Pipe the chocolate cheesecake filling into the coral lace shells.
Finish with homemade strawberry sauce and fresh strawberry slices.
I love the combination of chocolate and strawberries!
Raspberry cheesecake lace cups
If you prefer raspberries, replace the strawberry sauce with homemade raspberry sauce.
Use 1 cup of fresh raspberries, 2 tablespoons of sugar, and 1 teaspoon of lemon juice.
Cook until the berries soften.
If desired, strain the mixture to remove the seeds.
Thicken with the cornstarch mixture and allow to cool.
Top the finished dessert cups with fresh raspberries.
Lemon strawberry cheesecake cups
For a refreshing citrus flavor, add 1 teaspoon of finely grated lemon zest to the cheesecake filling.
The lemon adds a bright flavor that pairs perfectly with strawberries.
I recommend keeping the amount small so the filling doesn’t become too tart.
Finish with strawberry sauce and fresh berries.
Strawberry pistachio dessert cups
Pistachios are a delicious addition!
Sprinkle ¼ cup of finely chopped pistachios over the finished dessert cups.
They add a wonderful nutty crunch and a beautiful green color.
The pistachios pair especially well with the almond lace shells and sweet strawberry cream.
Vanilla cheesecake coral lace cups
If you prefer a classic vanilla filling, leave the strawberry powder out of the cheesecake cream.
Prepare the filling using cream cheese, powdered sugar, vanilla, and whipped cream.
Pipe into the coral lace shells and add strawberry sauce on top.
This version has a delicious vanilla cheesecake flavor with a fresh strawberry topping.
Frequently asked questions
Can you make Strawberry Cheesecake Coral Lace Dessert Cups ahead of time?
Yes!
I recommend preparing the different components separately.
The lace shells can be made up to 24 hours ahead and stored in an airtight container at room temperature.
The cheesecake filling can be made up to 24 hours ahead and refrigerated.
The strawberry sauce can be prepared up to 2 days in advance.
Assemble everything shortly before serving for the crispiest shells.
Why are my lace cookies soft instead of crispy?
The cookies may need additional baking time.
They should develop a delicate lacy pattern, with bubbling that begins to slow and edges that look set.
If the cookies remain soft after cooling, they may have been removed too early.
Moisture can also soften the shells.
Allow them to cool completely and store in a dry, airtight container.
Can you use fresh strawberry puree in the cheesecake filling?
You can, but I don’t recommend it for this recipe.
Fresh strawberry puree adds moisture and can make the cheesecake filling too soft to pipe.
Freeze-dried strawberry powder adds concentrated flavor without changing the texture as much.
For fresh strawberry flavor, use the homemade sauce and sliced fruit on top.
Can you use mascarpone instead of cream cheese?
Absolutely!
Replace the cream cheese with 8 ounces of cold mascarpone.
Mix gently with the powdered sugar, strawberry powder, and vanilla.
Then fold in the whipped cream.
Mascarpone creates a milder, richer filling with less tanginess than cream cheese.
I recommend avoiding overmixing because mascarpone can become grainy.
Can you use whipped topping instead of heavy cream?
Yes!
Replace the ¾ cup of heavy whipping cream with approximately 1 cup of thawed whipped topping.
Beat the cream cheese, powdered sugar, strawberry powder, and vanilla until smooth.
Then gently fold in the whipped topping.
Refrigerate until firm enough to pipe.
Can you make the lace shells without food coloring?
Yes!
The food coloring is only used to create the coral appearance.
Without coloring, the shells will have a natural golden color with a subtle strawberry tint.
The flavor will still be delicious.
Can you make these gluten free?
You can try replacing the all-purpose flour with a gluten-free flour blend designed for baking.
Make sure the other ingredients are also gluten free.
Since lace cookies depend on a specific balance of ingredients, the spreading and texture may change.
I recommend baking a test cookie before preparing the full batch.
Can you freeze the assembled dessert cups?
I don’t recommend freezing the assembled dessert cups.
The delicate shells can lose their crispness after thawing.
The cream cheese filling and strawberry sauce may also release moisture.
For the best texture, prepare the components separately and assemble shortly before serving.
How long can the filled dessert cups sit out?
Since the filling contains cream cheese and heavy whipping cream, the filled cups should remain refrigerated until serving.
Don’t leave them at room temperature for more than 2 hours.
If the temperature is above 90°F, refrigerate within 1 hour.
For the best crispy texture, serve them shortly after assembly.
Can you double the recipe?
Absolutely!
These desserts are perfect for doubling when you’re preparing a large party.
Simply double all the ingredients.
I recommend baking the lace cookies in small batches so you have enough time to shape them while they’re warm.
Prepare the cheesecake filling in a large mixing bowl and refrigerate until ready to use.
A double batch makes approximately 32 dessert cups, depending on their size.
What to serve with Strawberry Cheesecake Coral Lace Dessert Cups
These beautiful little dessert cups are delicious on their own, but they’re also perfect for adding to a dessert platter.
Coffee is one of my favorite pairings. The rich cheesecake cream and sweet strawberries taste wonderful with a fresh cup of coffee.
Iced tea is another refreshing option, especially for spring and summer parties.
Hot chocolate is delicious if you’re serving these desserts during the cooler months.
Fresh berries make a beautiful addition to a dessert table. Arrange strawberries, raspberries, and blueberries around the cups.
White chocolate truffles are another delicious treat to serve alongside strawberry cheesecake desserts.
Mini vanilla cheesecakes are perfect if you want to offer guests a few different flavors.
For a beautiful presentation, I love arranging the coral lace cups on a large white serving platter.
Add a few fresh strawberries around the edges and decorate with tiny mint leaves.
The coral shells and pale pink cheesecake cream look beautiful together!
How to make them ahead of time
One of the best things about this recipe is that you can prepare the individual components ahead of time.
I recommend starting with the coral lace shells.
Bake and shape them according to the instructions.
Allow them to cool completely on a wire rack.
Once crisp, transfer them to an airtight container.
Store at room temperature in a cool, dry place for up to 24 hours.
Next, prepare the strawberry sauce.
Cook the strawberries with sugar and lemon juice, then thicken with cornstarch.
Allow the sauce to cool completely.
Transfer to an airtight container and refrigerate.
You can prepare it up to 2 days ahead.
For the cheesecake filling, beat the cream cheese with powdered sugar, strawberry powder, and vanilla.
Fold in the whipped cream.
Transfer to a piping bag or airtight container and refrigerate for up to 24 hours.
When you’re ready to serve, arrange the lace shells on a platter.
Pipe in the cheesecake cream, add the strawberry sauce, and decorate with fresh strawberries.
This method keeps the shells crispy and makes the final assembly quick and easy!
How to store leftovers
These Strawberry Cheesecake Coral Lace Dessert Cups are best enjoyed shortly after assembly.
The crispy shells begin absorbing moisture from the cheesecake filling and strawberry sauce once they’re filled.
If you have leftover assembled cups, transfer them to an airtight container.
Refrigerate promptly.
I recommend enjoying them within 24 hours.
The filling will still taste delicious, but the cookie shells may become softer.
How to store empty lace shells
Place completely cooled shells in an airtight container.
Store at room temperature in a cool, dry place for up to 24 hours for the best texture.
Avoid refrigerating the empty shells because moisture can make them sticky.
How to store cheesecake filling
Transfer leftover cheesecake filling to an airtight container.
Refrigerate at 40°F or below and use within 2 days for the best quality.
If the filling softens slightly, gently stir it before piping.
How to store strawberry sauce
Store the cooled strawberry sauce in an airtight container in the refrigerator for up to 3 days.
Stir before using.
If the sauce becomes thick after refrigeration, allow it to stand briefly until spoonable.
Can you reheat lace shells?
If an unfilled lace shell becomes slightly soft, you can try placing it in a 300°F oven for approximately 1-2 minutes.
Watch closely because the sugar can darken quickly.
Allow the shell to cool completely before filling.
This may help restore some crispness, although reheating can make the delicate shells more fragile.
More easy strawberry dessert ideas
If you love these Strawberry Cheesecake Coral Lace Dessert Cups, there are so many other delicious strawberry desserts to try!
Strawberry cheesecake bites are perfect for parties. Creamy cheesecake filling is rolled into little balls and decorated with strawberries or chocolate.
No-bake strawberry cheesecake cups are another great individual dessert. Layers of graham cracker crumbs, strawberry cheesecake cream, and fresh strawberries are served in small glasses.
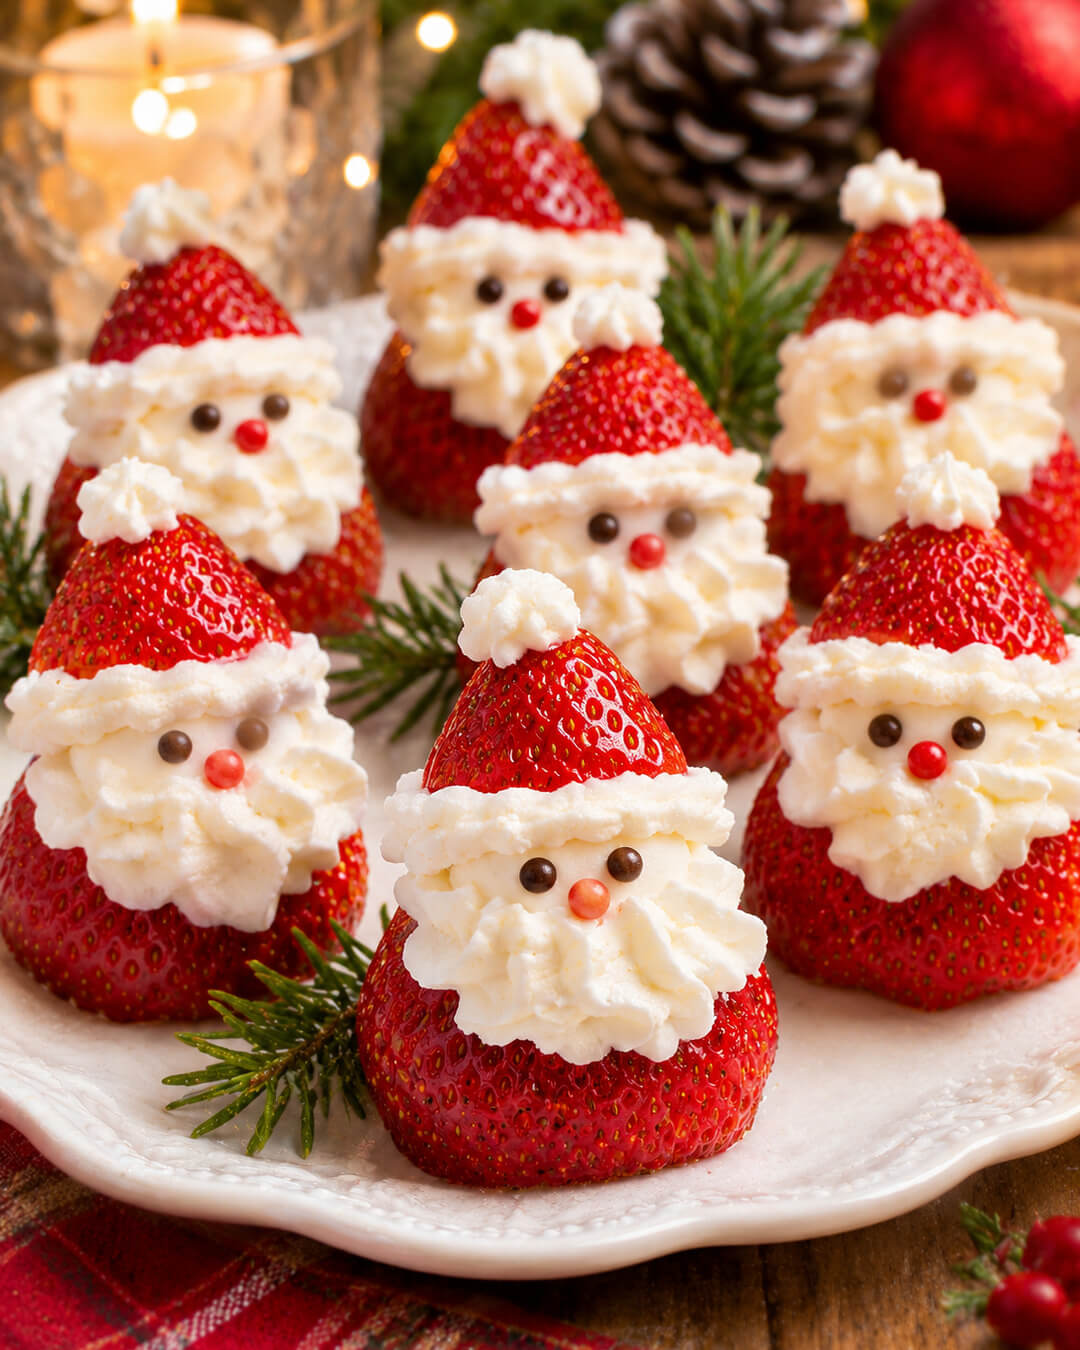
Strawberry Santas are perfect for Christmas. Fresh strawberries are filled with sweet cheesecake cream and decorated to look like little Santa figures.
Strawberry pretzel salad combines a crunchy pretzel crust, creamy cheesecake layer, and sweet strawberry topping.
Strawberry cheesecake bars are perfect when you want a make-ahead dessert that’s easy to slice and serve.
White chocolate strawberry mousse is another delicious option. Fluffy white chocolate mousse is topped with fresh strawberries for an elegant dessert.
Mini strawberry cheesecakes are perfect for birthday parties, baby showers, and holiday gatherings.
I love keeping a collection of beautiful strawberry desserts for special occasions.
They’re colorful, delicious, and perfect when you want something a little different from traditional cake or pie.
These Strawberry Cheesecake Coral Lace Dessert Cups are definitely one to save!
With delicate coral-pink cookie shells, fluffy strawberry cheesecake cream, homemade strawberry sauce, and fresh berries, they’re a wonderful combination of crispy, creamy, and fruity flavors.
Prepare the components ahead of time, assemble shortly before serving, and enjoy every delicious strawberry-filled bite!
Strawberry Cheesecake Coral Lace Dessert Cups
Ingredients
For the coral lace cookie shells
- 6 tablespoons unsalted butter
- ½ cup granulated sugar
- 2 tablespoons light corn syrup
- ⅔ cup finely ground blanched almond flour
- 3 tablespoons all-purpose flour
- 1 tablespoon finely ground freeze-dried strawberry powder
- ⅛ teaspoon salt
- ½ teaspoon vanilla extract
- Coral or pink gel food coloring a few drops as needed
For the strawberry cheesecake filling
- 8 ounces full-fat brick-style cream cheese softened
- ⅓ cup powdered sugar
- 2 tablespoons finely ground freeze-dried strawberry powder
- 1 teaspoon vanilla extract
- ¾ cup cold heavy whipping cream
For the strawberry sauce
- 1 cup fresh strawberries finely chopped
- 2 tablespoons granulated sugar
- 1 teaspoon fresh lemon juice
- 1 teaspoon cornstarch
- 1 teaspoon cold water
For decorating
- 8 medium fresh strawberries sliced
- Optional fresh mint leaves
- Optional white chocolate curls
- Optional finely chopped pistachios
Instructions
- Preheat the oven. Preheat the oven to 350°F. Line two large baking sheets with silicone baking mats. Prepare small, heat-safe metal ramekins or suitable silicone molds for shaping the cookie cups.
- Melt the butter mixture. In a small saucepan over medium-low heat, combine butter, granulated sugar, and light corn syrup. Stir until melted and smooth. Remove from the heat and cool for approximately 2 minutes.
- Add the dry ingredients. In a small bowl, combine almond flour, all-purpose flour, freeze-dried strawberry powder, and salt. Stir into the warm butter mixture until evenly combined.
- Add vanilla and color. Mix in ½ teaspoon of vanilla extract and a few drops of coral or pink gel food coloring until the batter reaches the desired shade.
- Scoop the batter. Drop approximately 1 level tablespoon of batter per cookie onto the prepared baking sheets, leaving at least 4 inches between portions. Bake only 2-3 cookies per tray at a time.
- Bake the lace cookies. Bake at 350°F for approximately 7-10 minutes, until the cookies spread into thin circles with a delicate lace pattern and set edges.
- Cool briefly. Remove from the oven and allow the cookies to cool for approximately 30-60 seconds, until firm enough to lift but still flexible.
- Shape the cups. Carefully lift each warm cookie with a thin spatula and drape it over an inverted, heat-safe ramekin or gently press into a suitable silicone mold to form a cup.
- Cool until crispy. Allow the shaped cookies to cool for approximately 5 minutes, until firm and crispy. Remove from the molds and transfer to a wire rack. Repeat with the remaining batter.
- Make the strawberry sauce. In a small saucepan, combine chopped strawberries, sugar, and lemon juice. Cook over medium-low heat for approximately 5-7 minutes, until the strawberries soften.
- Thicken the sauce. Whisk cornstarch with cold water. Stir into the strawberry mixture and cook for approximately 1 minute, until thickened. Remove from the heat and cool completely.
- Beat the cream cheese. In a mixing bowl, beat softened cream cheese until smooth. Add powdered sugar, freeze-dried strawberry powder, and vanilla extract. Mix until creamy.
- Whip the heavy cream. In a separate chilled bowl, whip cold heavy whipping cream until medium-stiff peaks form.
- Combine the cheesecake filling. Gently fold the whipped cream into the strawberry cream cheese mixture in several additions until smooth and fluffy. Transfer to a piping bag and refrigerate until ready to use.
- Fill the dessert cups. Just before serving, arrange the completely cooled coral lace shells on a serving platter. Pipe approximately 2 tablespoons of strawberry cheesecake filling into each cup.
- Add the strawberry sauce. Spoon approximately 1 teaspoon of chilled strawberry sauce over each cheesecake swirl.
- Decorate. Top each dessert cup with fresh strawberry slices. Add tiny mint leaves, white chocolate curls, or chopped pistachios if desired.
- Serve. Serve immediately for the best combination of crispy lace shells and creamy strawberry cheesecake filling.