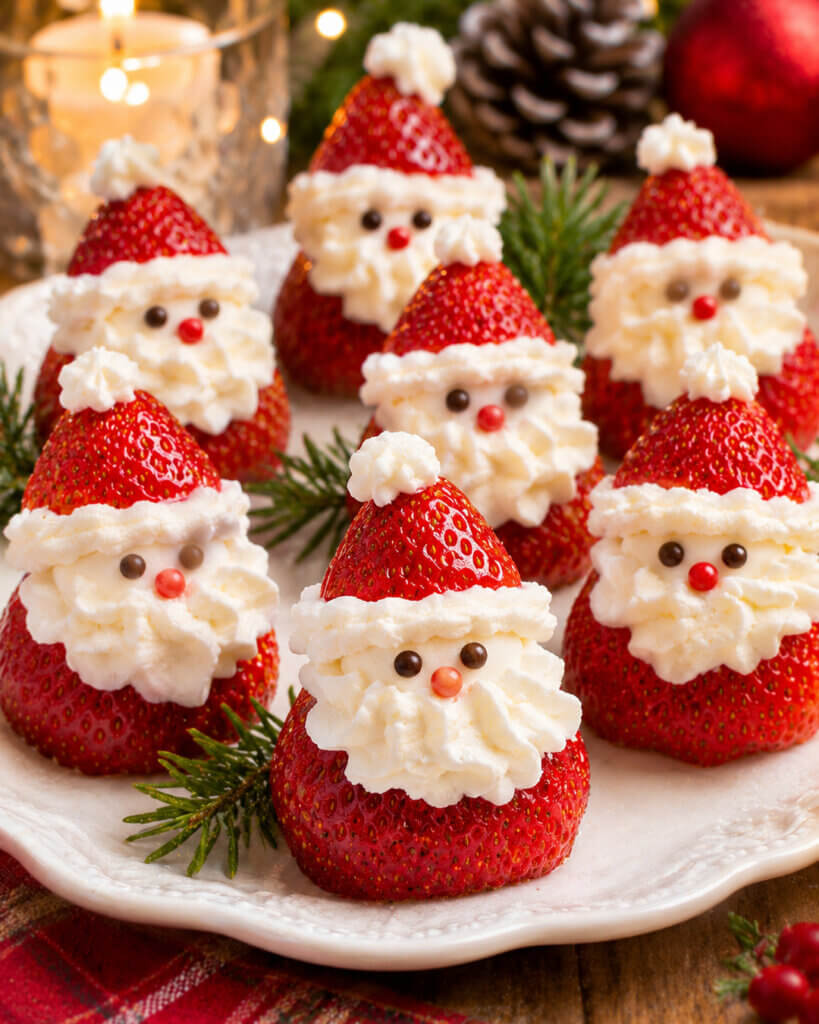
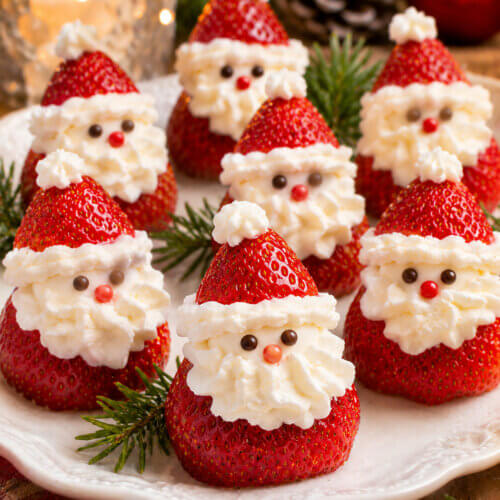
Make the best Strawberry Santas with this easy, adorable, and delicious Christmas dessert recipe! Fresh, juicy strawberries are filled with a sweet, creamy cheesecake filling, topped with little strawberry Santa hats, and decorated with chocolate chip eyes and tiny whipped cream-style pom-poms. These festive strawberry treats are perfect for Christmas parties, holiday dessert trays, school celebrations, or a fun Christmas Eve treat for the whole family!
If you’re looking for a cute Christmas dessert that doesn’t require turning on the oven, you’re going to love these Strawberry Santas!
We’re talking sweet, fresh strawberries filled with a rich vanilla cheesecake cream, then decorated to look like little Santas.
And the best part? They’re incredibly easy to make!
I love preparing simple Christmas desserts that look beautiful on a holiday platter without requiring hours of baking or complicated decorating.
These little strawberry treats are exactly that.
You only need a handful of ingredients, a piping bag, and about 30 minutes of hands-on preparation.
For this recipe, I like making the creamy filling with softened cream cheese, powdered sugar, vanilla extract, and freshly whipped heavy cream.
The combination creates a delicious cheesecake-style filling that’s thick enough to pipe but still wonderfully light and fluffy.
Each strawberry is cut into two pieces.
The larger bottom piece becomes Santa’s body, while the pointed top becomes his little red hat.
Pipe a swirl of cream onto the strawberry base, gently place the hat on top, and add two miniature chocolate chips for eyes.
Then finish with a tiny dot of cream on the very top of the hat!
They’re almost too cute to eat.
But once you taste the combination of juicy strawberries and sweet vanilla cheesecake filling, you’ll definitely want another!
One of my favorite things about this recipe is how pretty the finished strawberries look on a Christmas dessert table.
The bright red strawberries and white cream create natural holiday colors, without needing food coloring or complicated decorations.
You can arrange them on a large white platter, add a few fresh mint leaves around the edges, and you’ve got a beautiful festive dessert in minutes.
These Strawberry Santas are also a great recipe to make with kids.
You can prepare the strawberries and cream filling, then let everyone help decorate the little faces.
And since they’re served cold, there’s no need to worry about keeping them warm before a party.
Just refrigerate until you’re ready to serve!
Why you’ll love this recipe
There are so many reasons to love these easy Strawberry Santas! They’re festive, delicious, and perfect for Christmas celebrations.
- They’re completely no-bake. You don’t need an oven or stovetop to make these adorable little desserts. Simply prepare the strawberries, make the creamy filling, and assemble.
- You only need 6 main ingredients. Fresh strawberries, cream cheese, powdered sugar, vanilla extract, heavy whipping cream, and mini chocolate chips are all you need.
- They look adorable on a Christmas dessert tray. The red strawberry hats, white cheesecake filling, and little chocolate eyes create the cutest Santa faces!
- They’re made with fresh fruit. Juicy strawberries balance the rich cream filling, creating a dessert that’s sweet and refreshing without being overly heavy.
- They’re perfect for parties. Each Strawberry Santa is an individual serving, so guests can easily grab one from a holiday platter.
I especially love that you can customize the filling or decorate the strawberries in different ways.
You can make them with a classic cream cheese filling, use a little whipped topping for a shortcut, or add white chocolate for an extra sweet version.
They’re a fun little holiday treat that’s easy to prepare and even easier to enjoy!
What are Strawberry Santas?
Strawberry Santas are bite-sized Christmas desserts made by cutting fresh strawberries and filling them with sweetened cream cheese or whipped cream.
The strawberries are arranged to look like miniature Santa figures.
The large bottom portion of the strawberry becomes the body.
A swirl of white cream creates the face and beard, while the pointed strawberry tip becomes the hat.
Two tiny chocolate chips are added for eyes, and a small dot of cream finishes the top of the hat.
The result is a festive little treat that looks perfect for Christmas!
Unlike traditional Christmas cookies or cupcakes, these desserts don’t require baking.
They’re made with fresh strawberries and a simple cream filling.
For this version, I like using cheesecake cream instead of plain whipped cream.
Cream cheese gives the filling a richer flavor and helps it hold its shape when piped between the strawberry pieces.
The heavy whipping cream makes the mixture a little lighter and fluffier.
It’s a delicious combination!
Every bite has sweet, juicy strawberry, creamy vanilla filling, and just a little chocolate from the miniature chocolate chip eyes.
Ingredients
Here I explain the best ingredients for this Strawberry Santas recipe, what each one does, and substitution options. For the exact ingredient measurements, see the recipe card at the bottom of this post.
Fresh strawberries
You’ll need 24 large fresh strawberries.
Strawberries are the star of this recipe, so I recommend choosing the best ones you can find.
Look for berries that are bright red, firm, and relatively large.
Larger strawberries are easier to cut and decorate because they provide more room for the cheesecake filling and chocolate chip eyes.
I especially like using strawberries that have a nice pointed tip.
The pointed portion becomes Santa’s hat, so naturally shaped berries make the finished treats look even cuter!
Avoid strawberries that are overly soft, bruised, or leaking juice.
Very ripe strawberries may become mushy when cut and assembled.
I recommend washing the strawberries shortly before making the recipe and drying them thoroughly.
This helps keep the cheesecake filling thick and prevents extra moisture from collecting on the serving platter.
Cream cheese
You’ll need 4 ounces of full-fat cream cheese, softened.
Cream cheese gives the filling its rich cheesecake flavor.
I recommend using brick-style cream cheese instead of whipped cream cheese or a spreadable variety from a tub.
Brick-style cream cheese is thicker and helps the filling stay in place between the strawberry pieces.
Allow it to soften at room temperature for approximately 20-30 minutes before mixing.
You want the cream cheese soft enough to beat until smooth, but not warm or runny.
Powdered sugar
You’ll need ¼ cup of powdered sugar, also called confectioners’ sugar.
Powdered sugar adds sweetness to the cheesecake filling without making it grainy.
I recommend using powdered sugar instead of granulated sugar because it dissolves easily into the cream cheese.
The strawberries already have plenty of natural sweetness, so you don’t need a large amount.
If you prefer a sweeter filling, you can add another tablespoon.
Just keep in mind that adding more sugar can make the mixture slightly softer.
Vanilla extract
You’ll need ½ teaspoon of vanilla extract.
Vanilla adds a delicious flavor to the creamy cheesecake filling.
I love using pure vanilla extract because it pairs beautifully with fresh strawberries and cream cheese.
You can also add a tiny amount of almond extract if you’d like a different flavor.
For the classic version, vanilla is my first choice!
Heavy whipping cream
You’ll need ⅓ cup of cold heavy whipping cream.
This makes the cheesecake filling lighter and fluffier.
The cream is whipped separately until stiff peaks form, then gently folded into the cream cheese mixture.
I recommend keeping the heavy cream cold until you’re ready to use it.
Cold cream whips more easily and helps the filling hold its shape.
Make sure you’re using heavy whipping cream rather than regular milk or half-and-half.
Those ingredients won’t whip into the same fluffy texture.
Mini chocolate chips
You’ll need approximately 48 miniature chocolate chips, or 2 per strawberry.
The mini chocolate chips are used to create Santa’s little eyes.
I recommend using miniature semisweet chocolate chips because they’re small enough to fit on the cream filling.
Regular-sized chocolate chips are usually too large for these little faces.
You can also use tiny chocolate sprinkles or small pieces of dark chocolate.
If you’re making these with kids, miniature chocolate chips are definitely the easiest option!
What’s the best filling for Strawberry Santas?
For this recipe, I recommend using a simple cheesecake-style filling made with cream cheese, powdered sugar, vanilla, and whipped cream.
I love this combination because it tastes like strawberry cheesecake in every bite.
The cream cheese gives the filling a slightly tangy flavor that balances the sweetness of the strawberries.
Powdered sugar adds just enough sweetness, while vanilla makes the filling taste rich and delicious.
The whipped cream creates a softer, lighter texture.
And because the filling contains cream cheese, it has enough structure to hold the little strawberry hats.
You can also make Strawberry Santas with plain whipped cream.
However, whipped cream is softer and may not hold its shape as long.
If you’re serving them immediately, that can work perfectly well.
For a Christmas party or holiday dessert tray, I prefer the cheesecake filling.
It’s easy to pipe and gives the finished strawberries a delicious creamy center.
How to choose the best strawberries
Choosing the right strawberries makes this recipe so much easier!
I recommend looking for berries that are approximately the same size.
When the strawberries are similar in height and width, the finished Santas look beautiful arranged together on a platter.
You don’t need perfectly identical strawberries, though.
A little variety makes the dessert tray look fun and festive.
The most important thing is choosing strawberries that are firm.
Soft strawberries can collapse slightly when you add the cheesecake filling and hat.
Look for berries with a bright red color and a sweet strawberry aroma.
The pointed tip is another helpful feature.
Since that section becomes Santa’s hat, a nice pointed strawberry makes the finished dessert look more recognizable.
If some berries have very rounded tips, you can still use them!
They’ll just have slightly different-shaped hats.
I recommend purchasing a few extra strawberries in case some are too small, bruised, or difficult to decorate.
Instructions
I’ve included detailed step-by-step instructions below to make these Strawberry Santas super easy to prepare at home. For the full recipe instructions and exact ingredient quantities, scroll to the recipe card at the bottom of this post.
You’ll need a mixing bowl, an electric hand mixer, a small piping bag, a sharp knife, and a serving platter.
A large star piping tip or round piping tip works well for decorating.
Step 1. Wash the strawberries
Start by washing the strawberries under cool running water.
Place them in a colander and allow the water to drain.
Next, gently pat each strawberry dry with paper towels.
This is an important step!
Water on the strawberries can make the cheesecake filling slip and can cause moisture to collect on the bottom of the dessert platter.
I recommend taking an extra minute to dry them thoroughly.
Don’t soak the strawberries in water for an extended period.
They can absorb moisture and become softer.
Step 2. Remove the green tops
Use a small, sharp knife to remove the green leafy top from each strawberry.
Cut across the wide end to create a flat base.
This allows the strawberries to stand upright on the serving platter.
I recommend removing only enough of the strawberry to create a stable bottom.
You don’t want to cut away too much fruit.
Place one strawberry on your work surface and check that it stands without tipping.
Repeat with the remaining strawberries.
Step 3. Cut the Santa hats
Place a strawberry upright with the pointed end facing up.
Use a sharp knife to cut horizontally across the strawberry approximately one-third of the way down from the pointed tip.
The smaller pointed piece will become Santa’s hat.
The larger bottom piece will become the body.
Set the pointed top beside the strawberry base so you can keep the pieces together.
Repeat with all 24 strawberries.
I like keeping the hats next to their matching bottoms because the pieces fit together naturally.
This makes the finished Santas look a little neater!
Step 4. Beat the cream cheese
Add 4 ounces of softened cream cheese to a medium mixing bowl.
Use an electric hand mixer to beat the cream cheese on medium speed for approximately 1-2 minutes.
You want it completely smooth and creamy.
Scrape down the sides of the bowl with a rubber spatula.
Make sure there aren’t any lumps remaining.
I recommend taking your time with this step because a smooth filling is much easier to pipe.
Step 5. Add the powdered sugar and vanilla
Add ¼ cup of powdered sugar and ½ teaspoon of vanilla extract to the cream cheese.
Beat for another minute, until everything is smooth and well combined.
The mixture should be thick and slightly fluffy.
Taste a small amount.
If you prefer a sweeter filling, add another teaspoon or two of powdered sugar.
I like keeping the filling moderately sweet because the strawberries add plenty of natural flavor.
Set the cream cheese mixture aside.
Step 6. Whip the heavy cream
Pour ⅓ cup of cold heavy whipping cream into a separate mixing bowl.
Using an electric mixer, beat the cream until stiff peaks form.
This generally takes approximately 2-3 minutes, depending on the mixer.
You’ll know it’s ready when the cream holds its shape after the beaters are lifted.
Be careful not to overwhip.
Once the cream becomes thick and fluffy, stop mixing.
Step 7. Combine the cheesecake filling
Add approximately one-third of the whipped cream to the cream cheese mixture.
Use a rubber spatula to gently fold it in.
This helps loosen the cream cheese.
Add the remaining whipped cream and continue folding until the filling is smooth and fluffy.
I recommend folding gently instead of stirring aggressively.
You want to keep some of the air in the whipped cream.
The finished mixture should be thick enough to hold a small piped swirl.
If it feels too soft, refrigerate it for approximately 15-20 minutes before decorating.
Step 8. Fill the piping bag
Transfer the cheesecake filling to a piping bag fitted with a large round or star tip.
I love using a star tip because it gives the cream a pretty, ruffled appearance that looks like Santa’s fluffy beard.
A round tip creates a smoother face.
Both work beautifully!
If you don’t have a piping bag, you can use a sturdy zip-top bag.
Spoon the filling into the bag, press out the excess air, and snip a small corner.
Refrigerate the bag briefly if the filling becomes soft while you’re preparing everything.
Step 9. Pipe the Santa faces
Arrange the strawberry bases upright on a large serving platter or parchment-lined tray.
Pipe a generous swirl of cheesecake filling onto the cut surface of each strawberry base.
I recommend using approximately 1-2 teaspoons of filling per strawberry, depending on its size.
You want enough cream to create a visible white face between the strawberry body and hat.
Don’t add too much filling!
If the cream is piled too high, the strawberry hat may slide off.
The finished filling should be tall enough to hold the hat securely while still looking like Santa’s fluffy white beard.
Step 10. Add the strawberry hats
Gently place the pointed strawberry tops onto the cream filling.
Press very lightly so they sit securely.
You don’t want to flatten the cream completely.
The white filling should remain visible between the strawberry body and hat.
I love how the little Santas begin taking shape during this step!
If a hat starts leaning, gently adjust it until it sits upright.
If needed, add a tiny extra dot of cream underneath to help hold it in place.
Step 11. Add the chocolate chip eyes
Take two miniature chocolate chips for each Strawberry Santa.
Gently press them into the front of the white cheesecake filling.
Position them side by side to create little eyes.
I recommend placing the pointed ends of the chips into the cream so the flat sides face outward.
This creates a neat appearance.
If the chocolate chips are very small, you can use the tip of a toothpick to help position them.
Repeat until all the Santas have their little chocolate eyes.
Step 12. Add the pom-poms
Use the piping bag to add a tiny dot of cheesecake filling to the pointed top of each strawberry hat.
This creates Santa’s fluffy white pom-pom.
I recommend making the dots relatively small.
A little bit of cream is all you need!
You can also add a few tiny dots of cream down the front of the strawberry body if you’d like to create little buttons.
This step is optional, but it makes the treats look extra festive.
Step 13. Chill the Strawberry Santas
Once all the strawberries are assembled, place the tray in the refrigerator for approximately 20 minutes.
This allows the cheesecake filling to firm up slightly and helps the hats stay in place.
You can serve the strawberries immediately if needed, but I recommend chilling them briefly.
The cool cream filling tastes delicious with fresh strawberries!
Step 14. Serve and enjoy
Transfer the Strawberry Santas to a festive Christmas serving platter.
I love arranging them in rows so all the little faces are looking forward.
For an extra festive presentation, add a few fresh mint leaves around the edges of the platter.
You can also sprinkle a small amount of powdered sugar over the empty spaces on the plate to create a snowy appearance.
Serve chilled and enjoy!
Every bite has sweet strawberry, creamy cheesecake filling, and just a little chocolate.
They’re such a fun Christmas dessert!
Recipe tips
These Strawberry Santas are incredibly easy to make, but I’ve included a few helpful tips to make them look beautiful every time.
Use large strawberries. Bigger berries are easier to cut and decorate. They also provide enough room for the cheesecake filling and chocolate chip eyes.
Choose firm strawberries. Soft or overripe strawberries can lose their shape when assembled.
Dry the strawberries thoroughly. Excess moisture can cause the cream filling to slide and make the platter watery.
Cut the bottoms flat. Removing a thin slice from the leafy end helps the Santas stand upright.
Keep the matching strawberry pieces together. The original tip fits its bottom piece best, making the finished Santa look more balanced.
Use softened cream cheese. Cream cheese that’s too cold may leave lumps in the filling.
Whip the heavy cream separately. This creates a light, fluffy cheesecake filling that pipes beautifully.
Don’t add too much filling. A generous teaspoon or two is usually enough. Overfilling can make the hats lean or slide off.
Use miniature chocolate chips. Regular chocolate chips can look too large on the little Santa faces.
Chill before serving. Refrigerating the finished strawberries helps the filling firm up and keeps everything fresh.
Assemble close to serving time. Fresh strawberries release moisture after being cut, so these treats look and taste best when served the same day.
How to make Strawberry Santas stand up
One of the most common challenges when making Strawberry Santas is getting them to stand upright on the serving platter.
Luckily, there’s an easy trick!
Start by removing the leafy end of each strawberry with a straight cut.
You want to create a flat surface on the widest portion of the berry.
Place the strawberry on your cutting board and make sure it stands on its own before cutting the hat.
If it leans to one side, trim another very thin slice from the bottom.
Be careful not to remove too much fruit.
The wider the base, the more stable the finished Santa will be.
Another helpful tip is choosing strawberries that are relatively straight.
Long, curved strawberries can be a little more difficult to balance.
You can still use them, but the finished Santas may lean slightly.
I also recommend using a flat serving platter rather than a deep bowl.
A flat plate provides a stable surface and makes the little faces easier to see.
If you’re transporting them to a party, place the finished strawberries in a shallow container with enough room between them.
This helps prevent the hats from being knocked off during transport.
How to make the perfect cheesecake filling
The cheesecake filling is one of my favorite parts of this recipe!
It’s rich and creamy, but still light enough to pipe into the little strawberry Santas.
The secret is combining softened cream cheese with freshly whipped heavy cream.
Cream cheese gives the filling that delicious cheesecake flavor.
Powdered sugar adds sweetness, while vanilla brings everything together.
The whipped cream creates a lighter texture that tastes wonderful with fresh strawberries.
I recommend beating the cream cheese first.
This helps remove lumps before adding the other ingredients.
Then whip the heavy cream separately until stiff peaks form.
When you fold the two mixtures together, you get a creamy filling that holds its shape without being overly dense.
One thing to remember is temperature.
The cream cheese should be softened before mixing, but the heavy cream needs to stay cold.
If the finished filling becomes too warm, it may soften and become difficult to pipe.
Simply refrigerate it for 15-20 minutes before assembling the strawberries.
I love using a piping bag with a star tip because the filling creates little ruffles that look like Santa’s beard.
But a round piping tip works just as well if you prefer a smooth face.
Can you make Strawberry Santas with whipped cream?
Yes!
If you want an even simpler version of this recipe, you can use sweetened whipped cream instead of the cheesecake filling.
Whip 1 cup of cold heavy whipping cream with 2 tablespoons of powdered sugar and ½ teaspoon of vanilla extract until stiff peaks form.
Transfer the whipped cream to a piping bag.
Pipe a small amount onto each strawberry base, add the hats, and decorate with chocolate chip eyes.
This variation has a lighter flavor and a softer texture.
However, whipped cream tends to lose its shape more quickly than the cream cheese filling.
For that reason, I recommend assembling whipped cream Strawberry Santas shortly before serving.
If you’re making them for a party and need them to hold their shape a little longer, the cheesecake filling is my first choice.
Can you use whipped topping?
Absolutely!
Prepared whipped topping is another convenient option.
You can combine 4 ounces of softened cream cheese with ¼ cup of powdered sugar, ½ teaspoon of vanilla, and approximately ¾ cup of thawed whipped topping.
Beat the cream cheese, sugar, and vanilla until smooth.
Then gently fold in the whipped topping.
Refrigerate the mixture until firm enough to pipe.
This creates a fluffy filling without needing to whip heavy cream yourself.
I love the original homemade cream version for its richer flavor, but the whipped topping shortcut is great when you’re short on time.
Recipe variations
One of my favorite things about this recipe is how easy it is to customize!
The original Strawberry Santas are delicious, but you can change the filling or decorations for a different holiday treat.
Strawberry Santas with chocolate cheesecake filling
If you love chocolate and strawberries together, this variation is for you!
Add 1 tablespoon of unsweetened cocoa powder to the cream cheese mixture along with the powdered sugar.
Beat until smooth, then fold in the whipped cream.
The filling will have a light chocolate flavor.
Pipe the chocolate cream between the strawberry pieces and decorate with white chocolate sprinkles for the eyes.
You can also add a small dot of regular vanilla cream on top of each hat.
White chocolate Strawberry Santas
For a sweeter version, add 2 tablespoons of finely grated white chocolate to the finished cheesecake filling.
The white chocolate adds a delicious creamy sweetness that pairs perfectly with fresh strawberries.
I recommend using finely grated chocolate rather than large chips so the mixture remains easy to pipe.
Decorate with miniature chocolate chip eyes as usual.
Strawberry Santas with mascarpone cream
Mascarpone cheese is another delicious option for the filling.
Replace the 4 ounces of cream cheese with 4 ounces of cold mascarpone.
Mix it gently with the powdered sugar and vanilla, then fold in the whipped cream.
Mascarpone has a rich, smooth flavor that’s less tangy than cream cheese.
I love this variation when serving the strawberries as part of an elegant Christmas dessert platter.
Strawberry Santas with coconut
For an extra festive appearance, sprinkle a little finely shredded coconut around the bottom of each strawberry.
The coconut creates a snowy effect and adds a delicious tropical flavor.
You can also add a tiny pinch of coconut extract to the filling.
I recommend using only a small amount so the coconut doesn’t overpower the strawberry flavor.
Strawberry Santas with cream cheese frosting
If you prefer a thicker filling, you can use a simple cream cheese frosting.
Beat together 4 ounces of softened cream cheese, 2 tablespoons of softened butter, ½ cup of powdered sugar, and ½ teaspoon of vanilla.
Refrigerate briefly until thick enough to pipe.
This version is richer and sweeter than the original whipped cheesecake filling.
It’s especially good if you want the strawberry hats to stay firmly in place.
Strawberry Santas with mini marshmallows
For a fun variation, use very small pieces of marshmallow to decorate the hats.
A tiny marshmallow piece can replace the cream pom-pom on top.
You can also use miniature chocolate candies for the eyes.
Just make sure the decorations are small enough to fit the strawberries without making the hats too heavy.
Frequently asked questions
Can you make Strawberry Santas ahead of time?
Yes, but I recommend preparing the components separately for the freshest results.
You can make the cheesecake filling up to 24 hours in advance and store it in an airtight container in the refrigerator.
Wash and dry the strawberries ahead of time, then refrigerate them whole.
For the best presentation, cut and assemble the strawberries within a few hours of serving.
Once assembled, keep them refrigerated until you’re ready to enjoy them.
How long do Strawberry Santas last?
Strawberry Santas are best enjoyed the day they’re made.
Fresh strawberries naturally release juice after being cut.
As they sit, the filling may soften and moisture can collect on the serving platter.
For the best quality, I recommend serving them within a few hours of assembly.
You can refrigerate leftovers in an airtight container and enjoy them within 24 hours, but the appearance and texture may change.
Can you freeze Strawberry Santas?
I don’t recommend freezing the assembled Strawberry Santas.
Fresh strawberries become soft and watery after thawing.
The cream cheese filling can also change texture.
For the best results, prepare these desserts fresh and keep them refrigerated until serving.
Why is my cheesecake filling runny?
The cream cheese may have been too warm, or the heavy cream may not have been whipped long enough.
For the best results, use full-fat brick-style cream cheese and whip the heavy cream until stiff peaks form.
If the filling seems soft after mixing, refrigerate it for 15-20 minutes before piping.
I also recommend avoiding extra liquid ingredients, since they can thin the mixture.
Why are the strawberry hats sliding off?
This usually happens when the filling is too soft or there’s too much cream between the strawberry pieces.
I recommend piping a small, thick swirl rather than a very tall mound.
Make sure the strawberries are dry, then gently press the hat into the filling.
Refrigerating the assembled strawberries also helps the cream firm up.
Can you use frozen strawberries?
I don’t recommend frozen strawberries for this recipe.
Frozen strawberries become soft and release excess moisture after thawing.
They also won’t hold their shape well enough to create the little Santa bodies and hats.
Fresh, firm strawberries give the best results.
Can you make Strawberry Santas without cream cheese?
Absolutely!
You can use sweetened whipped cream, stabilized whipped cream, or a thick vanilla frosting.
For the easiest alternative, whip heavy cream with powdered sugar and vanilla until stiff peaks form.
Keep in mind that a softer filling may need to be assembled immediately before serving.
Can you make these without chocolate chips?
Yes!
Mini chocolate chips are an easy way to create Santa’s eyes, but you have other options.
You can use tiny chocolate sprinkles, small dark chocolate pieces, or little dots of melted chocolate.
If you’re using melted chocolate, allow it to cool slightly before decorating.
I recommend adding the eyes with the tip of a toothpick for the neatest appearance.
Can you double the recipe?
Absolutely!
These Strawberry Santas are perfect for doubling when preparing a Christmas party dessert tray.
You’ll need 48 large strawberries, 8 ounces of cream cheese, ½ cup of powdered sugar, 1 teaspoon of vanilla, ⅔ cup of heavy whipping cream, and approximately 96 mini chocolate chips.
I recommend assembling them in batches so the cream filling stays cold.
A double batch makes 48 adorable Strawberry Santas!
How to serve Strawberry Santas for Christmas
One of my favorite things about these little desserts is how beautiful they look on a Christmas serving platter.
The bright red strawberries and white cheesecake filling create a festive appearance without needing much decoration.
I recommend arranging the Strawberry Santas on a large white platter.
The white background makes the red strawberries stand out.
Place them in neat rows or arrange them in a circle around the edge of the plate.
You can add a few fresh mint leaves between the strawberries for a little green color.
Another fun option is serving them on a wooden Christmas board alongside other small desserts.
I love pairing them with chocolate truffles, Christmas cookies, and little cheesecake bites.
For a Christmas brunch, serve the strawberries alongside French toast, pancakes, and a fresh fruit salad.
They’re also perfect for adding to a hot chocolate dessert table.
If you’re preparing these for a party, I recommend keeping the platter in the refrigerator until shortly before guests arrive.
You can bring out smaller batches throughout the gathering so the strawberries stay fresh and the filling remains cold.
How to make a Strawberry Santa dessert platter
If you want to make these little treats the centerpiece of your Christmas dessert table, there are several easy ways to arrange them.
Start with a large round or rectangular serving platter.
I recommend placing the Santas in the center with their chocolate chip eyes facing outward.
This makes all the little faces easy to see.
Next, add a few festive decorations around the edges.
Fresh mint leaves create a pretty green contrast against the red strawberries.
You can also arrange a few extra whole strawberries and raspberries around the platter.
For a snowy appearance, lightly dust the empty areas of the platter with powdered sugar.
I recommend doing this shortly before serving because powdered sugar dissolves when it touches moisture.
You can also place the Strawberry Santas in miniature white cupcake liners.
This helps keep them separated and makes them easier for guests to pick up.
If you’re serving them at a Christmas party, place a small pair of serving tongs nearby.
That way, everyone can grab a little Santa without touching the other strawberries.
How to make Strawberry Santas with kids
These Strawberry Santas are a wonderful holiday recipe for getting kids involved in the kitchen!
The little decorations are simple, and there’s no baking required.
I recommend having an adult wash and cut the strawberries first.
Once the strawberries are prepared, arrange the bases and matching hats on a large tray.
Prepare the cheesecake filling and transfer it to a piping bag.
You can let older children help pipe the cream onto the strawberry bases.
Younger children may enjoy adding the hats or placing the chocolate chip eyes.
I recommend setting out the decorations in small bowls so everything is easy to reach.
You can also use miniature chocolate sprinkles or tiny candy decorations for different faces.
The finished Santas don’t need to look identical.
Some will have taller hats, others will have extra fluffy beards, and a few may lean slightly to one side.
That’s part of the fun!
Once they’re decorated, refrigerate them until serving.
It’s a simple holiday activity that creates a delicious dessert everyone can enjoy afterward.
How to make Strawberry Santas ahead of time
If you’re planning a Christmas party or holiday gathering, preparing a few ingredients in advance can make this recipe even easier.
The best option is to make the cheesecake filling the day before serving.
Beat the cream cheese, powdered sugar, and vanilla until smooth.
Whip the heavy cream separately, then gently fold it into the cream cheese mixture.
Transfer the filling to an airtight container or piping bag.
Refrigerate for up to 24 hours.
You can also wash the strawberries ahead of time.
I recommend keeping them whole until you’re ready to assemble.
After washing, pat them dry and place them in a container lined with paper towels.
Store them in the refrigerator.
When you’re ready to make the Strawberry Santas, remove the green tops and cut the hats.
Pipe the cream, add the hats, and decorate the faces.
Refrigerate for approximately 20 minutes before serving.
This method gives you the convenience of preparing ahead while keeping the strawberries as fresh as possible.
I don’t recommend cutting and filling the strawberries the night before if you want the prettiest appearance.
The fruit can release moisture as it sits, causing the cream to soften and the hats to slip.
How to store leftovers
These Strawberry Santas are best eaten fresh, but you can store leftovers in the refrigerator.
Carefully transfer the remaining strawberries to a shallow airtight container.
Arrange them in a single layer whenever possible.
I don’t recommend stacking them because the little hats and cream filling can become crushed.
Refrigerate promptly at 40°F or below.
For the best flavor and texture, enjoy leftovers within 24 hours.
The strawberries may release some juice as they sit, so don’t worry if a little moisture collects at the bottom of the container.
If the hats have shifted, you can gently adjust them before serving.
How long can Strawberry Santas sit out?
Because the filling contains cream cheese and whipped cream, these desserts need to stay refrigerated until serving.
Don’t leave them at room temperature for more than 2 hours.
If you’re serving them outdoors or in temperatures above 90°F, refrigerate them within 1 hour.
For Christmas parties, I recommend serving the strawberries in smaller batches.
Keep the remaining treats refrigerated until needed.
This helps the filling maintain its shape and keeps the fruit fresh.
Can you freeze the cheesecake filling?
You can freeze cream cheese-based fillings, but the texture may change after thawing.
The filling can become slightly grainy or release moisture.
For the smoothest and fluffiest texture, I recommend preparing the cheesecake cream fresh or refrigerating it for up to 24 hours.
Since the filling only takes a few minutes to make, there’s really no need to freeze it.
More easy Christmas dessert ideas
If you love these Strawberry Santas, there are so many other fun and delicious Christmas desserts to make!
No-Bake Christmas Cheesecake Bites are perfect for holiday parties. Creamy cheesecake filling is rolled into balls, dipped in white chocolate, and decorated with red and green sprinkles.
Christmas Fruit Salad is another refreshing option. Strawberries, green grapes, kiwi, pineapple, mandarins, and pomegranate seeds are tossed in a sweet honey lime dressing.
Christmas Strawberry Cheesecake Cups combine fresh strawberries with creamy cheesecake filling and graham cracker crumbs for an easy individual dessert.
Chocolate-Dipped Strawberries are always a favorite. Fresh strawberries are dipped in melted chocolate and decorated with festive sprinkles.
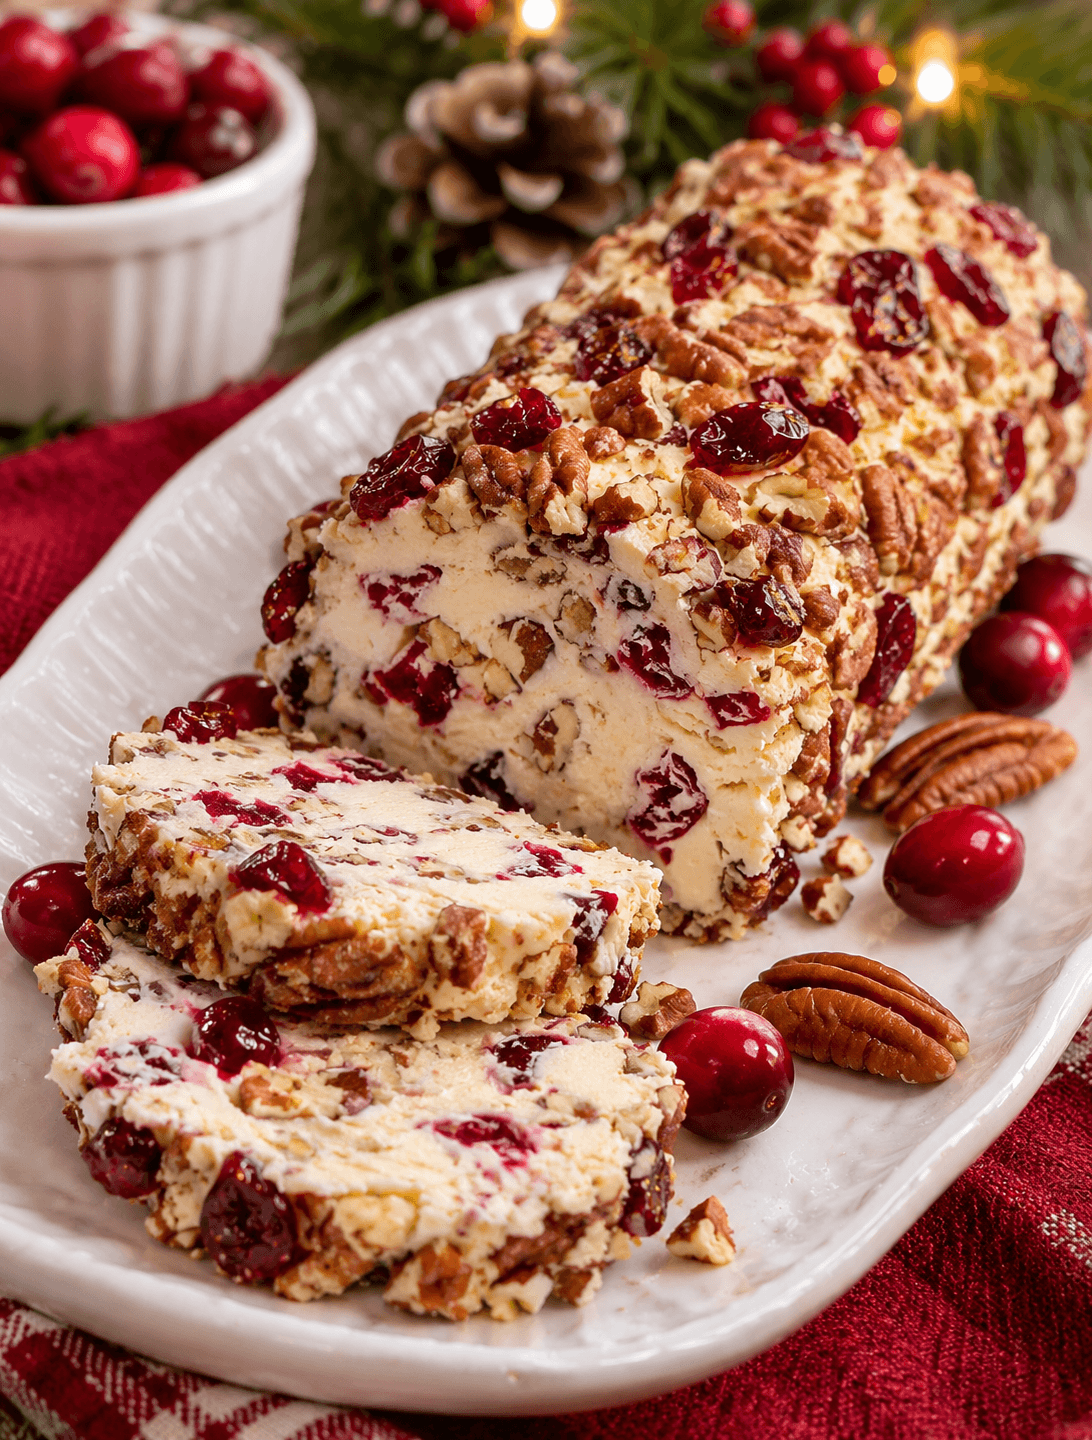
Christmas Cranberry Pecan Log is a delicious savory option for your holiday appetizer table. Cream cheese, cranberries, pecans, and herbs are combined into a beautiful festive cheese log.
Christmas Sugar Cookie Cups are another cute holiday treat. Little sugar cookie shells are filled with sweet frosting or cheesecake cream and decorated with Christmas sprinkles.
And if you love easy no-bake desserts, you can never go wrong with cheesecake bars, chocolate truffles, or homemade peanut butter balls!
I love having a collection of simple Christmas recipes that can be prepared without turning on the oven.
They’re especially helpful during the holidays when the kitchen is already busy with Christmas cookies, pies, and family dinners.
These Strawberry Santas are definitely one to save!
With sweet, juicy strawberries, a rich vanilla cheesecake filling, adorable little hats, and tiny chocolate chip eyes, they’re a delicious Christmas treat that’s almost too cute to eat.
Make a batch for your next holiday party, arrange them on a festive platter, and enjoy every sweet, creamy strawberry bite!
Strawberry Santas
Ingredients
For the strawberries
- 24 large fresh strawberries
- 48 miniature semisweet chocolate chips for the eyes
For the cheesecake filling
- 4 ounces full-fat cream cheese softened
- ¼ cup powdered sugar
- ½ teaspoon vanilla extract
- ⅓ cup cold heavy whipping cream
Optional decorations
- Fresh mint leaves for the platter
- Additional cheesecake filling for Santa buttons
- Powdered sugar for decorating the serving platter
Instructions
- Wash the strawberries. Rinse the strawberries under cool running water and gently pat dry with paper towels.
- Prepare the bases. Remove the green leafy tops and trim the wide ends of the strawberries to create flat bases so they can stand upright.
- Cut the Santa hats. Slice approximately the top one-third off each strawberry. Set the pointed pieces aside to use as hats, keeping each hat near its matching strawberry base.
- Beat the cream cheese. Add softened cream cheese to a medium mixing bowl. Beat with an electric mixer for 1-2 minutes, until completely smooth.
- Add sugar and vanilla. Mix in powdered sugar and vanilla extract until smooth and creamy.
- Whip the heavy cream. In a separate bowl, whip the cold heavy cream until stiff peaks form.
- Make the cheesecake filling. Gently fold the whipped cream into the sweetened cream cheese mixture until smooth and fluffy. Refrigerate for 15-20 minutes if the mixture is too soft to pipe.
- Fill the piping bag. Transfer the cheesecake filling to a piping bag fitted with a round or star tip.
- Pipe the Santa faces. Arrange the strawberry bases upright on a serving platter. Pipe approximately 1-2 teaspoons of cheesecake filling onto each strawberry base.
- Add the hats. Gently place the pointed strawberry tops over the cream filling to create Santa's red hats.
- Make the eyes. Press two miniature chocolate chips into the front of each cream filling to create Santa's eyes.
- Add the pom-poms. Pipe a small dot of cheesecake filling onto the tip of each strawberry hat. Add little cream buttons to the strawberry bodies if desired.
- Chill. Refrigerate the assembled Strawberry Santas for approximately 20 minutes to help the filling firm up.
- Serve. Arrange on a festive Christmas platter and serve chilled.