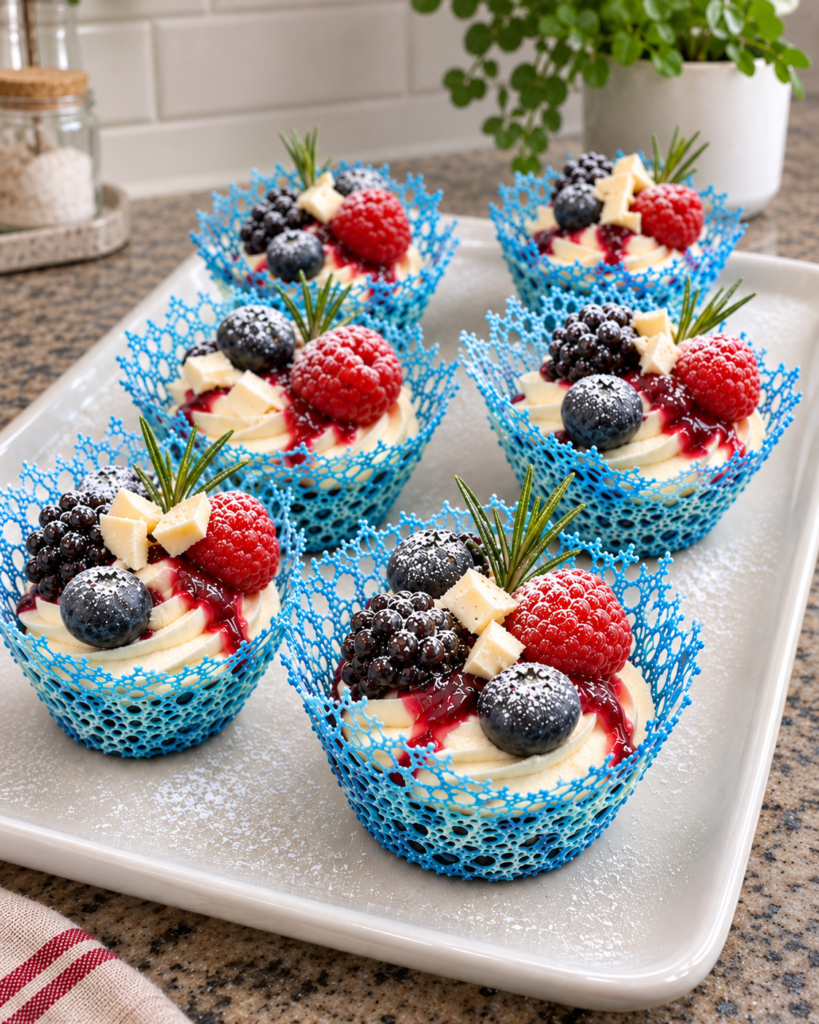
Make the best Winter Berry Cream Cups in Blue Coral Lace Tuiles with this beautiful, delicious homemade dessert recipe! Delicate blue lace cookie cups are filled with fluffy vanilla mascarpone cream, sweet winter berries, and a spoonful of homemade mixed berry sauce. Finished with fresh blueberries, raspberries, and a light dusting of powdered sugar, these elegant little desserts are perfect for Christmas parties, winter celebrations, New Year’s Eve, or any special occasion!
If you love creamy berry desserts and beautiful individual treats, you’re going to fall in love with these Winter Berry Cream Cups!
We’re talking delicate, crispy blue cookie shells with a pretty open lace pattern, filled with smooth vanilla cream and juicy winter berries.
And that beautiful blue color? It makes these little desserts look like something from a winter wonderland!
I love making individual desserts for special occasions, especially when they combine simple flavors with a beautiful presentation.
These Winter Berry Cream Cups are a wonderful example.
The blue coral lace tuiles are thin, buttery cookies with an intricate pattern that creates a delicate, almost snowflake-like appearance.
Inside each cup is a generous swirl of vanilla mascarpone cream.
Then comes my favorite part!
A spoonful of sweet homemade berry sauce and a few fresh raspberries and blueberries.
So good!
For this recipe, I like making the lace cups with a simple sweet tuile batter made from egg whites, powdered sugar, flour, melted butter, and vanilla.
A little blue gel food coloring gives the cookies their pretty winter color.
Instead of spreading the batter into solid circles, we’ll pipe it into a connected lace pattern with a small base in the center.
This creates the beautiful coral-inspired appearance while giving the cookies enough structure to hold the filling.
Once baked, the cookies are shaped into little cups while they’re still warm.
As they cool, they become wonderfully crisp!
The filling is just as delicious.
Cold mascarpone cheese is mixed with powdered sugar, vanilla, fresh orange zest, and whipped heavy cream.
It creates a rich, fluffy vanilla cream that tastes wonderful with berries.
I especially love adding a little orange zest because orange and winter berries are such a delicious combination.
The citrus gives the filling a fresh flavor without overpowering the vanilla.
For the fruit layer, I like using a mixture of strawberries, blueberries, and raspberries.
Some of the fruit is cooked into a thick berry sauce, while the remaining berries are used fresh for decorating.
Every bite has buttery cookie, smooth vanilla cream, and a delicious combination of sweet and tart berries.
And the best part?
You can prepare the different components ahead of time!
Bake the blue lace cups, make the berry sauce, and prepare the mascarpone cream before your gathering.
Then assemble everything shortly before serving.
That’s the secret to keeping the delicate cookie shells nice and crispy.
Why you’ll love this recipe
There are so many reasons to love these Winter Berry Cream Cups in Blue Coral Lace Tuiles! They’re beautiful, delicious, and perfect for special occasions.
- They’re perfect for winter celebrations. The blue lace shells, white vanilla cream, and bright red berries create a beautiful winter-inspired dessert that’s perfect for Christmas and New Year’s Eve.
- The combination of textures is delicious. Thin, crispy cookies surround rich, fluffy mascarpone cream, while the berry sauce adds a sweet, fruity finish.
- They look elegant without complicated decorations. A swirl of cream, a few fresh berries, and a little powdered sugar are all you need.
- You can prepare the components ahead of time. Make the cookies, filling, and berry sauce separately, then assemble before serving.
- They’re easy to customize. Use different berries, add white chocolate, or change the vanilla cream into a lemon or orange-flavored filling.
I also love that each guest gets their own dessert.
There’s no need to cut a cake or divide a large cheesecake into slices.
Just arrange the filled cups on a platter and serve!
What are blue coral lace tuiles?
Blue coral lace tuiles are thin, delicate cookies made with a sweet tuile batter that’s colored blue and shaped into an open, connected lace pattern.
The word tuile refers to a thin cookie that’s often shaped while warm.
Traditional tuiles can be curved over a rolling pin, formed into little bowls, or molded into decorative shapes.
For this recipe, we’re making a sweet, dessert-friendly version with a beautiful coral-inspired design.
The batter is piped onto a silicone baking mat in thin lines that connect to form small openings.
The centers are made a little more solid so the cups can support the creamy filling.
When the cookies bake, the batter sets into delicate, buttery lace.
While they’re still warm, they’re flexible enough to shape over small molds.
As they cool, they become crisp and hold their shape.
The blue coloring gives them a beautiful icy appearance.
I love pairing these little shells with white vanilla cream because the contrast is so pretty!
The fresh berries add another burst of color, creating an elegant dessert that looks beautiful on a winter dessert table.
Ingredients
Here I explain the best ingredients for these Winter Berry Cream Cups, what each one does, and substitution options. For the exact ingredient measurements, see the recipe card at the bottom of this post.
For the blue coral lace tuiles
Egg whites – you’ll need 2 large egg whites. Egg whites provide structure and help create thin, delicate cookies that become crisp as they cool.
Powdered sugar – you’ll need ½ cup. Powdered sugar adds sweetness and blends smoothly into the batter.
All-purpose flour – you’ll need ½ cup. Flour gives the lace pattern enough structure to hold together after baking.
Unsalted butter – you’ll need 4 tablespoons, melted and cooled slightly. Butter gives the cookies a rich flavor and helps create their delicate, crisp texture.
Vanilla extract – you’ll need ½ teaspoon. Vanilla adds a delicious flavor that pairs beautifully with the mascarpone cream.
Salt – just a pinch helps balance the sweetness.
Blue gel food coloring – you’ll need a small amount to create the beautiful blue color. I recommend gel coloring instead of liquid food coloring because it adds color without thinning the batter very much.
I like using a soft icy-blue shade for winter desserts.
You can make the shells a little darker if you prefer a more dramatic appearance.
For the vanilla mascarpone cream
Mascarpone cheese – you’ll need 8 ounces of cold mascarpone. Mascarpone creates a rich, smooth filling with a mild flavor.
I love using mascarpone because it’s creamy without being overly tangy.
Heavy whipping cream – you’ll need 1 cup of cold heavy whipping cream. This makes the filling light and fluffy.
Powdered sugar – you’ll need ⅓ cup. It adds sweetness and blends smoothly into the cream.
Vanilla extract – you’ll need 1 teaspoon. Vanilla gives the filling its delicious classic flavor.
Orange zest – you’ll need ½ teaspoon of finely grated orange zest. Orange brings a fresh citrus aroma that pairs beautifully with the winter berries.
You can leave it out if you prefer a plain vanilla filling.
For the winter berry sauce
Mixed berries – you’ll need 1 cup of berries for the sauce. I like using a combination of chopped strawberries, blueberries, and raspberries.
Granulated sugar – you’ll need 2 tablespoons. Sugar brings out the natural juices and balances the tartness of the berries.
Fresh lemon juice – you’ll need 1 teaspoon. Lemon juice adds a bright flavor that complements the sweet cream.
Cornstarch – you’ll need 1 teaspoon. This helps thicken the sauce so it stays on top of the filling.
Cold water – you’ll need 1 teaspoon to mix with the cornstarch.
For decorating
Fresh mixed berries – you’ll need 1 additional cup of fresh blueberries, raspberries, and chopped strawberries.
I recommend using the prettiest whole raspberries and blueberries for the top of each dessert cup.
Powdered sugar – a light dusting creates a beautiful snowy appearance.
Fresh mint leaves – optional, but a tiny leaf adds a lovely contrast against the blue shells and white cream.
You can also add white chocolate curls if you’d like!
What’s the best berry combination?
For this recipe, I recommend using strawberries, blueberries, and raspberries.
Each berry adds something a little different.
Strawberries bring sweetness and a juicy, familiar flavor.
Blueberries are mild and slightly sweet, with a beautiful dark blue color.
Raspberries add a delicious tartness that balances the rich mascarpone cream.
I especially love how the colors look together!
The red raspberries, deep blue blueberries, and white vanilla cream create a beautiful winter dessert.
You can also use blackberries.
They have a delicious sweet-tart flavor and look lovely alongside the other berries.
If you’re using blackberries, I recommend choosing smaller ones for decorating.
Large berries can make the delicate dessert cups a little top-heavy.
Can you use frozen berries?
Yes, for the cooked berry sauce!
Frozen mixed berries work well because they’ll soften during cooking.
There’s no need to thaw them completely before adding them to the saucepan.
You may need a few extra minutes of cooking time to reduce the additional liquid.
For decorating, I recommend fresh berries.
Frozen berries often become soft and watery after thawing, which can make the cream and cookie shells soggy.
Fresh raspberries and blueberries give the prettiest appearance and best texture.
How to make the perfect blue coral lace pattern
The lace pattern is one of the most important parts of this dessert.
And it doesn’t need to be perfectly symmetrical!
I recommend making the tuiles with a small, mostly solid circle in the center and a connected network of thin lines around it.
The center becomes the bottom of the dessert cup.
The outer lace pattern becomes the sides.
To create the design, transfer the batter to a piping bag with a very small opening.
Pipe a circle approximately 4-4½ inches wide.
Then pipe a smaller circle in the center, approximately 1½ inches wide, filling most of that middle area with batter.
Next, connect the center to the outer circle using thin branching lines.
Add more curved lines between them to create small, irregular openings.
The finished pattern should look like delicate lace.
I recommend keeping most openings no larger than approximately ¼ inch.
Larger openings can make the shells more fragile.
And make sure the lines connect!
Disconnected pieces won’t hold together when you lift and shape the baked cookie.
I also recommend keeping the piped lines fairly consistent in thickness.
Very thin lines may burn or break, while thick sections can remain soft.
The finished cups don’t need to look identical.
Their slightly irregular shapes are part of what makes them beautiful.
How to make Winter Berry Cream Cups in Blue Coral Lace Tuiles
I’ve included detailed step-by-step instructions below to make this recipe easy to prepare at home. For the full ingredient measurements and shorter instructions, scroll to the recipe card at the bottom of this post.
You’ll need two baking sheets, silicone baking mats, mixing bowls, a small saucepan, an electric mixer, and a piping bag.
You’ll also need several small, heat-safe molds for shaping the cookies.
Step 1. Preheat the oven
Start by preheating the oven to 325°F.
Line two large baking sheets with silicone baking mats.
I recommend using silicone mats because the thin cookies are delicate and easier to remove from a nonstick surface.
Prepare several small metal ramekins or heat-safe cups for shaping.
I like using molds approximately 2-2½ inches wide.
Turn them upside down on a clean work surface.
You’ll need to shape the cookies immediately after baking, so have everything ready.
Step 2. Mix the egg whites and powdered sugar
Place 2 large egg whites in a medium mixing bowl.
Add ½ cup of powdered sugar.
Use a whisk to mix until smooth.
You don’t need to whip the egg whites into peaks.
Just whisk gently until the sugar is combined.
I recommend avoiding excessive whisking because too many air bubbles can make the piped lines uneven.
Step 3. Add the flour and salt
Add ½ cup of all-purpose flour and a pinch of salt.
Whisk until the batter is smooth.
You shouldn’t see any dry flour remaining.
The mixture should be thick enough to pipe, but soft enough to flow through a small piping bag opening.
If you notice a few lumps, use a spatula to press them against the side of the bowl.
A smooth batter makes the lace pattern much easier to pipe.
Step 4. Add the butter and vanilla
Pour in 4 tablespoons of melted butter that’s been allowed to cool slightly.
Add ½ teaspoon of vanilla extract.
Stir until the mixture is completely smooth.
The batter should have a soft, spreadable consistency.
I love how the butter gives the finished tuiles a delicate, rich flavor!
Step 5. Add the blue coloring
Add a small amount of blue gel food coloring.
Stir until the color is evenly distributed.
I recommend starting with just a little coloring.
You can always add more.
For a winter-inspired dessert, I love a light icy-blue shade.
Keep in mind that the edges of the cookies may develop a little golden color during baking.
A few darker edges are normal, but the centers should retain much of their blue appearance.
Step 6. Transfer the batter to a piping bag
Spoon the blue tuile batter into a piping bag.
Cut a very small opening, approximately ⅛ inch wide.
I recommend using a disposable piping bag because it’s easy to control the size of the opening.
You can also use a small round piping tip.
Don’t cut the opening too large.
Thin lines create the prettiest lace pattern.
Step 7. Pipe the lace designs
Pipe two connected lace designs onto the prepared baking sheet.
Start with a 4-4½-inch outer circle.
Pipe a small, mostly solid base in the middle.
Then connect the center to the outside with curved lines and little branches.
Add additional lines to create small openings throughout the pattern.
I recommend using approximately 1 generous tablespoon of batter per cookie, adjusting slightly depending on the design.
Don’t pipe the cookies too close together.
Leave at least 2 inches between them.
And remember to connect all the lines so the finished cookie holds together!
Step 8. Bake the blue lace tuiles
Place the baking sheet in the preheated oven.
Bake for approximately 7-9 minutes.
The cookies should look set and lose their wet shine.
The thin lines should feel dry and firm around the edges, with only the faintest golden coloring.
I recommend checking them closely after 7 minutes.
You don’t want to bake them until they’re dark brown.
That would change the pretty blue color and give the cookies a stronger toasted flavor.
If the cookies still look wet or very soft, bake for another minute.
Step 9. Cool briefly
Remove the baking sheet from the oven.
Allow the cookies to cool for approximately 15-30 seconds.
They should begin setting, but still be flexible.
This is the important part!
If you try to move the cookies immediately, they may stretch or tear.
But if you wait too long, they’ll become crisp and break when bent.
Use a thin spatula to carefully lift one cookie.
Step 10. Shape the dessert cups
Gently drape the warm tuile over an inverted, heat-safe metal ramekin.
Allow the outer lace edges to fall down the sides.
Use a heat-safe spatula to help guide the cookie into shape.
The mostly solid center should sit on top of the inverted mold, forming the bottom of the cup once removed and turned upright.
Work quickly but carefully.
The cookies contain hot sugar and butter, so don’t touch them directly while they’re hot.
Repeat with the second cookie.
Step 11. Cool until crispy
Allow the shaped tuiles to cool on their molds for approximately 5 minutes.
As they cool, the cookies will become firm and crispy.
Carefully remove each cup and place it on a wire rack.
Repeat the piping, baking, and shaping process with the remaining batter.
Since you’re baking two at a time, plan on approximately six batches.
You should have about 12 dessert cups, with the exact yield depending on the size and thickness of the lace patterns.
I recommend saving any broken pieces.
They’re delicious sprinkled over the finished desserts!
How to make the winter berry sauce
The homemade berry sauce adds a delicious sweet-tart flavor to these dessert cups.
I love making it with a combination of strawberries, blueberries, and raspberries.
It’s rich in berry flavor, but thick enough to sit neatly over the mascarpone cream.
Step 1. Prepare the berries
Measure 1 cup of mixed berries.
If you’re using strawberries, chop them into small pieces.
Leave small blueberries and raspberries whole.
Transfer the fruit to a small saucepan.
Step 2. Add sugar and lemon juice
Add 2 tablespoons of granulated sugar and 1 teaspoon of fresh lemon juice.
Stir gently.
Place the saucepan over medium-low heat.
The berries will begin releasing their natural juices as they warm.
Step 3. Cook the sauce
Cook for approximately 5-7 minutes, stirring occasionally.
The fruit should soften and begin breaking down.
I like leaving a few little berry pieces in the sauce for texture.
If you prefer a smoother topping, gently mash the fruit with the back of a spoon.
The mixture should smell sweet and fruity.
Step 4. Thicken the sauce
In a small bowl, combine 1 teaspoon of cornstarch with 1 teaspoon of cold water.
Stir until smooth.
Pour the mixture into the saucepan.
Continue cooking for approximately 1 minute, stirring gently, until the sauce thickens.
You want it glossy and thick enough to coat a spoon.
Remove from the heat.
Step 5. Chill the berry sauce
Transfer the sauce to a shallow bowl.
Allow it to cool, then refrigerate until completely cold.
I recommend preparing the sauce before making the cream so it has plenty of time to chill.
Don’t add warm berry sauce to the mascarpone filling.
The heat can soften the cream and make the delicate cookie shells soggy.
How to make the vanilla mascarpone cream
The vanilla mascarpone cream is one of my favorite parts of this dessert!
It’s smooth, rich, and wonderfully fluffy.
And the little bit of orange zest gives it a delicious fresh flavor that pairs beautifully with the winter berries.
Step 1. Chill the mixing equipment
Place a large mixing bowl and the beaters from your electric mixer in the refrigerator for approximately 10 minutes.
This is optional, but it helps the heavy cream whip more easily.
Keep the mascarpone and heavy cream refrigerated until needed.
Step 2. Mix the mascarpone
Place 8 ounces of cold mascarpone in a mixing bowl.
Add ⅓ cup of powdered sugar, 1 teaspoon of vanilla extract, and ½ teaspoon of finely grated orange zest.
Beat on low speed just until smooth.
Don’t overmix!
Mascarpone is delicate and can become grainy if beaten too aggressively.
The mixture should look creamy and thick.
Step 3. Whip the heavy cream
In a separate chilled mixing bowl, pour 1 cup of cold heavy whipping cream.
Use an electric mixer to whip until medium-stiff peaks form.
The cream should hold its shape when the beaters are lifted.
I recommend stopping as soon as it reaches this stage.
Overwhipped cream can become grainy.
Step 4. Combine the filling
Add approximately one-third of the whipped cream to the mascarpone mixture.
Use a rubber spatula to gently fold it in.
This makes the mascarpone easier to combine with the remaining cream.
Add the rest of the whipped cream in two additions.
Continue folding until the filling is smooth and fluffy.
You want a thick cream that can hold a beautiful piped swirl.
Step 5. Transfer to a piping bag
Spoon the mascarpone cream into a piping bag fitted with a large star tip.
I love using a star tip because it creates beautiful little swirls.
You can also use a round piping tip.
If the filling becomes soft, refrigerate for approximately 15-20 minutes before assembling.
Keep it chilled until you’re ready to serve.
How to assemble the Winter Berry Cream Cups
For the best crispy texture, I recommend assembling these dessert cups shortly before serving.
The cookie shells are delicate, while the mascarpone cream and berry sauce contain moisture.
Keeping them separate until the last minute gives you the best contrast between crispy and creamy.
Step 1. Arrange the blue lace cups
Place the completely cooled blue coral lace tuiles on a large serving platter.
I love using a white platter because the blue color stands out beautifully.
If any shells are slightly unstable, place them in small shallow dessert dishes.
This gives them extra support.
Step 2. Pipe the vanilla cream
Remove the mascarpone cream from the refrigerator.
Pipe approximately 3 tablespoons of filling into each lace cup, adjusting to the size of the shell.
Start in the center and work upward in a circular motion.
Create a small swirl that rises just above the rim.
I recommend keeping the cream centered over the more solid bottom of the cookie cup.
Don’t overfill!
The delicate shells need to support the weight of the filling.
Step 3. Add the berry sauce
Spoon approximately 1 teaspoon of cold berry sauce over each cream swirl.
I like adding it slightly off-center so some of the white mascarpone cream remains visible.
The dark red berry sauce looks beautiful against the pale cream and blue cookie shell.
Step 4. Decorate with fresh berries
Top each dessert cup with a few fresh berries.
I recommend using small raspberries, blueberries, and thin strawberry pieces.
Arrange them gently so they don’t crush the cream.
I especially love using one raspberry and two blueberries on each cup.
The bright berries add beautiful winter colors.
Step 5. Add the finishing touches
Lightly dust the desserts with powdered sugar.
This creates a delicate snowy appearance.
You can also add a tiny fresh mint leaf or a few white chocolate curls.
I recommend adding powdered sugar just before serving because it can dissolve when it touches moisture.
Step 6. Serve immediately
Serve the Winter Berry Cream Cups as soon as they’re assembled.
The blue lace cookies should be crisp and delicate.
The mascarpone cream will be rich and fluffy, while the berry sauce adds a delicious fruity sweetness.
Every bite has a wonderful combination of textures and flavors!
Recipe tips
These Winter Berry Cream Cups are easier to prepare when you follow a few simple tips.
Use gel food coloring. Gel coloring provides a beautiful blue shade without adding too much liquid to the tuile batter.
Pipe a solid center. The mostly solid middle section helps support the cream and prevents it from falling through the lace openings.
Connect the lace lines. Every line should connect to another part of the pattern so the finished cookie holds together.
Bake two cookies at a time. This gives you enough time to shape them before they become brittle.
Don’t overbake. Remove the cookies when they’re set and lightly colored to preserve the blue appearance.
Prepare the molds ahead of time. You’ll need to shape the cookies while they’re still warm.
Use a thin spatula. This makes it easier to lift the delicate cookies without tearing.
Keep the mascarpone cold. Cold mascarpone and heavy cream create the best filling texture.
Cool the berry sauce completely. Warm sauce can soften the cream.
Use fresh berries for decorating. Fresh berries look prettier and won’t release as much liquid as thawed frozen fruit.
Assemble shortly before serving. This keeps the blue lace shells crispy.
How to keep blue coral lace tuiles crispy
The crisp cookie shells are what make this dessert so special.
They’re delicate, buttery, and lightly sweet, with a beautiful lace pattern.
And there are a few things you can do to preserve that texture.
First, bake the cookies until the batter is completely set.
The surface should no longer look wet.
If the cookies are removed too soon, they may remain soft after cooling.
Next, allow them to cool completely on a wire rack.
Don’t stack the warm shells.
Trapped steam can soften the cookies.
Once cool, place the empty shells in an airtight container.
Store at room temperature in a cool, dry place.
I don’t recommend refrigerating the empty tuiles.
The moisture inside the refrigerator can make thin cookies soft or sticky.
For the best results, prepare the shells ahead of time and keep them separate from the filling.
Then assemble just before serving.
The mascarpone cream and berry sauce will gradually soften the shells after they’re filled.
That’s normal.
But serving them right away gives you that delicious crispy texture!
Why did my lace cookies break?
The most common reason for broken lace cookies is waiting too long to shape them.
Once a tuile has cooled completely, it becomes brittle.
If you try to bend it after that point, it may crack.
I recommend allowing the cookies to cool just long enough to lift them with a spatula.
Then shape them immediately.
Another possible problem is piping the lace pattern too thin.
If the lines are extremely fine or don’t connect properly, the cookie may break when transferred.
I recommend creating a connected pattern with a thicker center.
This provides additional support.
If a cookie becomes too stiff before you can shape it, try returning it to the warm oven for approximately 10 seconds.
It may soften enough to bend again.
Be careful when handling the cookies because they’re hot!
And don’t throw away any broken pieces.
They’re delicious crumbled over mascarpone cream and berries in a small dessert glass.
Can you make these without food coloring?
Absolutely!
The blue coloring is mainly used for the winter-inspired appearance.
Without it, the tuiles will have a natural pale golden color.
The flavor will be exactly the same.
You can also use another gel color if you’d like.
A pale pink shade is beautiful for Valentine’s Day.
Soft green works well for spring celebrations.
For Christmas, I especially love the icy-blue color with white cream and red berries.
If you prefer a natural cookie appearance, simply leave out the coloring.
Recipe variations
One of my favorite things about these dessert cups is how easy they are to customize!
The original vanilla mascarpone and mixed berry combination is delicious, but there are plenty of other flavors to try.
White Chocolate Winter Berry Cups
For a richer filling, add 2 ounces of melted and cooled white chocolate to the mascarpone mixture.
Mix gently before folding in the whipped cream.
Reduce the powdered sugar slightly if you’d like a less sweet filling.
Top with fresh raspberries, blueberries, and white chocolate curls.
The white chocolate pairs beautifully with the tart berries.
Lemon Berry Cream Cups
For a brighter flavor, replace the orange zest with 1 teaspoon of finely grated lemon zest.
The lemon adds a refreshing citrus flavor that complements the berries.
I recommend using zest instead of extra juice because too much liquid can soften the mascarpone filling.
Raspberry Vanilla Lace Cups
If you love raspberries, make the sauce entirely with raspberries.
Cook 1 cup of raspberries with the sugar and lemon juice.
Strain the sauce if you prefer to remove the seeds.
Thicken with the cornstarch mixture and allow to cool.
Top with fresh raspberries.
Blueberry Cheesecake Lace Cups
Replace the mascarpone with 8 ounces of softened full-fat cream cheese.
Prepare the filling with powdered sugar, vanilla, and whipped cream.
Use blueberries for the sauce and topping.
The cream cheese adds a tangier cheesecake flavor that tastes delicious with the sweet blueberries.
Chocolate Winter Berry Cups
For a chocolate version, add 2 tablespoons of unsweetened cocoa powder to the mascarpone filling.
Mix it with the powdered sugar before folding in the whipped cream.
Pipe the chocolate cream into the blue lace shells.
Finish with berry sauce and fresh raspberries.
Chocolate and berries are always a delicious combination!
Coconut Snowflake Dessert Cups
For a tropical winter variation, add ¼ teaspoon of coconut extract to the mascarpone cream.
Sprinkle finely shredded coconut over the finished desserts.
The coconut creates a pretty snowy appearance and adds a subtle tropical flavor.
Strawberry Pistachio Cream Cups
For extra crunch, sprinkle ¼ cup of finely chopped pistachios over the finished dessert cups.
Their nutty flavor pairs beautifully with mascarpone and fresh strawberries.
The green pistachios also create a lovely contrast with the blue cookie shells.
Frequently asked questions
Can you make Winter Berry Cream Cups ahead of time?
Yes!
I recommend preparing the different components separately.
The empty blue lace shells can be made up to 24 hours ahead and stored in an airtight container at room temperature.
The mascarpone filling can be made up to 24 hours ahead and refrigerated.
The berry sauce can be prepared up to 2 days ahead.
Assemble shortly before serving for the crispiest shells.
Why are my blue tuiles soft instead of crispy?
The cookies may need a little more baking time.
They should look set and dry when removed from the oven.
Allow them to cool completely before checking their texture.
Moisture can also soften the shells, so store them in a dry, airtight container.
Can you use cream cheese instead of mascarpone?
Absolutely!
Replace the mascarpone with 8 ounces of softened full-fat brick-style cream cheese.
Beat with the powdered sugar, vanilla, and orange zest until smooth.
Then fold in the whipped cream.
The filling will have a tangier cheesecake-style flavor.
Can you use whipped topping?
Yes!
Replace the 1 cup of heavy whipping cream with approximately 2 cups of thawed whipped topping.
Gently fold it into the sweetened mascarpone mixture.
Refrigerate until thick enough to pipe.
The texture will be a little different from freshly whipped cream, but it will still be delicious.
Can you use frozen mixed berries?
Yes, for the cooked sauce.
Frozen berries release additional moisture as they heat, so you may need to cook them a little longer.
For decorating, I recommend fresh berries because they hold their shape better.
Can you make the tuiles gluten free?
You can experiment with a gluten-free all-purpose flour blend suitable for cookies.
However, the spreading and flexibility of the tuiles may change.
I recommend baking a test cookie before preparing the full batch.
You’ll also need to check that the other ingredients are suitable for your dietary needs.
How long can the filled dessert cups sit out?
Since the filling contains mascarpone and heavy whipping cream, keep the desserts refrigerated until serving.
Don’t leave them at room temperature for more than 2 hours.
If the temperature is above 90°F, refrigerate within 1 hour.
For the best crispy texture, serve shortly after assembly.
Can you freeze the dessert cups?
I don’t recommend freezing the fully assembled dessert cups.
The delicate shells can lose their crispness after thawing.
The mascarpone filling may also change texture.
For the best results, prepare the components fresh or store them separately.
Can you double the recipe?
Absolutely!
These little desserts are perfect for doubling when you’re preparing a large party.
Simply double the ingredients.
I recommend baking the tuiles in small batches so you have enough time to shape them while warm.
A double batch makes approximately 24 dessert cups.
How to serve Winter Berry Cream Cups for Christmas
These desserts look beautiful arranged on a winter-inspired serving platter.
I recommend using a large white or silver platter.
The icy-blue cookie shells stand out beautifully against a light-colored background.
Arrange the cups in neat rows or a circle.
Add a few fresh blueberries and raspberries around the edges.
You can also decorate the platter with tiny mint leaves.
For an extra snowy appearance, lightly dust the empty areas of the platter with powdered sugar.
I love serving these alongside white chocolate truffles, mini cheesecakes, and Christmas sugar cookies.
The blue, white, and red colors create a festive winter theme.
You can also serve the dessert cups individually on small white dessert plates.
Add a spoonful of extra berry sauce beside each cup and a few fresh berries.
It’s a beautiful way to serve dessert after Christmas dinner or a winter celebration!
How to make them ahead of time
One of the best things about this recipe is that most of the preparation can be finished in advance.
I recommend making the blue lace shells first.
Bake and shape them according to the recipe instructions.
Allow them to cool completely on a wire rack.
Once crisp, transfer them to an airtight container.
Store at room temperature in a cool, dry place for up to 24 hours.
Next, prepare the berry sauce.
Cook the mixed berries with sugar and lemon juice, then thicken with cornstarch.
Allow the sauce to cool completely.
Transfer it to an airtight container and refrigerate.
For the mascarpone cream, combine the cheese, powdered sugar, vanilla, and orange zest.
Fold in the whipped cream.
Transfer to a piping bag or airtight container and refrigerate until needed.
When you’re ready to serve, arrange the lace cups on a platter.
Pipe in the vanilla cream, add berry sauce, and decorate with fresh berries.
This method keeps the delicate cookie shells crispy and makes the final assembly quick and easy!
How to store leftovers
These Winter Berry Cream Cups are best enjoyed shortly after assembly.
The crispy tuiles begin absorbing moisture from the mascarpone cream and berry sauce once they’re filled.
If you have leftover assembled cups, transfer them to an airtight container and refrigerate promptly.
For the best quality, enjoy them within 24 hours.
The filling will still taste delicious, but the cookie shells may soften.
How to store empty blue lace tuiles
Place completely cooled shells in an airtight container.
Store at room temperature in a cool, dry place for up to 24 hours.
Avoid refrigerating the empty shells because moisture can affect their texture.
How to store mascarpone cream
Transfer leftover cream to an airtight container.
Store in the refrigerator at 40°F or below and use within 2 days for the best texture.
If the filling softens slightly, gently stir it before piping.
How to store berry sauce
Store cooled berry sauce in an airtight container in the refrigerator for up to 3 days.
Stir before using.
If it becomes very thick, allow it to stand briefly until spoonable.
Can you reheat the empty tuiles?
If an unfilled tuile becomes slightly soft, you can try placing it in a 275°F oven for approximately 1-2 minutes.
Watch closely because the delicate cookies can brown quickly.
Allow the shell to cool completely before filling.
This may help restore some crispness, although reheated tuiles can become more fragile.
More easy winter dessert ideas
If you love these Winter Berry Cream Cups, there are so many other beautiful desserts to make for the holidays!
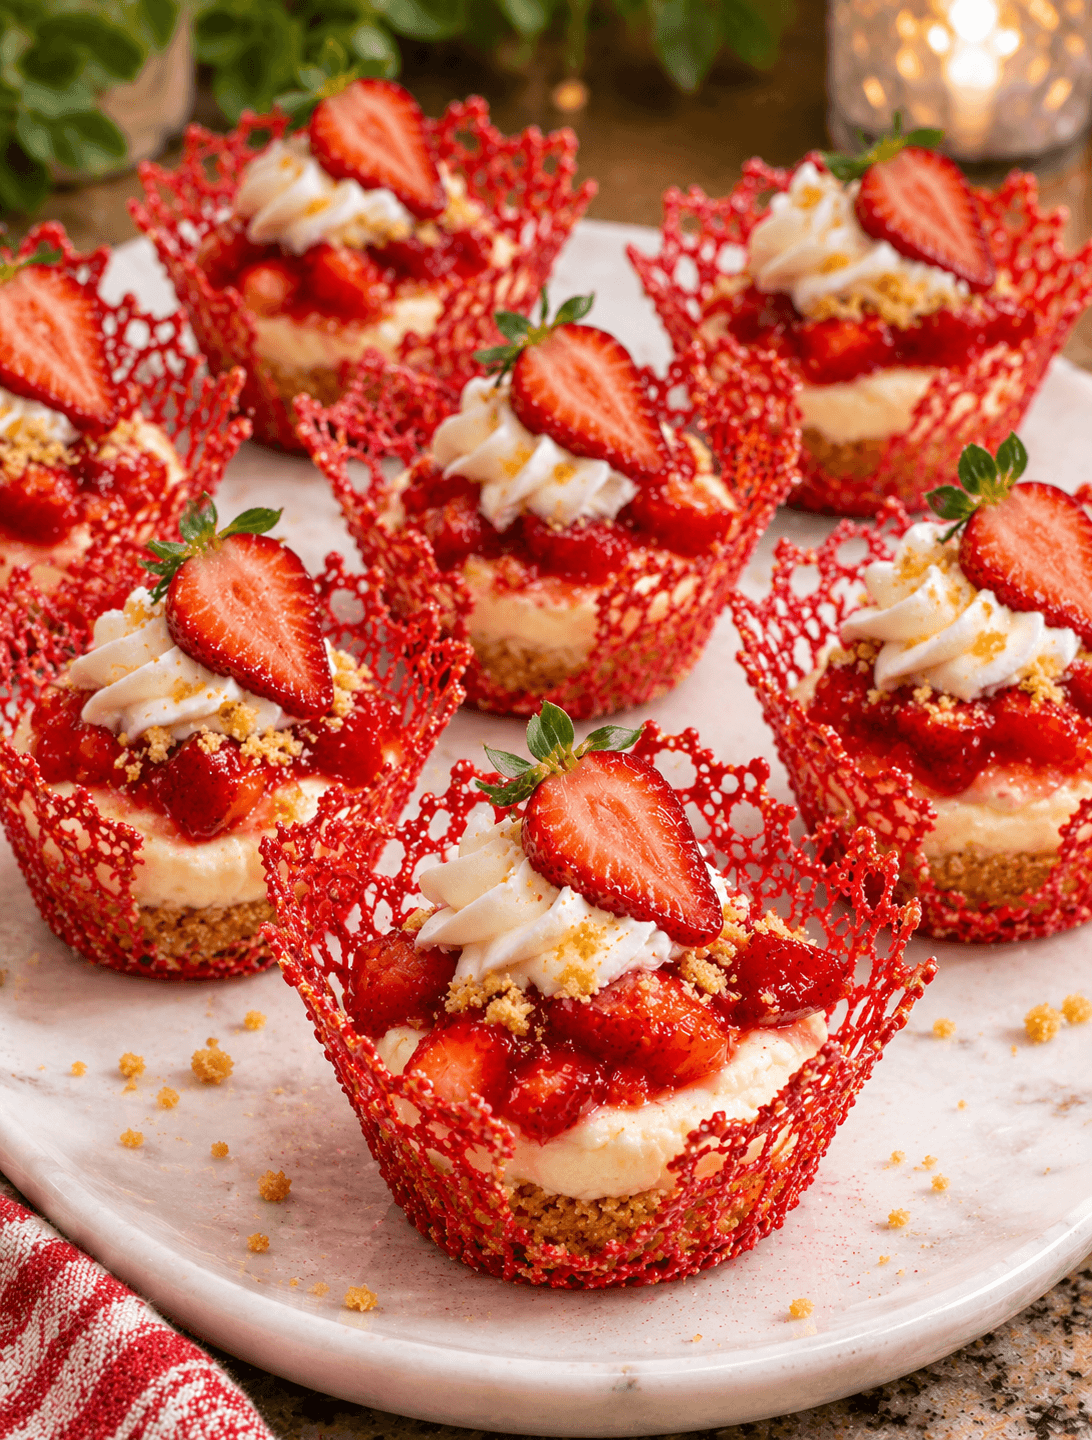
Strawberry Cheesecake Coral Lace Dessert Cups are perfect for special occasions. Delicate coral-pink cookie shells are filled with fluffy strawberry cheesecake cream and fresh berries.
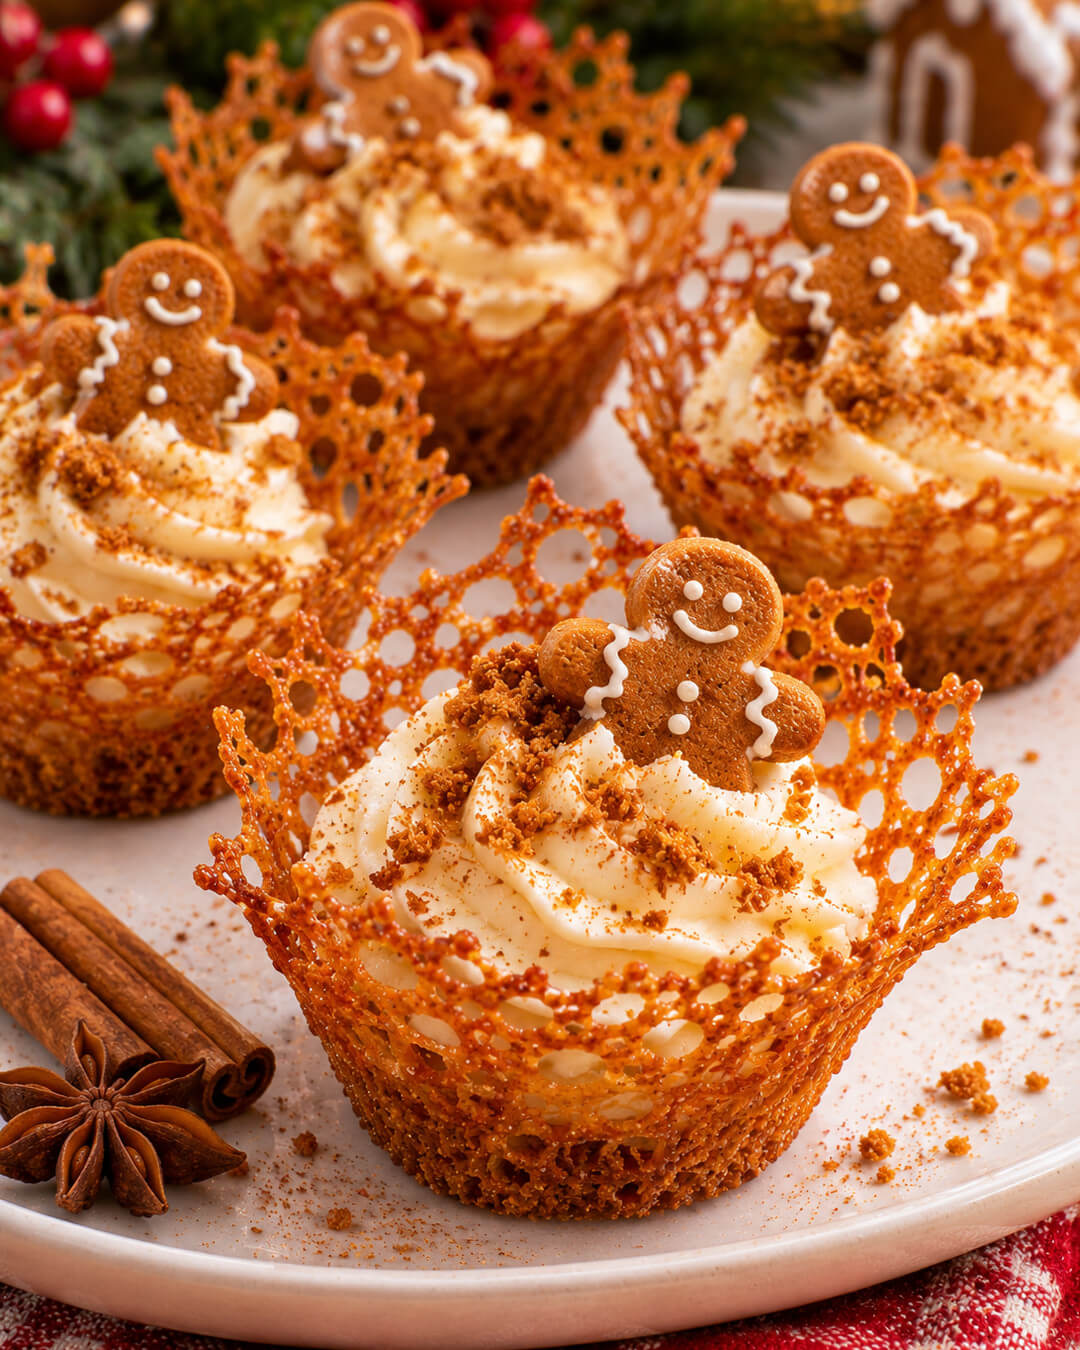
Gingerbread Spice Coral Lace Cups are another delicious winter dessert. Crispy gingerbread lace shells are filled with spiced mascarpone cream and topped with caramel.
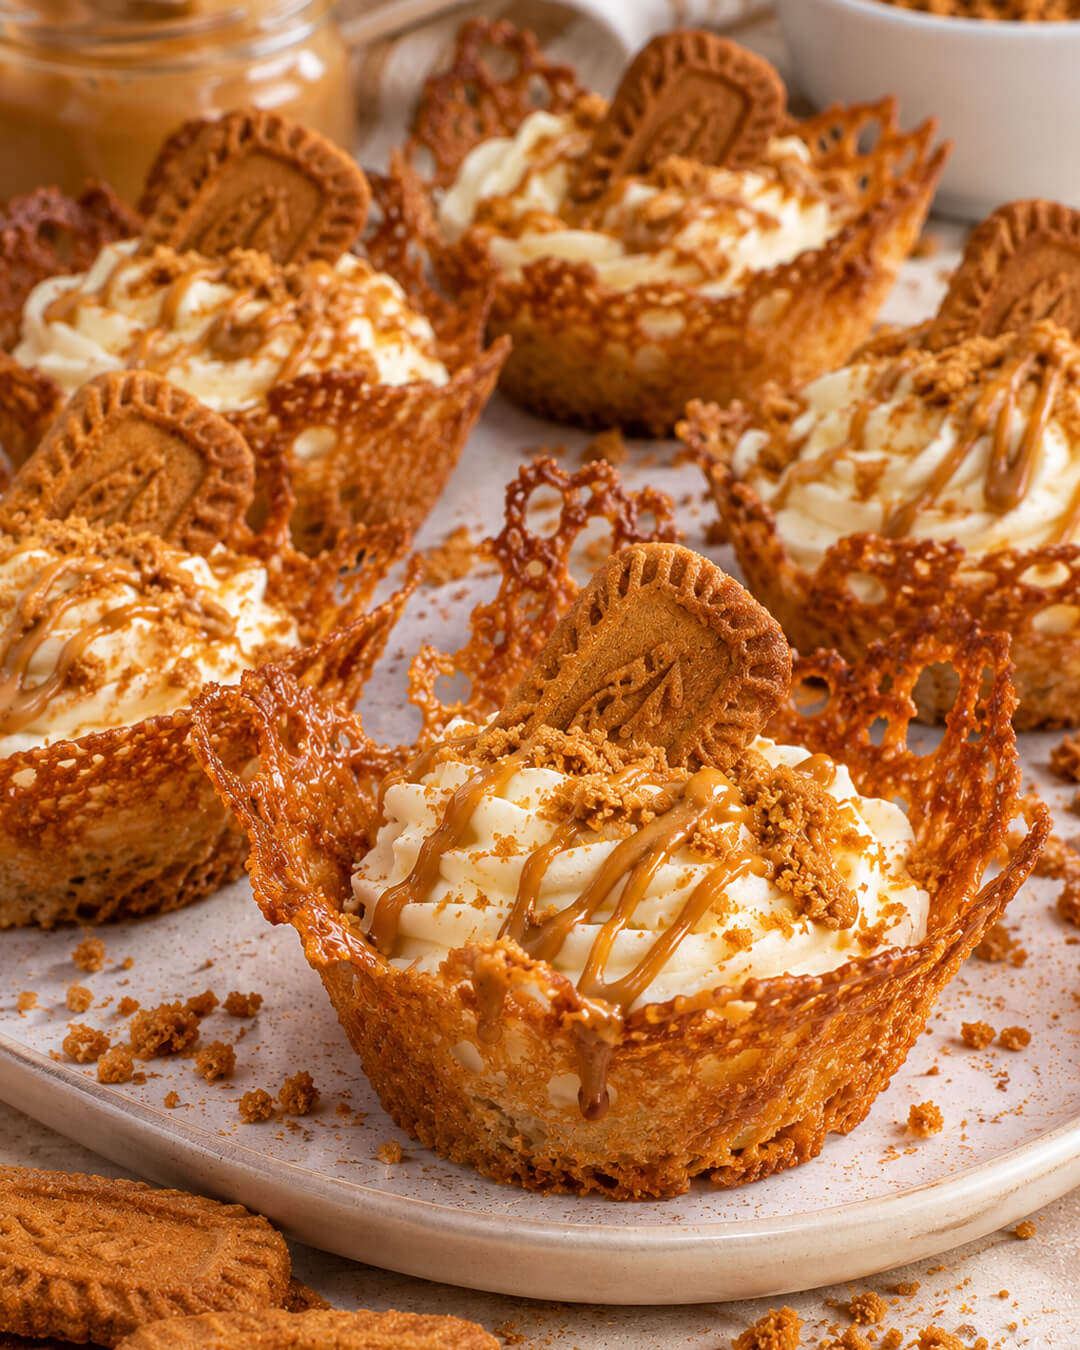
Crispy Biscoff Lace Dessert Cups combine caramelized cookie shells with vanilla cream and rich cookie butter.
White Chocolate Raspberry Cheesecake Cups are perfect for winter parties. Layers of cookie crumbs, white chocolate cheesecake cream, and raspberries create a beautiful individual dessert.
No-Bake Winter Berry Cheesecake is another great option. A buttery cookie crust is topped with creamy vanilla cheesecake filling and mixed berry sauce.
Mini Cranberry Orange Cheesecakes combine tangy cranberries with fresh orange flavor for a festive holiday dessert.
Vanilla Berry Trifle Cups are perfect when you want something easy to assemble. Layers of vanilla cake, whipped cream, and fresh berries create a delicious individual treat.
I love having a collection of winter desserts that can be prepared ahead of time.
They’re especially helpful during the holidays when there’s already so much baking and cooking to do.
These Winter Berry Cream Cups in Blue Coral Lace Tuiles are definitely one to save!
With beautiful icy-blue cookie shells, rich vanilla mascarpone cream, sweet homemade berry sauce, and fresh winter berries, they’re a delicious combination of crispy, creamy, and fruity flavors.
Prepare the components ahead of time, assemble shortly before serving, and enjoy every beautiful berry-filled bite!
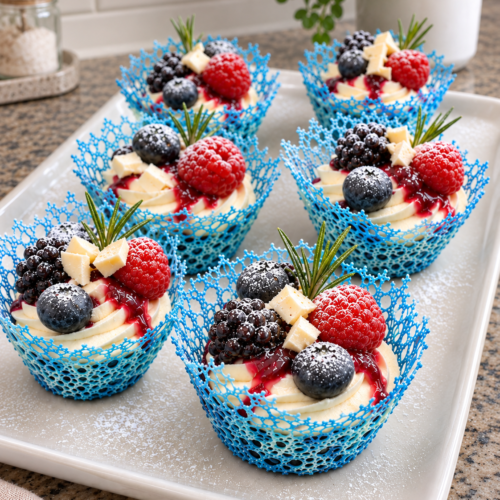
Winter Berry Cream Cups in Blue Coral Lace Tuiles
Ingredients
For the blue coral lace tuiles
- 2 large egg whites
- ½ cup powdered sugar
- ½ cup all-purpose flour
- 4 tablespoons unsalted butter melted and slightly cooled
- ½ teaspoon vanilla extract
- 1 pinch salt
- Blue gel food coloring a few drops as needed
For the vanilla mascarpone cream
- 8 ounces mascarpone cheese cold
- 1 cup heavy whipping cream cold
- ⅓ cup powdered sugar
- 1 teaspoon vanilla extract
- ½ teaspoon finely grated orange zest
For the winter berry sauce
- 1 cup mixed berries such as strawberries, blueberries, and raspberries
- 2 tablespoons granulated sugar
- 1 teaspoon fresh lemon juice
- 1 teaspoon cornstarch
- 1 teaspoon cold water
For decorating
- 1 cup fresh mixed berries such as blueberries, raspberries, and sliced strawberries
- Powdered sugar for dusting
- Fresh mint leaves optional
- White chocolate curls optional
Instructions
- Preheat the oven. Preheat the oven to 325°F. Line two large baking sheets with silicone baking mats. Prepare small, inverted heat-safe metal ramekins or molds approximately 2-2½ inches wide.
- Mix the egg whites and sugar. In a medium bowl, gently whisk the egg whites with powdered sugar until smooth. Don't whip into peaks.
- Add the flour. Whisk in all-purpose flour and salt until no lumps remain.
- Add butter and vanilla. Stir in the melted, slightly cooled butter and vanilla extract until smooth.
- Color the batter. Add a few drops of blue gel food coloring and stir until the batter reaches a soft icy-blue shade.
- Prepare the piping bag. Transfer the batter to a piping bag fitted with a small round tip or an opening approximately ⅛ inch wide.
- Pipe the lace patterns. Pipe two connected lace designs approximately 4-4½ inches wide onto the prepared baking sheet. Create a mostly solid center approximately 1½ inches wide, then pipe connected branching lines around it to form a delicate coral-inspired lace pattern.
- Bake. Bake at 325°F for approximately 7-9 minutes, until the cookies look set and dry with only lightly colored edges.
- Cool briefly. Remove from the oven and allow the cookies to cool for approximately 15-30 seconds, until flexible but firm enough to lift.
- Shape the cups. Carefully lift each warm tuile with a thin spatula and drape it over an inverted, heat-safe metal ramekin. Gently guide the lace edges down the sides with a heat-safe spatula.
- Cool until crispy. Allow the shaped tuiles to cool for approximately 5 minutes, until firm and crisp. Carefully remove from the molds and transfer to a wire rack. Repeat with the remaining batter to make approximately 12 cups.
- Prepare the berry sauce. In a small saucepan, combine 1 cup of mixed berries, granulated sugar, and lemon juice. Cook over medium-low heat for approximately 5-7 minutes, stirring occasionally, until the berries soften.
- Thicken the sauce. Whisk cornstarch with cold water. Stir into the berry mixture and cook for approximately 1 minute, until thickened. Remove from the heat and refrigerate until completely cold.
- Prepare the mascarpone filling. In a mixing bowl, beat cold mascarpone, powdered sugar, vanilla extract, and orange zest on low speed just until smooth.
- Whip the heavy cream. In a separate chilled bowl, whip cold heavy whipping cream until medium-stiff peaks form.
- Combine the cream. Gently fold the whipped cream into the mascarpone mixture in several additions until smooth and fluffy. Transfer to a piping bag and refrigerate until ready to use.
- Arrange the dessert cups. Just before serving, place the completely cooled blue coral lace shells on a large serving platter or in individual shallow dessert dishes.
- Pipe the cream. Pipe approximately 3 tablespoons of vanilla mascarpone cream into each lace cup, adjusting to the size of the shell.
- Add the berry sauce. Spoon approximately 1 teaspoon of chilled berry sauce over each cream swirl.
- Decorate. Top with fresh raspberries, blueberries, and strawberry pieces. Add a tiny mint leaf or white chocolate curls if desired.
- Finish and serve. Lightly dust with powdered sugar and serve immediately for the best combination of crispy lace shells and fluffy cream.