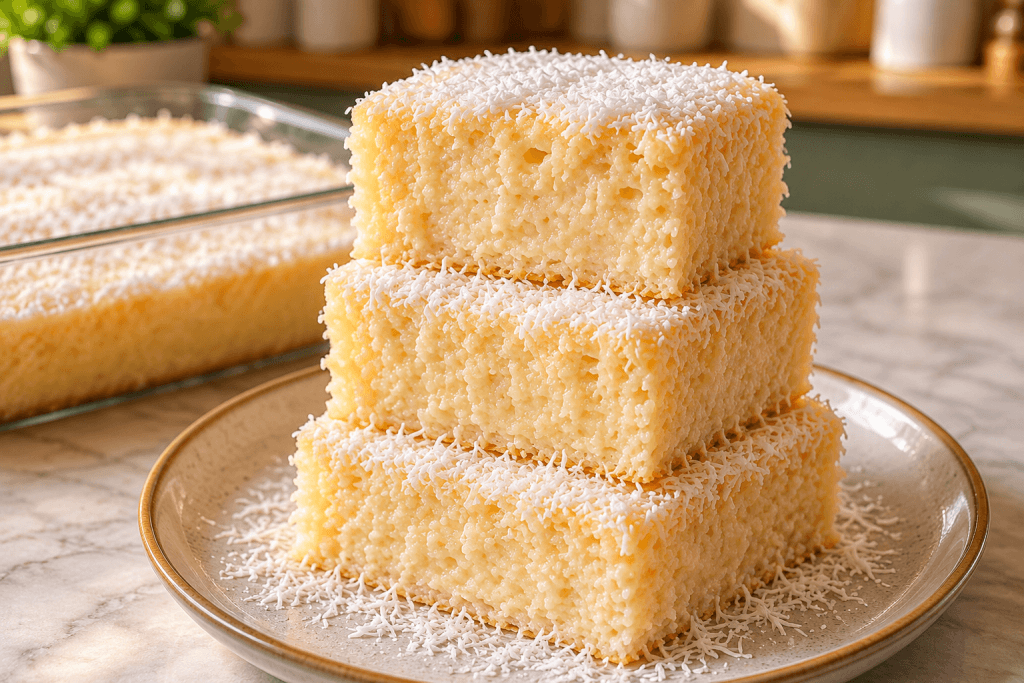
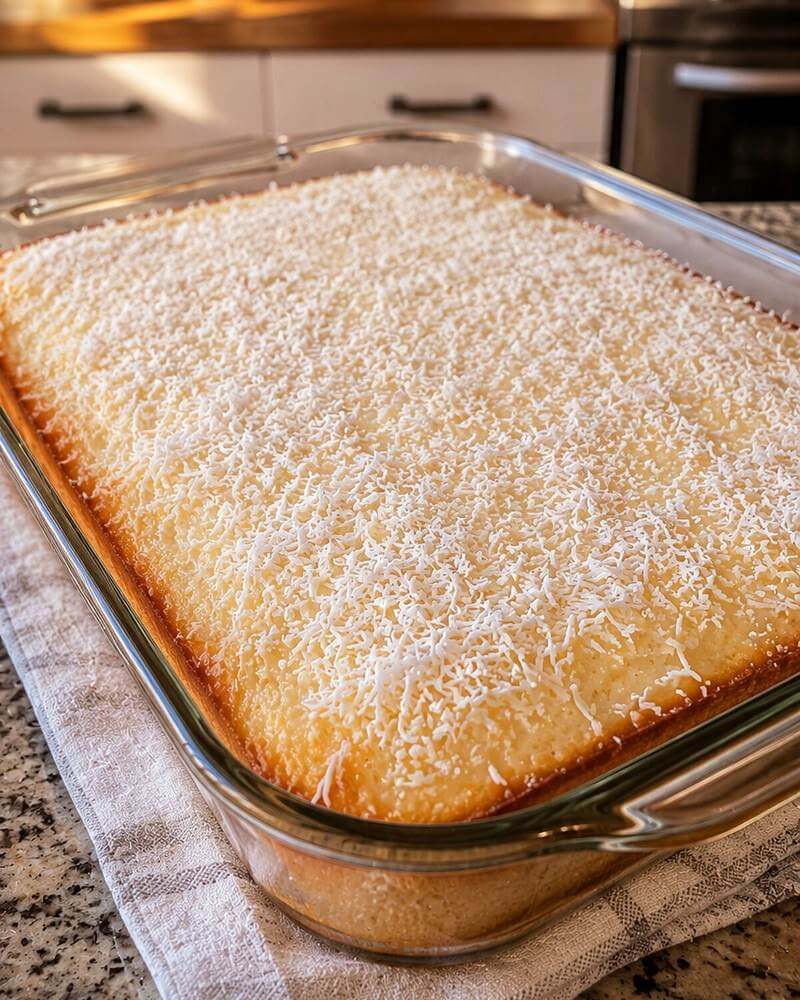
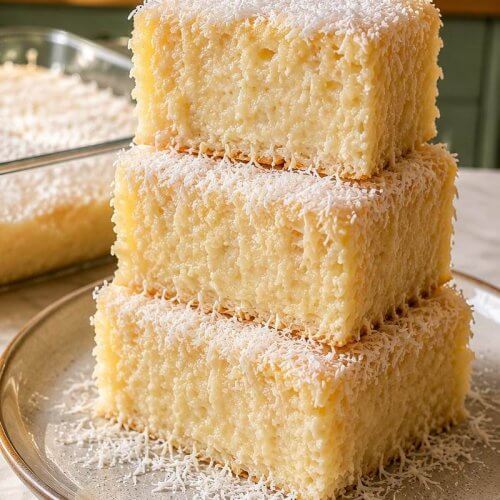
This Very Creamy Coconut Cake is soft, rich, and filled with sweet coconut flavor in every bite! A fluffy homemade coconut cake is poked all over, soaked with a silky mixture of cream of coconut, coconut milk, and sweetened condensed milk, then finished with a light cream cheese whipped topping. Add a thick layer of shredded coconut on top and you have an easy, impressive dessert that’s perfect for holidays, birthdays, potlucks, or any coconut lover.
The first thing you’ll notice about this cake is the texture. It’s incredibly moist, but it doesn’t fall apart when you slice it. The coconut cream mixture slowly moves into the holes in the warm cake, giving the inside little pockets of creamy sweetness. Once chilled, the topping becomes cool and fluffy while the cake underneath stays soft.
And yes, it tastes even better the next day!
I love a dessert that can be completely prepared ahead of time, especially when I’m planning a holiday meal or bringing something to a party. This coconut cake needs several hours in the refrigerator, so making it the night before works perfectly. By the time you’re ready to serve it, the flavors have blended together and the creamy coconut mixture has soaked through the entire cake.
The recipe starts with a homemade cake batter made with coconut milk, sour cream, butter, and a little coconut extract. After the cake comes out of the oven, you’ll poke holes across the top and slowly pour on the creamy coconut soak.
Don’t rush that part. Pouring the mixture on gradually gives it time to settle into the cake instead of collecting around the edges of the pan.
The final layer is a smooth cream cheese whipped topping. It has enough tanginess to balance the sweet coconut filling, but it’s still light enough that the finished dessert doesn’t feel heavy. A generous sprinkle of shredded coconut adds even more flavor and a soft, chewy finish.
Creamy, fluffy, and loaded with coconut. This is the kind of cake that disappears one cool slice at a time!
Why You’ll Love This Coconut Cake
It’s extra creamy without becoming soggy
The cake is baked until light and tender, then soaked while it’s still warm. This allows the coconut mixture to move down into the center of the cake. After chilling, the texture becomes moist and creamy while the bottom still holds together.
It’s made for coconut lovers
Coconut milk goes into the cake batter, cream of coconut flavors the soak, and shredded coconut covers the top. A small amount of coconut extract ties everything together without making the flavor taste artificial.
You can make it ahead of time
This cake needs at least 4 hours to chill, but overnight is even better. That makes it a great choice when you want dessert finished before your guests arrive.
It feeds a crowd
A 9 inch x 13 inch cake makes 15 generous slices or up to 20 smaller party portions. Since the cake is rich and creamy, a little piece goes a long way.
Ingredients
Here I explain the best ingredients for this creamy coconut cake recipe, what each one does, and easy substitution options. For the exact ingredient measurements, see the recipe card at the bottom of this post.
For the coconut cake
All-purpose flour – spoon the flour into a measuring cup and level it off with a knife. Packing flour firmly into the cup can add too much and create a dry, heavy cake.
Baking powder – this gives the cake its lift and helps create a soft, fluffy crumb. Make sure the baking powder is fresh before you start baking.
Salt – a small amount balances the sweetness and brings out the coconut and vanilla flavors.
Unsalted butter – let the butter soften at room temperature before mixing the batter. Softened butter should hold its shape but give slightly when pressed. If it’s melted or greasy, the cake may not rise as evenly.
Granulated sugar – sweetens the cake and helps the butter hold air as the two ingredients are creamed together.
Large eggs – use room-temperature eggs so they blend smoothly into the butter mixture. Cold eggs can cause the batter to look separated.
Vanilla extract – adds a warm background flavor that works perfectly with coconut.
Coconut extract – this creates a more noticeable coconut flavor. Coconut extracts can vary in strength, so one teaspoon is enough for the cake batter. You can leave it out for a lighter flavor.
Full-fat canned coconut milk – shake or stir the can before measuring because the coconut cream may separate from the liquid. Full-fat coconut milk gives the cake more flavor and a softer texture than refrigerated coconut milk from a carton.
Sour cream – adds moisture and gives the cake a fine, tender crumb. Plain full-fat Greek yogurt can be used in its place.
Sweetened shredded coconut – adds little pieces of coconut throughout the cake. If the shreds are very long, give them a rough chop before folding them into the batter.
For the creamy coconut soak
Sweetened condensed milk – this thick, sweet milk is poured over the warm cake and creates its creamy texture. Be sure to use sweetened condensed milk, not evaporated milk. The cans can look similar, but the two products work very differently.
Cream of coconut – this is a thick, sweetened coconut product, usually sold in a can or squeeze bottle. Stir it well before measuring. Do not replace it with coconut cream unless you also adjust the sweetness, because coconut cream is generally unsweetened.
Coconut milk – thins the soak just enough that it can move through the holes in the cake. Use the same full-fat canned coconut milk that you used in the batter.
For the cream cheese whipped topping
Cream cheese – use a full-fat block of cream cheese for the thickest, smoothest topping. Cream cheese sold in a tub is softer and can make the topping loose.
Powdered sugar – lightly sweetens the topping and blends into the cream cheese without leaving a grainy texture.
Vanilla extract – adds flavor without overpowering the coconut.
Coconut extract – a small amount adds one final layer of coconut flavor. You can leave it out if you prefer a more subtle topping.
Heavy whipping cream – keep the cream cold until you’re ready to use it. Cold cream whips faster and holds its shape better.
Shredded coconut – sprinkle it over the finished cake. Sweetened coconut creates a softer, sweeter topping, while unsweetened coconut has a drier texture and stronger natural coconut taste.
What Is Cream of Coconut?
Cream of coconut is a sweetened coconut product with a thick, syrupy consistency. It’s commonly used in tropical drinks and desserts. In this cake, it adds concentrated coconut flavor while helping create that soft, creamy center.
Cream of coconut is not the same thing as canned coconut milk. Coconut milk is thinner and usually contains little or no added sugar. It’s also different from coconut cream, which is the rich, thick portion of coconut milk but is normally unsweetened.
Before measuring cream of coconut, stir it thoroughly. The contents can separate while sitting in the container. You want the thick and thin portions completely mixed so the soak has an even consistency.
Instructions
I’ve broken the recipe into simple steps to make it easy to follow at home. For the shorter version with exact quantities, scroll to the recipe card at the bottom of this post.
1. Prepare the baking dish
Preheat the oven to 350°F.
Coat a 9 inch x 13 inch baking dish with cooking spray. You can also lightly grease the pan with butter, then dust it with flour.
A metal baking pan will usually bake the cake a few minutes faster than a glass or ceramic dish. Begin checking the cake at the lower end of the baking time if you’re using metal.
2. Combine the dry ingredients
Add the all-purpose flour, baking powder, and salt to a medium mixing bowl.
Whisk until the baking powder and salt are evenly distributed throughout the flour. Set this bowl aside while you prepare the wet ingredients.
Taking a few seconds to whisk the dry ingredients now helps prevent little pockets of baking powder from ending up in the finished cake.
3. Cream the butter and sugar
Add softened butter and granulated sugar to a large mixing bowl.
Use an electric hand mixer or stand mixer to beat them together on medium speed for 3-4 minutes. The mixture should become pale, fluffy, and slightly increased in volume.
Scrape down the sides and bottom of the bowl halfway through mixing. Butter and sugar can collect near the base of the bowl, especially when using a stand mixer.
This step adds air to the cake batter, so give it the full mixing time. That trapped air helps create a lighter cake.
4. Add the eggs and extracts
Add the eggs one at a time, mixing after each addition.
Once the eggs are combined, add the vanilla extract and coconut extract. Mix for another 30 seconds, then scrape down the bowl again.
The batter might look slightly separated after the eggs are added. That’s okay. It will smooth out when the flour and coconut milk go into the bowl.
5. Add the coconut milk and sour cream
In a small bowl or measuring cup, whisk the coconut milk and sour cream together until mostly smooth.
Add one-third of the flour mixture to the butter mixture and blend on low speed. Pour in half of the coconut milk mixture and mix again.
Repeat with another third of the flour, the remaining coconut milk mixture, then the final third of the flour.
Mix only until the flour disappears. Overmixing at this stage can make the cake dense instead of soft.
6. Fold in the coconut
Add the shredded coconut to the batter.
Use a spatula to gently fold it in, scraping along the bottom of the bowl to make sure no dry flour remains. The batter will be thick, creamy, and easy to spread.
Spoon the batter into the prepared baking dish and smooth the top into an even layer.
7. Bake the cake
Place the cake on the center rack of the preheated oven.
Bake for 32-38 minutes, or until the top is lightly golden and a toothpick inserted into the center comes out clean or with a few moist crumbs.
Avoid opening the oven during the first 25 minutes. A rush of cool air can cause the center of the cake to sink before its structure has set.
Remove the cake from the oven and place the pan on a wire rack. Let it cool for 10 minutes before adding the coconut soak.
8. Make the creamy coconut mixture
Add the sweetened condensed milk, cream of coconut, and coconut milk to a medium bowl or large measuring cup.
Whisk until smooth. Cream of coconut can be thick, so make sure there are no heavy clumps remaining in the mixture.
The soak should be pourable but still creamy.
9. Poke the cake
Use the handle of a wooden spoon, a thick skewer, or a large fork to poke holes all over the warm cake.
Space the holes approximately 1 inch apart. Press down about three-quarters of the way through the cake, but try not to push all the way to the bottom of the pan.
Larger holes allow more of the creamy mixture to soak into the center. A fork will work, but the soak won’t move as deeply into the cake.
10. Soak the cake
Slowly pour the coconut mixture over the warm cake.
Start in the center, then move toward the edges. Pause after each pour and give the liquid several seconds to move into the holes.
Use a spatula to gently spread any mixture that collects on top. Pay extra attention to the corners, since they can dry out faster than the center during baking.
It may look like a lot of liquid at first. The warm cake will continue absorbing it as it cools.
Let the cake sit at room temperature for 30 minutes. Cover the pan and transfer it to the refrigerator for at least 3 hours before adding the topping.
11. Prepare the cream cheese whipped topping
Add the softened cream cheese and powdered sugar to a large mixing bowl.
Beat on medium speed for 1-2 minutes, or until completely smooth. Add the vanilla and coconut extracts, then mix again.
With the mixer running on low, slowly pour in the cold heavy whipping cream. Once the cream is combined with the cream cheese, increase the speed to medium-high.
Beat until the topping is thick, fluffy, and holds soft peaks. This should take 2-4 minutes, depending on the mixer.
Stop mixing as soon as the topping holds its shape. Whipped cream can become grainy if it’s beaten too long.
12. Frost and chill the cake
Spread the cream cheese whipped topping over the chilled cake.
Use an offset spatula or the back of a spoon to create an even layer. Sprinkle the shredded coconut generously over the entire top.
Cover and refrigerate the finished cake for at least 1 more hour before slicing. This gives the topping time to firm up and makes the cake easier to cut cleanly.
For the creamiest texture, serve it cold straight from the refrigerator.
Recipe Tips
Use room-temperature ingredients for the cake batter. Softened butter, eggs, coconut milk, and sour cream blend together more easily when they aren’t cold. Take them out of the refrigerator approximately 30 minutes before baking.
Use canned coconut milk. Refrigerated coconut beverages are much thinner and contain less coconut fat. They won’t add the same flavor or texture to the cake.
Stir the coconut products before measuring. Coconut milk and cream of coconut naturally separate. Mix each one until smooth so you get the correct balance of cream and liquid.
Don’t overmix the batter. Once the flour is added, use low speed and stop mixing as soon as everything comes together. Too much mixing can create a firm, tight crumb.
Poke the holes while the cake is warm. A warm cake absorbs the coconut mixture more easily. Let it rest for 10 minutes after baking, then poke and soak it.
Pour slowly. Adding the soak in several rounds gives the cake time to absorb it. Pouring everything in one spot can make the center overly wet while leaving the edges dry.
Give the cake enough time to chill. Four hours is the minimum, but an overnight rest gives you the best texture. The liquid continues moving through the cake as it sits.
Keep the whipping cream cold. Leave it in the refrigerator until the cream cheese mixture is smooth and ready. Cold cream creates a thicker topping.
Clean the knife between slices. Run a sharp knife under warm water, dry it, then cut the cake. Wipe the blade after each slice for cleaner edges.
How to Toast Coconut
You can top the cake with soft shredded coconut, toasted coconut, or a combination of both.
To toast it in the oven, spread 1½ cups shredded coconut in a thin layer on a baking sheet. Place it in a 325°F oven for 5-8 minutes.
Stir the coconut every 2 minutes so it browns evenly. The pieces around the edges will toast first, so keep a close eye on the pan.
Remove the coconut when it turns light golden brown. It will continue to darken slightly from the heat of the baking sheet.
Let it cool completely before adding it to the whipped topping. Warm coconut can soften or melt the frosting.
For more texture, sprinkle soft coconut over the cake first, then finish with a smaller amount of toasted coconut.
Easy Recipe Variations
Pineapple coconut cake
Drain an 8 ounce can of crushed pineapple very well. Fold it into the cake batter with the shredded coconut.
You can also spoon a small amount of drained pineapple over the soaked cake before adding the whipped topping. Keep the pieces thin and evenly distributed so the cake remains easy to slice.
Coconut lime cake
Add 1 tablespoon finely grated lime zest to the cake batter.
Replace the vanilla extract in the topping with 1 teaspoon lime zest and add a little extra lime zest over the finished cake. The fresh citrus flavor cuts through the rich coconut cream and gives the dessert a lighter finish.
Coconut almond cake
Replace half of the vanilla extract in the cake with almond extract. Almond extract is strong, so ¼-½ teaspoon is plenty.
Sprinkle sliced toasted almonds over the coconut topping right before serving.
Coconut lemon cake
Add 1 tablespoon lemon zest to the cake batter. You can also spread a thin layer of lemon curd over the chilled, soaked cake before adding the whipped topping.
The lemon adds a bright flavor while the coconut keeps the dessert rich and creamy.
Easy boxed cake version
You can make a faster version with one box of white or vanilla cake mix.
Prepare the cake in a 9 inch x 13 inch pan according to the package directions, but replace the water with canned coconut milk. Add 1 teaspoon coconut extract and ½ cup shredded coconut to the batter.
Bake as directed on the box, then continue with the coconut soak and whipped topping from this recipe.
The homemade cake has a richer coconut flavor, but the boxed version is useful when you need a quick party dessert.
Frequently Asked Questions
Can I use coconut cream instead of cream of coconut?
They aren’t an equal replacement because coconut cream is usually unsweetened, while cream of coconut contains sugar.
You can use coconut cream, but the finished soak will be much less sweet. Whisk ¾ cup coconut cream with ¼-⅓ cup powdered sugar before combining it with the sweetened condensed milk and coconut milk. Taste the mixture and adjust the sweetness before pouring it over the cake.
Can I use evaporated milk instead of sweetened condensed milk?
No, evaporated milk doesn’t have the same sweetness or thickness. Using it would make the soak thinner and the cake would lose much of its rich, creamy flavor.
Use a standard can of sweetened condensed milk for this recipe.
Does this cake need to be refrigerated?
Yes. The cake contains a milk soak, cream cheese, and whipped cream, so it should remain refrigerated.
Don’t leave it at room temperature for more than 2 hours. When serving it at an outdoor gathering, keep the pan chilled until dessert time.
Can I make it without coconut extract?
Yes. The coconut milk, cream of coconut, and shredded coconut will still add plenty of flavor.
Without the extract, the coconut taste will be softer and more natural. You can add an extra teaspoon of vanilla extract to the cake batter if you’d like.
Can I make this as a layer cake?
I don’t recommend using this exact recipe for a traditional stacked layer cake. The coconut soak makes the layers very soft, which can cause them to slide or break.
For a round presentation, bake the cake in a deep 9 inch x 13 inch pan, soak and frost it as directed, then cut individual round portions with a biscuit cutter before serving.
Can I use unsweetened shredded coconut?
Yes. Unsweetened coconut has a stronger natural flavor and makes the finished dessert slightly less sweet.
It can also be drier than sweetened coconut. For the softest texture inside the cake, use sweetened shredded coconut in the batter and unsweetened coconut on top.
Why did my cake turn out dense?
The most common causes are using too much flour, mixing the batter too long, or starting with butter that was too cold.
Measure the flour by spooning it into the cup rather than scooping directly from the bag. Cream the softened butter and sugar for the full 3-4 minutes, then mix gently once the dry ingredients are added.
Why isn’t the soak moving into the cake?
The holes may be too small or too shallow.
Use the handle of a wooden spoon and press it most of the way through the warm cake. Pour the soak slowly, pausing between additions. If some liquid remains on top, gently spread it across the cake and let it sit for several minutes.
Can I serve the cake warm?
This recipe is best served cold. Chilling gives the soak time to settle into the crumb and allows the cream cheese topping to hold its shape.
A warm slice will be much softer and the topping may begin to melt.
Make-Ahead Instructions
This is one of my favorite cakes to prepare a day before serving.
Bake and soak the cake, let it sit at room temperature for 30 minutes, then cover and refrigerate it. Once the cake has chilled for at least 3 hours, add the cream cheese whipped topping and shredded coconut.
Cover it again and refrigerate overnight.
You can also prepare the topping separately and store it in an airtight container in the refrigerator for up to 24 hours. Give it a gentle stir before spreading it over the cake.
For the best appearance, add toasted coconut just before serving. Soft shredded coconut can be added the night before.
Storage
Store leftover coconut cake covered in the refrigerator for up to 5 days.
A baking dish with a fitted lid works best. You can also wrap the dish tightly with plastic wrap, but insert a few toothpicks into the top of the cake to prevent the wrap from sticking to the frosting.
The cake will become even softer after the first day. By day four or five, some liquid may begin to settle near the bottom of the pan. The cake is still good, but the texture will be very creamy.
Serve leftovers cold. There’s no need to reheat this cake.
Can You Freeze Coconut Cake?
Yes, but I recommend freezing the cake before adding the whipped topping.
Bake the cake, poke the holes, and add the coconut soak. Chill it until completely cold, then wrap the pan tightly with plastic wrap and a layer of aluminum foil.
Freeze for up to 2 months.
Thaw the cake overnight in the refrigerator. Once thawed, prepare the cream cheese whipped topping, spread it over the cake, and add shredded coconut.
Individual frosted slices can also be frozen. Place them on a parchment-lined baking sheet and freeze until firm, then transfer them to an airtight freezer container. Thaw the slices in the refrigerator. The topping may be slightly softer after freezing, but the flavor will still be delicious.
How to Serve It
Serve this coconut cake chilled for the best texture.
It’s rich enough to stand on its own, but fresh berries make a beautiful addition. Strawberries, raspberries, or sliced mango add color and a little fresh acidity next to the sweet coconut.
For a holiday dessert table, cut the cake into small squares and place each piece in a paper cupcake liner. This makes it easy for guests to pick up a portion without slicing the cake at the table.
You can also garnish each slice with whipped cream, a few flakes of toasted coconut, or a thin lime slice.
The cake pairs nicely with hot coffee, iced coffee, black tea, or a cold glass of milk.
Once you taste the soft coconut cake with that cool, creamy center, you’ll understand why it’s worth giving it plenty of time in the refrigerator. Each layer brings something different: fluffy cake, rich coconut filling, light cream cheese topping, and tender shredded coconut.
Make it the night before, keep it cold, then watch those creamy coconut slices disappear!
Very Creamy Coconut Cake Recipe
Ingredients
For the coconut cake
- 2½ cups all-purpose flour
- 2½ teaspoons baking powder
- ½ teaspoon salt
- ¾ cup unsalted butter softened
- 1¾ cups granulated sugar
- 4 large eggs at room temperature
- 2 teaspoons vanilla extract
- 1 teaspoon coconut extract
- 1 cup full-fat canned coconut milk stirred
- ½ cup sour cream
- 1 cup sweetened shredded coconut
For the coconut soak
- 1 can 14 ounces sweetened condensed milk
- ¾ cup cream of coconut stirred
- ½ cup full-fat canned coconut milk
For the topping
- 8 ounces full-fat cream cheese softened
- 1 cup powdered sugar
- 1 teaspoon vanilla extract
- ½ teaspoon coconut extract
- 2 cups cold heavy whipping cream
- 1½ cups sweetened shredded coconut
Instructions
- Preheat the oven to 350°F. Coat a 9 inch x 13 inch baking dish with cooking spray.
- Whisk the flour, baking powder, and salt together in a medium bowl. Set aside.
- Add the softened butter and granulated sugar to a large mixing bowl. Beat with an electric mixer on medium speed for 3-4 minutes, or until light and fluffy.
- Add the eggs one at a time, mixing after each addition. Mix in the vanilla and coconut extracts.
- Whisk the coconut milk and sour cream together in a separate bowl.
- Add one-third of the flour mixture to the butter mixture. Mix on low, then add half of the coconut milk mixture.
- Repeat with another third of the flour, the remaining coconut milk mixture, and the final third of flour. Mix just until combined.
- Fold in 1 cup shredded coconut.
- Spread the batter evenly in the prepared baking dish.
- Bake for 32-38 minutes, or until a toothpick inserted in the center comes out clean.
- Remove the cake from the oven and cool for 10 minutes.
- Whisk the sweetened condensed milk, cream of coconut, and coconut milk together until smooth.
- Use the handle of a wooden spoon to poke holes across the warm cake, spacing them approximately 1 inch apart.
- Slowly pour the coconut mixture over the cake, pausing to let it soak into the holes.
- Cool the cake at room temperature for 30 minutes. Cover and refrigerate for at least 3 hours.
- Beat the softened cream cheese and powdered sugar until smooth. Mix in the vanilla and coconut extracts.
- Slowly add the cold heavy whipping cream. Beat on medium-high speed until the topping is thick and fluffy.
- Spread the topping over the chilled cake.
- Sprinkle 1½ cups shredded coconut evenly over the top.
- Refrigerate for at least 1 hour before slicing and serving.
Notes
Stir the coconut milk and cream of coconut before measuring.
Make sure the cake is still warm when you poke the holes and add the soak.
Pour the coconut mixture slowly so it spreads evenly through the cake.
Chill the cake for at least 4 hours total. Overnight chilling gives it an even creamier texture.
Store the cake covered in the refrigerator for up to 5 days.
To freeze it, freeze the soaked cake without the whipped topping for up to 2 months.