
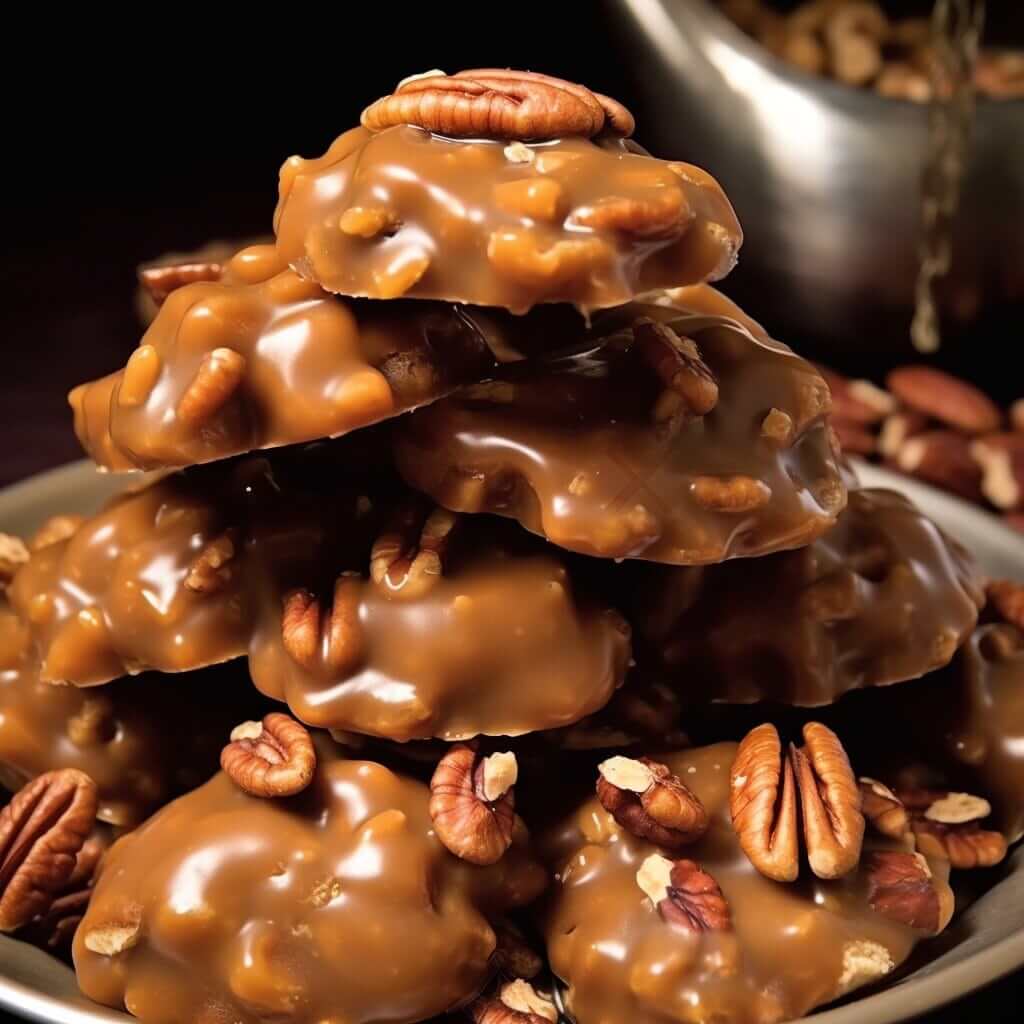
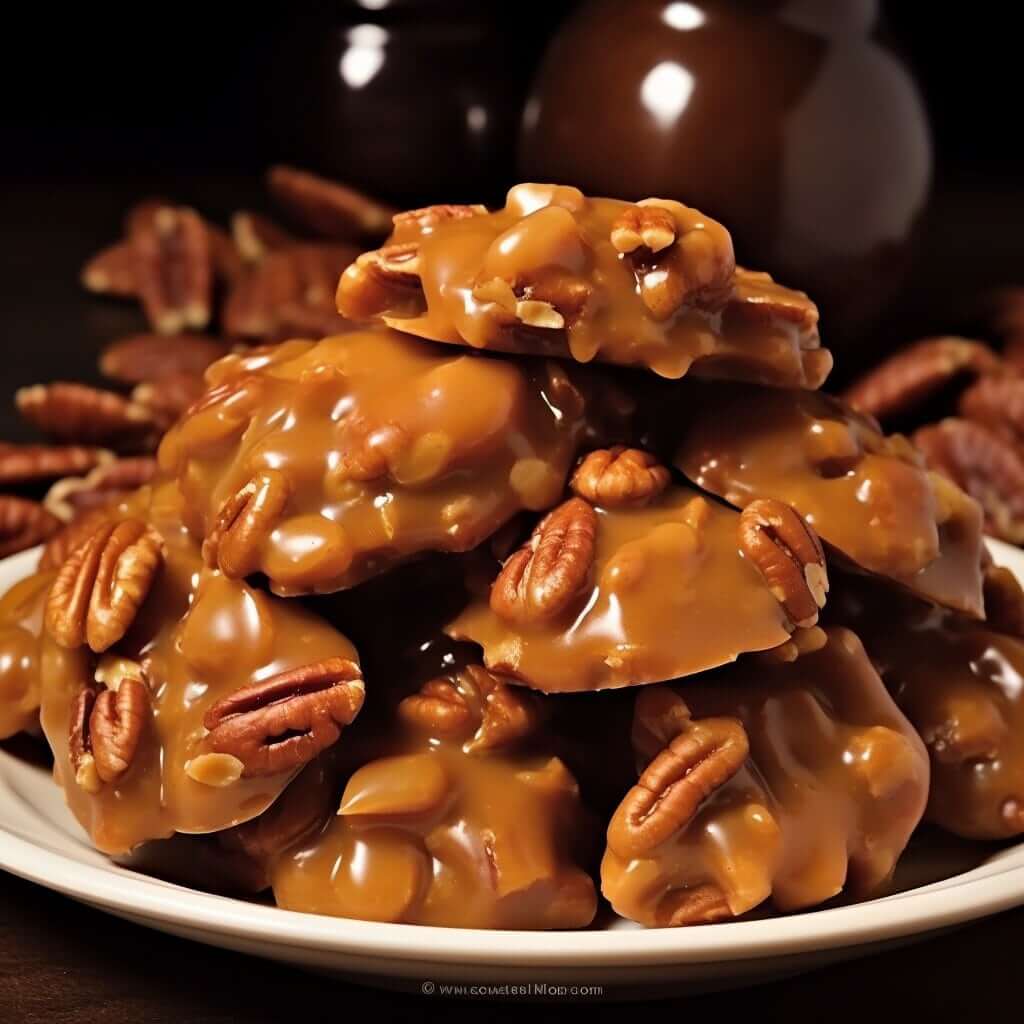
Close your eyes and imagine the sweet, nostalgic flavor of homemade pralines – that melt-in-your-mouth combination of buttery, sugary pecans and creamy vanilla. These traditional Southern candies evoke memories of front porch swings, sweet tea, and warm summer nights below the Mason-Dixon line.
Though simple in ingredients, pralines require precise technique to achieve their distinctive crumbly-crisp texture on the outside and soft, fudgy interior. Mastering the art of praline-making may take some practice, but it is well worth the effort. The aroma of pecans and brown sugar wafting from your kitchen as you stir the bubbling candy mixture is reward enough!
When those first pralines set and you bite into the caramelized pecan halves surrounded by creamy, vanilla-flecked candy, you’ll be hooked. Before you know it, you’ll be making batch after batch to give as gifts or bring to neighborhood potlucks and church socials like they do down South.
So get ready to channel your inner Southern belle or gentleman and prepare for these pralines to charm anyone lucky enough to receive them. We’re sharing tips and tricks for making these quintessential Southern treats right at home. From the ideal pecan to use to troubleshooting the finicky candy stage, you’ll gain the know-how to churn out perfect pralines every time.
Get ready to impress your friends and family with your newfound praline prowess! These melt-in-your-mouth candies may seem indulgent, but their sweet southern charm is simply irresistible.
What kind of pecans work best for pralines?
Pecan halves are ideal for getting the perfect crunch in pralines. Shelled, fresh raw pecans are best, but thawed frozen pecan halves also work well.
Does the type of sugar matter?
A combination of brown sugar and granulated white sugar gives pralines their distinctive flavor. The brown sugar provides a hint of molasses flavor while the white sugar helps achieve the right crystalline structure.
Why is evaporated milk used?
Evaporated milk has a creamy richness that gives the pralines a smooth, fudgy texture. Half-and-half or cream can be substituted but may produce a softer set.
What makes the pralines shiny?
The high fat content of butter and evaporated milk gives pralines their iconic glossy, shellacked appearance when cooled.
How long do pralines last?
Pralines will keep for 1-2 weeks stored in an airtight container at room temperature. For longer storage, freeze for up to 3 months.
What are some serving ideas for pralines?
Enjoy pralines on their own as a sweet treat or crumbled over ice cream. They also make a perfect holiday gift or party favor.
Prep Time: 10 minutes
Cook Time: 25 minutes
Total Time: 35 minutes
Ingredients:
- 2 cups pecan halves
- 2 cups white granulated sugar
- 1 cup brown sugar
- 1/8 teaspoon salt
- 1 cup evaporated milk
- 4 tablespoons unsalted butter
- 1 teaspoon vanilla extract
Instructions :
- Preheat your oven to 350°F. You’ll want a nice hot oven to lightly toast the pecans and bring out their aromatic nutty flavor.
- Spread the 2 cups of pecan halves in a single layer on a large rimmed baking sheet. Make sure they are spread out, not overlapping.
- Bake the pecans for 5-7 minutes, just until lightly browned and you can smell that heavenly pecan scent wafting from the oven.
- Remove the pecans from the oven and transfer them to a plate or bowl. Allow them to cool completely before using them in the praline candy. This ensures they stay crispy when mixed into the hot candy.
- Cooling the toasted pecans takes about 15-20 minutes. You can speed up the cooling by spreading them on two plates. The enhanced pecan flavor from toasting really takes the pralines up a notch!
- Line a large baking sheet with parchment paper and lightly grease it with butter or nonstick spray. This prevents the pralines from sticking when cooling. Set it aside for now.
- In a heavy 3 or 4 quart saucepan (avoid thin pans that can scorch easily), combine the 2 cups granulated sugar, 1 cup brown sugar, 1/8 teaspoon salt, 1 cup evaporated milk, and 4 tablespoons unsalted butter.
- Heat the mixture over medium heat, stirring constantly with a wooden spoon or heatproof rubber spatula. You want to fully dissolve the sugars as it heats.
- Attach a candy thermometer to the side of the pan with the point fully submerged in the mixture but not touching the bottom.
- Bring the mixture to a rolling boil over medium-high heat, stirring constantly. Make sure to get into the edges of the pan.
- Once boiling, stop stirring and allow the mixture to cook undisturbed until it reaches 236°F on the thermometer. This takes 12-15 minutes with vigorous bubbling. Watch closely near the end.
- When the temperature hits exactly 236°F, immediately remove the pan from the heat. Gently stir in the 1 teaspoon vanilla extract. Be careful as the mixture will be extremely hot.
- Working swiftly, use a tablespoon sized cookie scoop or spoon to drop large dollops of the praline mixture onto the prepared baking sheet. Space them about 1 inch apart as they will spread slightly.
- Sprinkle the toasted pecan halves evenly over the top of each dollop, gently pressing them in slightly so they adhere.
- Allow the pralines to sit undisturbed at room temperature until completely set and cooled, about 1 hour. Resist the urge to move or touch them while cooling.
- Storage
- Store completely cooled pralines in an airtight container at room temperature for 1-2 weeks max. Glass jars or tins work well.
- For longer storage, freeze pralines in a single layer for up to 3 months. Thaw at room temperature before enjoying these tasty southern treats!
Cooking Tips:
- Be sure to use a heavy-bottomed pan for even heating and to prevent scorching.
- Stirring constantly while boiling helps prevent burning on the bottom.
- Remove from heat exactly at 236°F for the ideal creamy, fudgy texture.
- Work swiftly when dropping spoonfuls onto the baking sheet before the mixture hardens in the pot.
- Cooling the pralines completely before storing allows them to set up properly.
- Layer wax or parchment paper between layers when freezing for easy separation.


Love these recipes!