
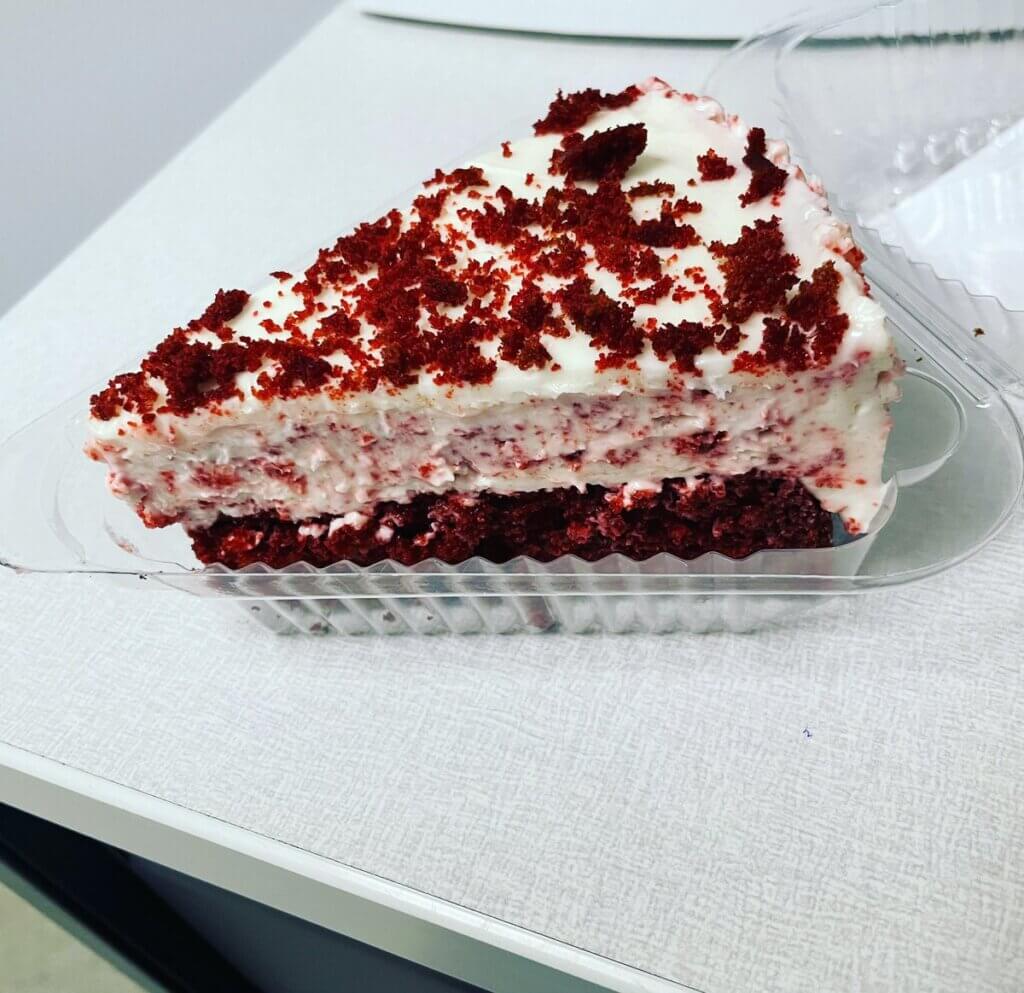
Red Velvet Cheesecake is a mouth-watering choice for the dessert menu. I have been trying different restaurants and then decided to look for a complete recipe for making red velvet cheesecake at home. Finally, I grabbed it from my elder sister and now sharing it on my blog page.
Red Velvet Cheesecake: The Recipe
Preparation Time: 30 minutes
Cooking Time: 1 hr 15 minutes
Chilling Time: 3 hrs
Total Time: 4 hrs and 45 minutes
Servings: 16 people
Ingredients:
CHEESECAKE:
- 16 ounces of cream cheese
- Two-third cup of Sugar
- Salt
- Two Eggs
- One-third cup of sour cream
- One-third cup of heavy whipping cream
- One teaspoon of vanilla extract
RED VELVET CAKE:
- Two and a half cups of All-Purpose flour
- One and a half cups of Sugar
- Three tablespoons of Cocoa Powder (Unsweetened)
- One and a half teaspoons of Baking Soda
- One teaspoon of salt
- Two Eggs
- One and a half cups of vegetable oil
- One cup of buttermilk
- One-fourth cup of red food colour
- Two teaspoons of vanilla extract
- Two teaspoons of white vinegar
CREAM CHEESE FROSTING:
- 16 ounces of cream cheese
- Two and a half cups of sugar
- Half cup of Unsalted butter
- One Tablespoon of vanilla extract
FOR GARNISH:
- White chocolate
Directions:
OVEN AND PAN:
- Preheat oven to 325 degrees Fahrenheit. Also, place the roasting pan on the middle rack.
- Boil a kettle of water.
- Grease the baking pan.
CHEESECAKE LAYER:
- Beat the cream in a bowl and add sugar and salt to it. Mix well and mix eggs.
- Now add creams and vanilla extract. Blend well.
- Spread this batter in the pan and even it.
- Put this pan in the roasting pan and add water from the kettle to one inch of the sides of the pan.
- Bake it for 45 min and then remove it from the oven. Leave it for one to two hours for cooling.
- After cakes are cooled, freeze them overnight.
RED VELVET CAKE LAYERS:
- Preheat oven to 350 degrees Fahrenheit.
- Brush butter and flour on the baking pan.
- Blend all the dry ingredients in a bowl and then add eggs, buttermilk, vinegar, oil, food colouring and vanilla extracts. Blend them all well.
- Divide the prepared batter into the prepared pans.
- Put these pans in the oven and bake for half an hour.
- Cool the cakes for ten minutes. Now, take them out on a wire rack for complete cooling.
CREAM CHEESE FROSTING:
- Prepare cheese frosting by blending cream cheese, sugar, vanilla and butter until it turns smooth.
ASSEMBLE THE CAKE:
- The first layer is red velvet cake.
- Now take out the cheesecake and peel off the baking paper.
- Amend the size of the cheesecake to the size of the red velvet cake layer. Cut all the extra sizes for adjustment.
- Put a cheesecake layer on the red cake layer and then layer the 2nd piece of red velvet cake.
FROST THE CAKE:
- With the help of a spatula, apply a thin coat of frosting on all sides of the cake.
- Put the cake in the fridge for half-hour so frosting settles.
- Add a second layer of frosting to the top of the cake and even it as much as possible. Let the extra frosting dip on the sides.
- After frosting is done, garnish the cake. Use chocolate chips of white chocolates.
- Cover your prepared cake until you are ready to serve.
VARIATION IDEAS:
Variations ideas for red velvet cheesecake are as follow;
Chocolate flour red velvet cheesecake is most appreciated variation. Make it spicier by adding cinnamon, nutmeg and ginger. Along the cocoa, when you add these spices, the taste is enhanced.
You can try variations in the filling. Cream cheese filling is recommended but you can try vanilla or regular BC. If you prefer cocoa taste, then go for chocolate fillings.
Can you store the red velvet cheesecake?
Yes, you can store the red velvet cheesecake. You should cover the cake and then store it in the fridge for three to five days. As frosting is used, it should be refrigerated.


SOUNDS YUMMY!!!!