This is one of those skillet dinners that feels like you pulled off something big, even though you barely turned on your brain to do it.
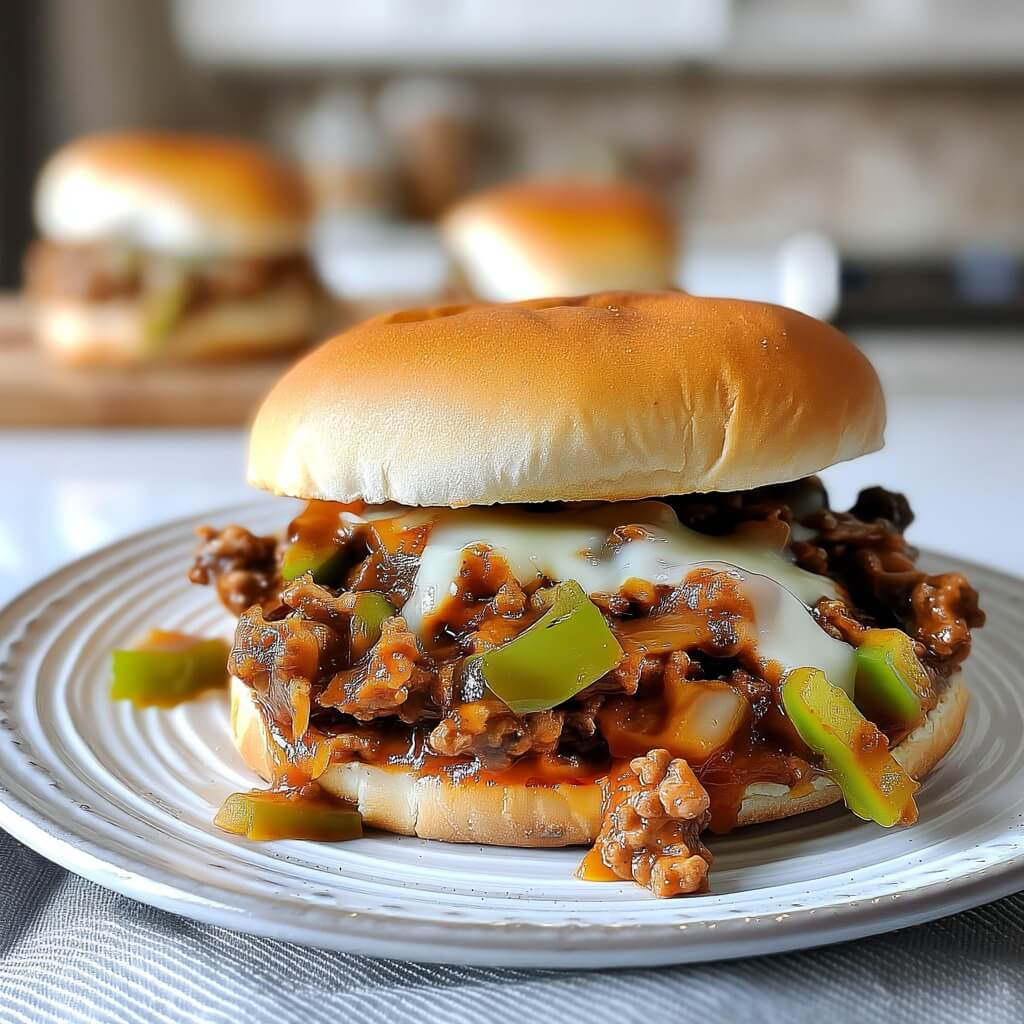
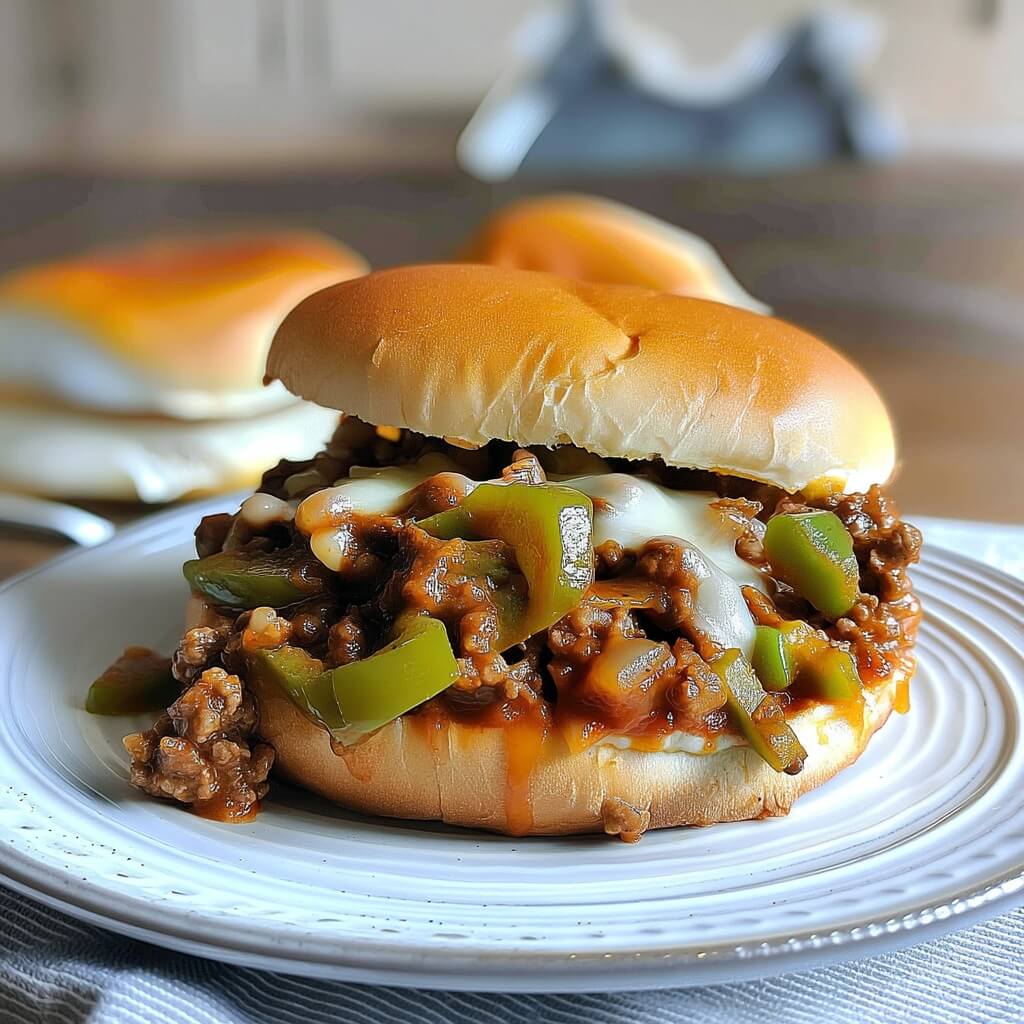
You get all the best parts of a Philly-style cheesesteak—savory beef, sweet onions, tender peppers, melty cheese—then you spin it into sloppy joe form so it’s faster, saucier, and honestly easier to feed a hungry group. The meat cooks quickly. The vegetables soften right in the same pan. A simple sauce pulls everything together, and the cheese melts into the top like it’s meant to be there (because it is).
The texture is the whole point here. You want the beef mixture juicy and cohesive, not watery. You want onions that taste sweet, not sharp. You want peppers that still have a little life, not cooked into limp strips. And you want that moment where the cheese hits the heat and turns stretchy across the bun.
This is also a smart recipe for real-life timing. It’s quick enough for a weeknight. It reheats well. It can be stretched with extra veggies if you’re feeding more people than expected. And if you’re doing a casual gathering, these turn into easy sliders with zero extra drama.
Toast the rolls. Don’t skip that part. The buns stay sturdy, the edges get crisp, and the whole sandwich feels like something you’d happily pay for.
Frequently asked questions
Can I make these ahead of time?
Yes. Cook the beef mixture, cool it, and store it in an airtight container in the fridge for up to 4 days. Reheat in a skillet over medium heat with a splash of beef broth to loosen it up, then add the cheese right before serving.
What’s the best cheese for cheesesteak sloppy joes?
Provolone is the classic move for a melty top. American cheese melts the smoothest and gives you that creamy, diner-style finish. Mozzarella works if you want stretch, but it’s milder. If you like a punchier bite, try sharp white cheddar mixed with provolone.
How do I keep the buns from getting soggy?
Toast them. Also, simmer the beef mixture long enough to thicken so it clings to the meat instead of pooling liquid under it. If you’re holding the meat warm for a bit, keep it on low heat uncovered so extra moisture can cook off.
Can I use ground turkey or chicken instead of beef?
You can. Use dark-meat ground turkey if possible, since it stays juicier. Add an extra tablespoon of butter or a drizzle of olive oil to help the flavor feel rich, and keep the simmer gentle so it doesn’t dry out.
Ingredients
I’ve included notes and descriptions below for each ingredient in this recipe. For the exact ingredient measurements, jump to the recipe card at the bottom of this post.
Ground beef
Go with 80/20 if you can. That bit of fat carries flavor and keeps the mixture juicy. If you use lean beef, the recipe still works, but you may want a little extra butter or a splash more broth so the filling doesn’t feel dry.
If you want a closer “steak” vibe, you can swap in thin-sliced steak or chopped deli roast beef, but ground beef keeps it quick and classic for sloppy joes.
Onion
A yellow onion is my favorite here because it softens and turns sweet as it cooks. Slice it thin or dice it small. Thin slices give you that cheesesteak look. Small dice disappears into the filling more.
Bell pepper
Green pepper is the traditional pick, but red is sweeter and mild. I like a mix if I have it. Slice it thin so it softens quickly and stays bite-friendly in a sandwich.
Mushrooms (optional)
Not required, but they add a savory depth and stretch the filling. Slice them thin and cook them until they drop their moisture and start to brown. If you add mushrooms, you may need a few extra minutes of simmer time so the filling thickens again.
Garlic
Just enough for background flavor. Add it after the onions and peppers start softening so it doesn’t scorch.
Worcestershire sauce
This gives you that meaty, savory edge that makes the filling taste “finished.” It’s a small amount, but you’ll miss it if it’s not there.
Ketchup
A little ketchup helps the sauce cling and adds a touch of sweetness. This is sloppy-joe territory, after all. It shouldn’t taste like barbecue sauce or tomato soup. It’s just a supporting player.
Beef broth
This loosens the pan drippings and makes the filling saucy. Use low-sodium broth so you control the salt.
Cornstarch (optional)
If you like a thicker filling that really holds to the bun, a small cornstarch slurry is the easiest way to get there. It’s optional because simmering works too, but it’s a handy trick when you’re short on time.
Seasonings
Salt and black pepper are a must. I also like a little smoked paprika for warmth and color. If you have steak seasoning, it works beautifully here, but don’t overdo it because many blends are salty.
Cheese
Provolone is the most familiar choice. Use slices for easy melting. Shredded cheese works too, but slices give you that classic blanket over the meat.
Want a creamier finish? Add a little cheese sauce or a couple slices of American cheese along with provolone.
Buns
Hoagie rolls are perfect, but brioche buns and hamburger buns work too. If your rolls are huge, you can split the filling between fewer sandwiches and serve with a side salad or fries.
Toasting the buns makes everything better. It’s a small step. Big payoff.
Instructions
I’ve included step-by-step instructions below to make this recipe easy to follow at home. For the full detailed recipe instructions and ingredient quantities, scroll to the recipe card at the bottom of this post.
1) Start with the vegetables
Heat a large skillet over medium-high heat.
Add butter (or a mix of butter and olive oil), then add the onions and peppers. Cook for 6–8 minutes, stirring often, until the onions start to soften and turn glossy.
If you’re adding mushrooms, toss them in now. Cook another 4–6 minutes, until the mushrooms release their liquid and the pan starts to look a little drier again.
2) Add garlic
Add the garlic and stir for 30 seconds to 1 minute, just until it smells fragrant. You don’t want browned garlic here.
3) Brown the beef
Add the ground beef to the skillet. Break it up with a spatula and let it brown.
Give it a minute or two without stirring so it actually develops color instead of steaming. Once it starts browning, stir and keep cooking until no pink remains.
If there’s excess grease, drain it, but leave a little behind for flavor.
4) Build the sauce
Reduce the heat to medium.
Stir in Worcestershire sauce, ketchup, beef broth, smoked paprika, salt, and black pepper. Scrape up anything stuck to the bottom of the skillet. That browned stuff is flavor.
Let the mixture simmer for 6–10 minutes, stirring occasionally, until it thickens and looks glossy.
If you want it thicker faster, stir together cornstarch and cold water, then add it to the skillet and simmer for 1–2 minutes until the sauce tightens up.
5) Toast the buns
While the filling simmers, split the buns and toast them.
You can toast in a dry skillet, in the oven, or under the broiler. If you’re using the broiler, keep an eye on them. Bread goes from golden to burned quickly.
6) Melt the cheese
Spoon the beef mixture onto the bottom halves of the buns.
Top with provolone slices. You have a few easy options to melt:
-
Broiler method: Place open-faced sandwiches on a baking sheet and broil 1–2 minutes until melted.
-
Skillet-steam method: Add the filled buns back into the skillet, add a splash of water to the pan (not on the sandwiches), cover, and steam for 1–2 minutes.
-
Oven method: Bake at 400°F for 3–5 minutes until melted.
Close the sandwiches, serve hot, and don’t be surprised if everyone asks for seconds.
What makes these “Philly-style”
A traditional cheesesteak is steak, onions, and cheese on a roll. That’s the core.
This recipe keeps that flavor profile and structure, then shifts the texture into sloppy-joe territory by using ground beef and a light sauce that binds everything together. The onions and peppers stay front and center. The Worcestershire adds that savory depth you expect in a beefy sandwich. The cheese melts right into the top, so every bite has that creamy pull.
The sauce is restrained on purpose. You want juicy meat, not a tomato-heavy mixture that tastes like classic cafeteria sloppy joes. This is closer to cheesesteak flavor with sloppy-joe comfort.
Choosing the right buns
The bun can make or break this.
Hoagie rolls
Best for the full cheesesteak look and feel. Choose rolls that are soft inside but sturdy enough to hold the filling. Toasting helps a lot.
Brioche buns
Slightly sweet, very soft. Great for a family-friendly version, especially if you’re making burgers-style sandwiches instead of long subs.
Potato rolls
Soft, pillowy, and sturdy. They toast beautifully and work well for sliders.
Gluten-free buns
Totally workable. Toast them lightly so they don’t crumble, and keep the filling thick so it stays put.
No matter what bun you pick, toast it. It protects the bread and improves the texture from the first bite to the last.
How to melt the cheese the easy way
If you want the best melt without making extra dishes, the skillet-steam method is hard to beat.
Here’s how:
-
Spoon filling onto buns and top with cheese.
-
Put the open sandwiches back in the skillet.
-
Add 2–3 tablespoons water to the side of the skillet.
-
Cover with a lid for 1–2 minutes.
The steam melts the cheese quickly. The buns stay warm. You don’t turn on the oven. Easy.
If you’re making a big batch, the broiler is the fastest. Just watch closely.
Recipe tips
Let the beef brown.
Color equals flavor. If you stir constantly, you miss that deeper taste.
Slice veggies thin.
Thinner onions and peppers soften fast and feel more “cheesesteak” in the bite.
Simmer until glossy.
You’re looking for a filling that clings to the meat. If it looks watery, keep simmering uncovered.
Taste after simmering.
Salt levels change as liquid cooks down. Taste near the end and adjust then.
Toast the buns.
It’s the difference between a sandwich that holds up and a sandwich that falls apart halfway through.
Don’t overload the roll.
It’s tempting. A slightly lighter fill keeps the sandwich neat and makes the cheese melt more evenly.
Variations
Extra cheesy version
Add 2 slices of American cheese to the sauce while it simmers, then top with provolone at the end. The filling turns creamier, almost like a melted-cheese coating.
Spicy version
Add sliced pickled jalapeños or a pinch of crushed red pepper flakes. Keep it controlled. You still want the beef and onion flavor to lead.
Mushroom-lover version
Double the mushrooms and cook them long enough to brown. Mushrooms carry a lot of water, so patience matters.
Lighter version
Use ground turkey and add a teaspoon extra Worcestershire plus a little butter for richness. The flavor stays satisfying without feeling heavy.
Slider version
Use small rolls, keep the filling thick, and melt the cheese on top in the oven. Great for parties and easy to portion.
What to serve with them
These sandwiches are hearty, so sides can be simple.
-
oven fries or sweet potato fries
-
a crisp green salad with a tangy dressing
-
coleslaw (something cool and crunchy works well)
-
roasted broccoli or green beans
-
pickles on the side for contrast
If you’re serving a crowd, a big tray of fries and a simple salad is a solid pairing.
Storage and reheating
Storage
Store leftover filling in an airtight container in the refrigerator for up to 4 days.
Store buns separately. Always.
Reheating
Reheat the filling in a skillet over medium heat with a splash of broth to loosen it. Stir until hot.
You can reheat in the microwave too, but do it in short bursts and stir between so it heats evenly.
Toast fresh buns, pile on the hot filling, and melt the cheese right before serving.
Freezing and meal prep
This filling freezes well.
How to freeze
Cool the meat mixture completely, then store in freezer-safe containers or bags for up to 3 months. Label it with the date.
How to thaw and reheat
Thaw overnight in the fridge, then reheat in a skillet with a splash of broth.
If the mixture looks a little loose after thawing, simmer uncovered for a few minutes to tighten it back up.

Philly Cheese Steak Sloppy Joes
Ingredients
- 1 tablespoon unsalted butter or 1 tablespoon olive oil
- 1 medium yellow onion thinly sliced
- 1 green bell pepper thinly sliced
- 1 red bell pepper optional, thinly sliced
- 8 ounces mushrooms optional, thinly sliced
- 3 cloves garlic minced
- 1 ½ pounds ground beef 80/20 preferred
- 2 teaspoons Worcestershire sauce
- 3 tablespoons ketchup
- ¾ cup low-sodium beef broth
- ½ teaspoon smoked paprika optional
- ¾ teaspoon salt plus more to taste
- ½ teaspoon black pepper
- 1 tablespoon cornstarch + 1 tablespoon cold water optional, for thickening
- 6 hoagie rolls or sturdy buns, split and toasted
- 6 –8 slices provolone cheese or your favorite melting cheese
Instructions
- Heat a large skillet over medium-high heat. Add butter, then onions and peppers. Cook 6–8 minutes until softened. Add mushrooms (if using) and cook 4–6 minutes more.
- Add garlic and cook 30–60 seconds.
- Add ground beef. Brown, breaking it up, until cooked through. Drain excess grease if needed.
- Reduce heat to medium. Stir in Worcestershire, ketchup, broth, smoked paprika, salt, and pepper. Simmer 6–10 minutes until thickened and glossy.
- Optional: stir cornstarch with cold water, add to skillet, and simmer 1–2 minutes until thicker.
- Toast the buns. Spoon filling onto buns and top with provolone.
- Melt cheese under the broiler for 1–2 minutes, or cover in the skillet with a splash of water to steam-melt for 1–2 minutes. Serve hot.
Notes