
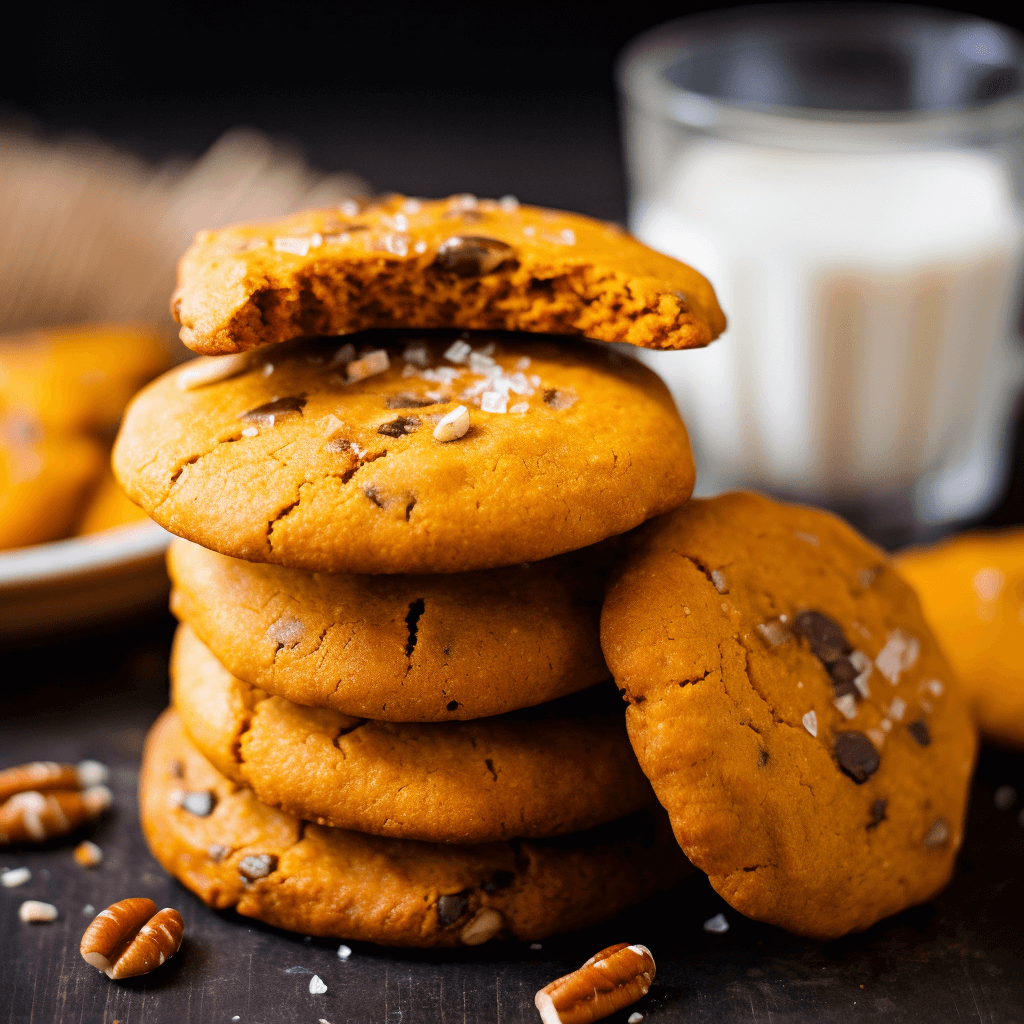
Hey wonderful people! Today, I’ve got a treat that’ll knock your socks off and add some extra flair to your autumn table. If you haven’t yet discovered the magic that is butternut squash in desserts, you’re in for an absolute revelation. Imagine taking a bite of a cookie that captures the essence of fall, brimming with the warmth of spices and the subtle sweetness of squash. Intrigued? Great! Let’s dive into this Butternut Bonanza Cookie recipe that is as heartwarming as a cozy scarf on a chilly day.
🌟 Why You Should Try This Dish?
It’s all about embracing seasonal flavors. Butternut squash is so much more than just a soup ingredient; it’s a remarkable addition to sweet treats too! Rich in vitamins, fibers, and that gorgeous orange hue, these cookies are as good for your soul as they are for your body.
Can I use pumpkin puree instead of butternut squash?
Absolutely! Pumpkin puree can make an excellent substitute and will give you a similar autumnal vibe. However, the flavor will be slightly different, leaning more towards pumpkin-spice rather than the unique sweetness of butternut squash.
Why do I need to soften the butter?
Softened butter blends more easily with sugar, creating that creamy, fluffy texture we aim for in these cookies. It’s crucial for achieving a light and tender crumb. If you forget to soften it beforehand, a quick hack is to microwave it for about 10-15 seconds.
What kind of nuts would pair best with this recipe?
Walnuts or pecans are my go-to for this recipe, as they complement the butternut squash wonderfully. However, you can experiment with almonds or hazelnuts for a different texture and flavor.
Can I freeze the cookie dough for later?
A: Yes, you can! Just scoop the dough onto a baking sheet and freeze until solid. Once frozen, transfer them to an airtight container and store in the freezer for up to 3 months. You can bake them directly from the freezer; you might just need to add an extra minute or two to the baking time.
How long will these cookies stay fresh?
Stored in an airtight container, these cookies will maintain their freshness for up to a week. But let’s be real, they’ll probably get devoured long before that!
Prep Time: 20 minutes
Cook Time: 12-15 minutes per batch
Total time : 35-40 minutes
Ingredients :
- Wet Ingredients:
- 1 cup butternut squash puree (about 8 oz)
- 1 large egg, room temperature
- 1 cup brown sugar, tightly packed
- 1/2 cup (1 stick) unsalted butter, softened
- 1 teaspoon pure vanilla extract
- Dry Ingredients:
- 2 cups all-purpose flour
- 1/2 teaspoon salt
- 1/2 teaspoon baking soda
- 1/2 teaspoon ground cinnamon
- 1/4 teaspoon ground nutmeg
- 1/4 teaspoon ground ginger
- Optional Add-ins:
- 1 cup chopped nuts (walnuts or pecans)
- 1/2 cup chocolate chips or raisins
Instructions:
- Kickstart your baking journey by preheating the oven to 350°F (175°C). While that’s warming up, line your baking sheet with parchment paper. This small step ensures your cookies come off easily and bake uniformly.
- Take your softened butter and brown sugar, and blend them together until you get a creamy, fluffy mix. This base mixture is your cookie’s flavor backbone, so make sure to blend it well.
- Add your room-temperature egg and vanilla extract into the mix. The egg lends structure, while vanilla boosts the aroma.
- Now introduce your butternut squash puree into the bowl. Blend until it’s perfectly incorporated. This is what makes the cookie soft, moist, and uniquely delicious.
- In a separate bowl, whisk together your dry ingredients. Your spices add that kick of warmth, so don’t skip them!
- Now, slowly add your dry ingredients to the wet mix. Stir until just combined; overmixing will make your cookies tough.
- Fold in your choice of nuts, chocolate chips, or raisins. Make these cookies truly yours!
- Using a cookie scoop, portion out the dough onto your baking sheet. Leave about 2 inches between each scoop to allow for spreading.
- Place your cookies in the oven for 12-15 minutes. Look for a golden edge as a sign they’re done.
- Let them sit on the baking sheet for a few minutes before
- transferring them to a wire rack to cool completely. Once cooled, enjoy or store in an airtight container.
Cooking tips:
- If you prefer chunkier cookies, use a larger scoop, but adjust the baking time. A few extra minutes in the oven could make all the difference.
- You can easily make these cookies vegan-friendly by substituting the egg with a flax egg and using plant-based butter.
- If you or someone in your household has a nut allergy, feel free to substitute the nuts with pumpkin seeds or sunflower seeds for that crunch without the worry.
- If you want to make the dough ahead of time, you can keep it in the fridge for up to 2 days. Just let it sit at room temperature for about 10-15 minutes before you start scooping.
- If you’re storing the cookies for more than a few days, placing a slice of bread in the airtight container can help keep them soft. The cookies will absorb the moisture from the bread, prolonging their chewy texture.
- For a gluten-free option, use a 1:1 ratio gluten-free all-purpose flour. Just be aware that the texture may vary slightly.
- If you’re baking at high altitudes, you might need to make minor adjustments. Reduce the amount of sugar and increase the liquid to get the desired texture and flavor.


i love your recipes they are all so great thank you for sharing them