
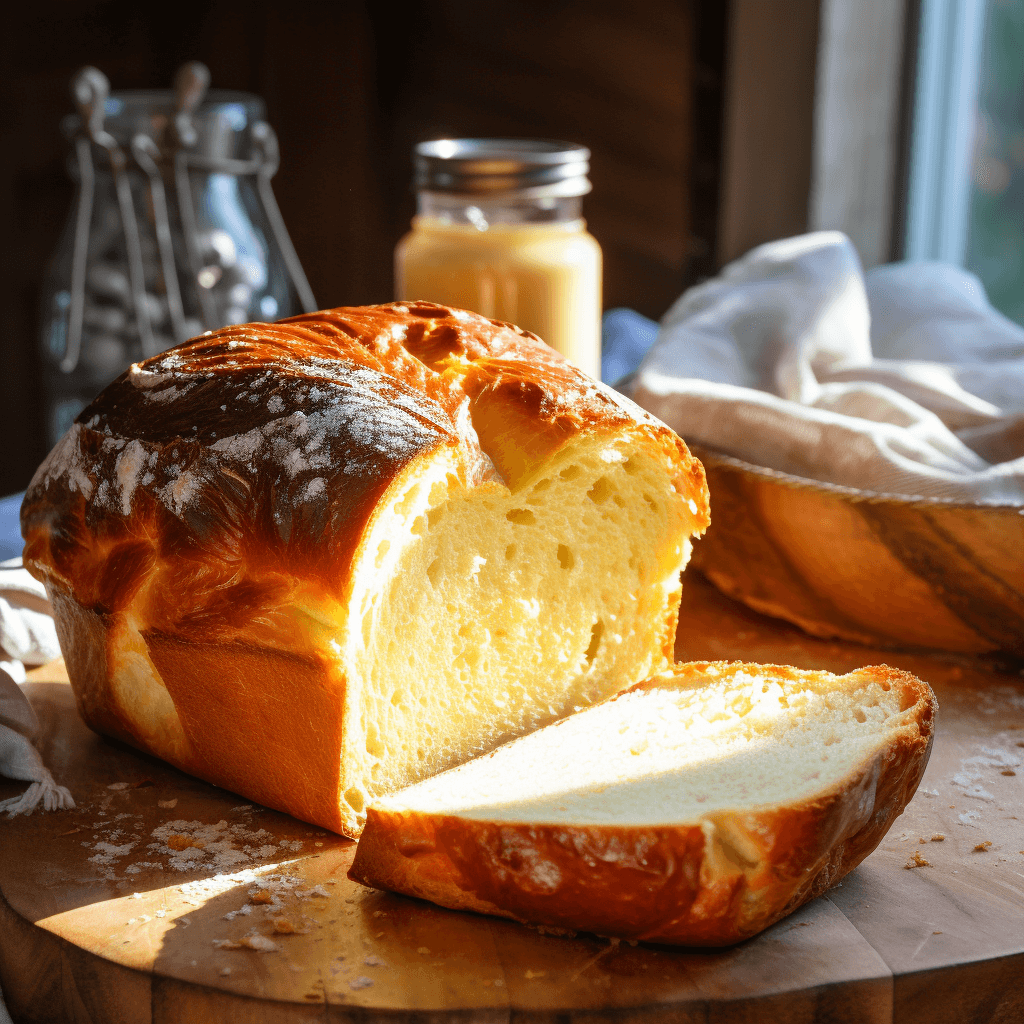
Today, I’m bringing a little slice of heaven straight from my kitchen to yours – the delightful Milk Brioche! Every time I whip up a batch of these, they take me back to my childhood days. Soft, buttery, and oh-so-delicious, there’s nothing quite like the simple joy a homemade brioche can bring. Here’s why you need to give this recipe a try: they’re perfect for Sunday brunch, a little afternoon treat, or frankly, whenever you want to feel that burst of warmth and happiness. Dive in, and let’s get baking!
Why should I try making Milk Brioche?
Because it’s incredibly rewarding to make and even more delightful to eat. It’s soft, it’s buttery, and it has that just-right touch of sweetness that makes it perfect for any time of the day.
Is this recipe beginner-friendly?
Absolutely! With our step-by-step guide, you’ll be a brioche maestro in no time.
What can I serve it with?
The options are endless! From savory sandwiches to desserts, this brioche complements just about everything.
Can I make it ahead of time?
Yes, you can prepare the dough a day in advance and let it rise in the refrigerator overnight.
Is the double rising process necessary?
It’s essential for achieving that light, airy texture that makes brioche such a delight.
What do I need to get started?
Just a handful of basic ingredients and a bit of patience. The rest, as they say, is a piece of cake—or in this case, a piece of brioche!
Prep Time: 20 minutes
Cook Time: 20-25 minutes
Total Time: Around 2 hours and 15 minutes
Ingredients:
- 1 cup (240ml) warm milk – gives the bread its signature tender texture.
- 2 1/4 teaspoons active dry yeast – the magic ingredient that makes our brioche rise and shine!
- 1 tablespoon sugar – just a hint of sweetness to complement the richness.
- 1 large egg – brings everything together and provides moisture.
- 1/2 cup (1 stick) unsalted butter, softened – the secret behind that irresistible buttery goodness.
- 3 1/2 cups all-purpose flour – our main body.
- 1 teaspoon salt – to balance out the sweetness.
Instructions:
- Begin with the Yeast Mix: In a cozy bowl, whisk together your warm milk, sugar, and yeast. Set this aside for about 5 minutes. You’re waiting for a creamy froth – a sign the yeast is awake and ready!
- Buttery Embrace: Using a stand mixer (a hand mixer works too!), blend the softened butter and egg. This is the foundation for the texture and taste. Once creamy, introduce your yeast mixture. You’ll love the dance of aromas!
- Time for Flour Power: Slowly, with grace and love, incorporate the all-purpose flour and salt into the mixer. This stage decides the softness of your brioche. Mix until you get a supple, non-sticky dough.
- Knead to Succeed: Set your mixer on medium speed and knead the dough for a good 5-7 minutes. Look for a smooth, elastic feel – that’s when you know it’s perfect.
- The Rising Star: Transfer the kneaded love into a bowl you’ve lightly greased. Cover it up snugly with plastic wrap. Allow it to rest in a warm corner of your kitchen for an hour. This nap helps the brioche gain volume and character.
- Shaping the Dream: Once risen, gently deflate the dough and split it into 12 even pieces. Shape them into neat balls, like little pillows, and place them in your greased 9×13 inch baking dish.
- One More Rise to Glory: Swaddle the baking dish with plastic wrap and let it rest for another 30 minutes. These moments heighten the fluffiness.
- Heat Things Up: As your brioche enjoys its second rise, preheat your oven to 375°F (190°C).
- Golden Touch: Gently brush an egg wash over your soon-to-be-baked brioches. This ensures a glistening golden finish.
- Into the Oven: Let them bake for 20-25 minutes. As they turn a delightful golden hue, the aroma will fill your kitchen, and your heart with joy.
Cooking tips:
- Cool & Serve: Give them a few moments to cool, but not too long! They’re best enjoyed slightly warm.
- Temperature Matters: Make sure the milk is warm, not hot or cold, to activate the yeast effectively.
- Softened Butter: Your butter needs to be soft but not melted for that creamy, rich texture.
- Fresh Yeast: Always double-check the expiry date on your yeast to ensure your brioche rises as it should.
- Kneading is Key: Knead the dough until it’s smooth and elastic. Skimping on kneading time may result in dense brioche.
- Grease Well: Properly grease your bowl and baking dish to ensure an easy release of the brioche.
- Double Rise: Don’t rush the rising times. Both rises are essential for achieving that airy, soft texture.
- Egg Wash: Don’t skip the egg wash if you’re after that beautiful, golden-brown crust.
- Baking Time: Keep an eye on the oven to prevent over-baking. The perfect brioche should be golden brown, not dark brown.
- Cooling Time: Let the brioche cool for just a bit before serving; they are divine when slightly warm.
- Storage: Store any leftover brioche in an airtight container to maintain its softness for up to two days.


i am eager to try