
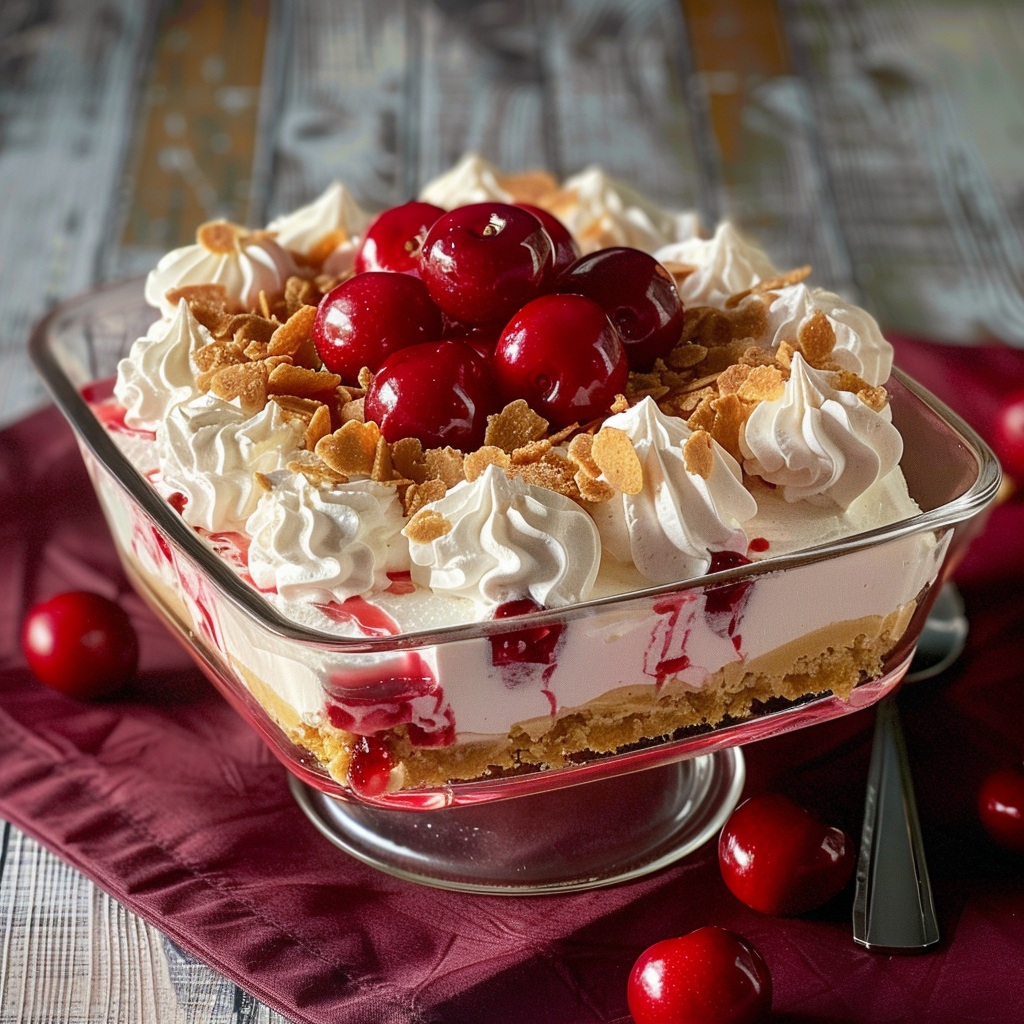
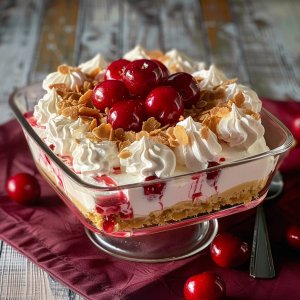
Cherry Cheesecake Lush is the dessert I reach for when I want something that looks like you planned ahead… even if you didn’t. It’s cold, creamy, and layered in that old-school potluck way that always gets people hovering near the fridge door, asking when it’s ready to slice.
You get a buttery crumb crust that stays firm. A cheesecake layer that’s tangy, sweet, and fluffy without feeling heavy. A silky pudding layer that makes every bite feel extra smooth. Then a cloud of whipped topping and a glossy cherry finish that tastes bright and fruity against all that creaminess.
It’s the contrast that makes it so good. Crunchy meets creamy. Sweet meets a little tang. Cold and soft with just enough structure to cut into clean squares. And since it’s a no-bake dessert, it’s all about a few small habits that keep the layers neat: softened cream cheese, fully set pudding, and enough chill time.
This is the kind of dessert that disappears fast, but it also holds up beautifully in the fridge for days. Which means it’s perfect for holidays, birthdays, summer cookouts, or that random weeknight when you want something fun waiting after dinner.
Why You’ll Love This Recipe
-
No-bake and low stress. The fridge does the hard work.
-
Layered texture in every bite. Crust, cheesecake, pudding, whipped topping, cherries—each layer earns its place.
-
Feeds a crowd. A 9×13 pan makes plenty, and it slices clean.
-
Make-ahead friendly. It’s even better after a night in the fridge.
-
Easy to customize. Swap the crust, change the pudding flavor, try a different fruit topping.
Frequently Asked Questions (FAQs)
1) Can I make Cherry Cheesecake Lush the day before?
Yes, and it’s the best way to do it. Overnight chill time helps the layers firm up, the crust set, and the flavor mellow into something extra creamy. If you want the prettiest slices, make it the day before.
2) How do I keep the crust from crumbling when I slice it?
Press the crust firmly into the pan (use the bottom of a measuring cup) and chill it before adding the next layer. If you’re serving this at a party and want super clean squares, pop the crust in the freezer for 10 minutes after pressing it in.
3) Can I skip the pudding layer?
You can. It’ll still be delicious, just a little less “lush.” If you skip pudding, I recommend increasing the cheesecake layer slightly (extra whipped topping folded in) so the dessert still feels tall and creamy.
4) Can I use homemade whipped cream instead of whipped topping?
Yes. Whip heavy cream to stiff peaks with powdered sugar and vanilla. Just know it’s a little softer than whipped topping, so your layers may not stay quite as sharply defined. Still very good.
Ingredients
I’ve included notes and descriptions below for each ingredient in this recipe. For the exact ingredient measurements, jump to the recipe card at the bottom of this post.
For the crust
Graham cracker crumbs
Classic, buttery, and sturdy. They taste like cheesecake crust, which is exactly what you want here.
Granulated sugar
A little sugar helps the crust taste balanced, not bland.
Butter (melted)
Butter is the glue. It binds the crumbs and firms up in the fridge so the crust holds together.
Crust tip: If you like a thicker base (more crunch), you can add a bit more crumbs. If you like a lighter base, press it slightly thinner.
For the cheesecake layer
Cream cheese (softened)
This is the heart of the dessert. Softened cream cheese mixes smooth and lump-free.
Powdered sugar
Powdered sugar dissolves instantly and keeps the cheesecake layer silky.
Vanilla extract
Adds warmth and that bakery-style cheesecake flavor.
Pinch of salt
Small detail, big impact. It keeps the sweetness from tasting flat.
Whipped topping (thawed)
This lightens the cheesecake layer and helps it set into a fluffy sliceable texture.
Cheesecake tip: If the cream cheese is even slightly cold, you’ll fight lumps. Let it sit out until it’s soft enough to press a finger into easily.
For the pudding layer
Instant vanilla pudding mix
This creates that smooth “lush” layer without cooking.
Cold milk
Cold milk helps pudding set quickly and evenly.
Optional almond extract
Cherry + almond is a classic pairing. A tiny splash makes the cherry topping taste even better.
Pudding tip: Let the pudding sit for 3–5 minutes after whisking so it thickens before you spread it. That keeps the cheesecake layer underneath from mixing.
For the topping
Whipped topping (thawed)
This creates a soft layer between pudding and cherries, and it makes the dessert look finished.
Cherry pie filling
The bright, glossy top layer. Sweet cherries, thick sauce, and a classic look.
Cherry tip: You can use one can for a lighter topping or two cans for a thicker, fully covered finish.
Optional garnish
-
shaved chocolate
-
toasted sliced almonds
-
extra graham crumbs
-
fresh cherries (when in season)
Tools That Make It Easier
You can make this with basic kitchen gear, but a few tools make it feel smoother.
-
9×13-inch baking dish
-
mixing bowls
-
hand mixer (or stand mixer)
-
rubber spatula
-
whisk
-
offset spatula (nice for smooth layers)
-
measuring cup (great for packing the crust)
Instructions
I’ve included step-by-step directions below to make this recipe easy to follow at home. For the full detailed recipe instructions, scroll to the recipe card at the bottom of this post.
Step 1: Build the crust
Add graham cracker crumbs and sugar to a bowl. Pour in melted butter and mix until the crumbs look evenly moistened, like damp sand.
Press the mixture into a 9×13-inch dish. Press firmly. This is what keeps slices clean later.
Chill the crust in the refrigerator for at least 15 minutes. If you’re in a hurry, freeze it for 10 minutes.
Step 2: Make the cheesecake layer
In a large bowl, beat the softened cream cheese until smooth.
Add powdered sugar, vanilla, and salt. Beat again until creamy and fluffy.
Fold in the whipped topping gently with a spatula. Don’t stir aggressively—folding keeps the layer light.
Spread the cheesecake mixture over the chilled crust. Smooth it into an even layer.
Place the dish back in the refrigerator while you mix the pudding.
Step 3: Make the pudding layer
Whisk the instant pudding mix with cold milk until thickened, about 2 minutes.
Let it sit for 3–5 minutes so it sets up a little more.
If using almond extract, whisk it in now.
Gently spread the pudding over the cheesecake layer. Take your time. The cheesecake layer is soft, so a gentle hand keeps the layers distinct.
Step 4: Add the whipped topping layer
Spread whipped topping over the pudding. Smooth it out into an even layer, reaching the edges.
This layer is your buffer. It keeps the cherries from sinking and helps the top look neat.
Step 5: Finish with cherry topping
Spoon cherry pie filling over the whipped topping. Spread it gently so you don’t drag whipped topping into the cherries.
Cover and chill for at least 4 hours. Overnight is even better.
Step 6: Slice and serve
For clean slices, use a sharp knife and wipe it between cuts.
Serve cold. Keep the dish refrigerated between servings.
How to Get Clean, Pretty Layers
A lush dessert is simple, but layers can get messy if you rush.
Chill between steps when needed
You don’t have to chill for hours between each layer, but a short chill helps everything stay neat.
A good rhythm:
-
chill the crust
-
chill the cheesecake layer while pudding sets
-
then final long chill after topping
Spread gently
Instead of pushing down with the spatula, float it across the surface. Light pressure. Slow passes.
Wipe the knife
A warm, clean knife makes clean cuts. I keep a damp towel nearby and wipe between slices.
Crust Options
Graham cracker is the classic, but you’ve got options.
Oreo crust
Swap graham crumbs for Oreo crumbs (no need to remove the filling). Reduce the sugar slightly because Oreos are sweet.
Shortbread cookie crust
Crushed shortbread cookies give a buttery, rich base that feels a little more “bakery.”
Pretzel crust
Crushed pretzels + butter + a touch of sugar gives you salty-sweet crunch. It’s surprisingly good with cherry topping.
Cheesecake Layer Tips
This is the layer people notice first. Get it smooth and it tastes like a dream.
Softened cream cheese matters
If it’s cold, you’ll get little lumps that never fully disappear. Let it sit at room temp until soft.
Beat before adding sugar
Cream cheese needs a head start. Beat it smooth first, then add powdered sugar.
Fold, don’t stir
Whipped topping needs gentle folding so you keep the airy texture.
Pudding Layer Tips
Pudding is the layer that turns this from “cheesecake bars” into true lush.
Use cold milk
Warm milk won’t set instant pudding properly. Cold is non-negotiable here.
Let it thicken before spreading
If you spread it too soon, it can sink and swirl into the cheesecake layer underneath.
Want it extra thick?
Use slightly less milk. Not a lot less—just a small reduction makes the pudding set firmer.
Cherry Topping Options
Cherry pie filling is the easy classic, but you can tweak it based on what you like.
One can vs. two cans
-
One can: lighter cherry layer, more cream showing through.
-
Two cans: thicker cherry topping, more fruit in each bite.
Homemade cherry topping
If you have frozen cherries, you can simmer them with sugar and a little cornstarch until thick. Let it cool completely before adding, or it will melt the whipped topping layer.
Cherry + chocolate
Sprinkle mini chocolate chips or shaved chocolate between the whipped topping and cherries. Cherry and chocolate always work.
Easy Variations
Chocolate cherry lush
Use chocolate graham crumbs or Oreo crust. Swap vanilla pudding for chocolate pudding. Keep everything else the same.
Lemon cherry version
Add lemon zest to the cheesecake layer and use lemon pudding. The lemon makes the cherry topping taste brighter.
Almond cherry version
Add ¼ teaspoon almond extract to the cheesecake layer and pudding layer. It gives that bakery cherry-almond vibe without overpowering.
Lightened-up version
Use reduced-fat cream cheese and swap some whipped topping for thick Greek yogurt. The texture changes slightly, but it’s still creamy and sliceable.
What to Serve With It
Cherry Cheesecake Lush is rich and cold, so it pairs best with simple drinks and lighter snacks.
-
coffee or espresso
-
iced tea
-
a glass of milk
-
fresh fruit on the side (berries are great)
-
salty snacks at a party table (pretzels, nuts) to balance the sweetness
Make-Ahead Tips
This dessert was made for planning ahead.
Best timing
Make it the night before. Chill overnight. Slice the next day.
Party timing
If you’re traveling with it, keep it chilled as long as possible. The whipped layers hold better when cold.
For the cleanest topping
If you want the cherries to look extra glossy and neat, spread the whipped topping layer, chill 30 minutes, then add the cherry filling.
Storage and Reheating
This is a fridge dessert, so storage is simple.
Refrigerator
Cover tightly and store for up to 4 days.
The crust may soften a little over time (still tasty). The flavor stays great.
Reheating
No reheating needed. Serve cold.
Freezing Notes
You can freeze it, but the texture may change slightly when thawed. Whipped layers can weep a little after freezing.
If you want to freeze:
-
freeze in slices for easier thawing
-
wrap tightly
-
thaw overnight in the fridge
For best texture, enjoy it fresh from the fridge instead of freezing.
Troubleshooting
My cheesecake layer is lumpy.
Cream cheese wasn’t soft enough. Next time, let it soften longer and beat it smooth before adding sugar.
My pudding layer mixed into the cheesecake layer.
Pudding was too thin or you spread it too aggressively. Let pudding sit a few minutes to thicken, then spread gently.
My crust is crumbly.
It wasn’t pressed firmly enough, or it didn’t chill long enough. Press hard and chill before layering.
My cherry topping slid around.
The whipped topping underneath was too soft. Chill the whipped layer for 20–30 minutes before adding cherries.
Recipe Notes
-
Chill time is part of the recipe. If you slice too early, it won’t hold clean squares.
-
A firm crust makes the whole dessert easier to serve. Press it in firmly and chill it.
-
Wipe the knife between cuts for neat layers.
-
If you love a thicker dessert, use two cans of cherry topping and spread each layer slightly thicker.
Cherry Cheesecake Lush
Ingredients
Crust
- 2 ½ cups graham cracker crumbs
- ¼ cup granulated sugar
- 10 tablespoons butter melted
Cheesecake layer
- 16 ounces cream cheese softened
- 1 cup powdered sugar
- 2 teaspoons vanilla extract
- ⅛ teaspoon salt
- 8 ounces whipped topping thawed
Pudding layer
- 2 boxes 3.4 oz each instant vanilla pudding mix
- 3 cups cold milk
- ¼ teaspoon almond extract optional
Topping
- 8 ounces whipped topping thawed
- 1 –2 cans 21 oz each cherry pie filling
Optional garnish
- shaved chocolate toasted sliced almonds, extra crumbs
Instructions
- Make the crust: Mix graham crumbs, sugar, and melted butter. Press firmly into a 9×13-inch dish. Chill 15 minutes (or freeze 10 minutes).
- Cheesecake layer: Beat cream cheese smooth. Add powdered sugar, vanilla, and salt; beat fluffy. Fold in whipped topping. Spread over crust.
- Pudding layer: Whisk pudding mix with cold milk 2 minutes. Rest 3–5 minutes. Spread gently over cheesecake layer.
- Whipped layer: Spread whipped topping over pudding.
- Cherry topping: Spoon cherry pie filling on top and spread gently.
- Chill: Cover and refrigerate at least 4 hours (overnight for best slices).
- Serve: Slice into squares and serve cold.


