Hey there, my lovely readers! You’ve landed once again on “Life with Jeviko” – your go-to place for out-of-the-box culinary delights. Today, we’re going on a charming twist on a classic favorite – our beloved Banana Bread! But here’s the kicker – we’re creating a delightful “Banana Bread in a Jar” version! Get ready to fill your home with a sweet, warm aroma and treat yourself or your loved ones with these adorable jarred wonders. Ready to embark on this delightful baking journey? Let’s go!
Give a Second Life to Your Overripe Bananas with Banana Bread in a Jar!
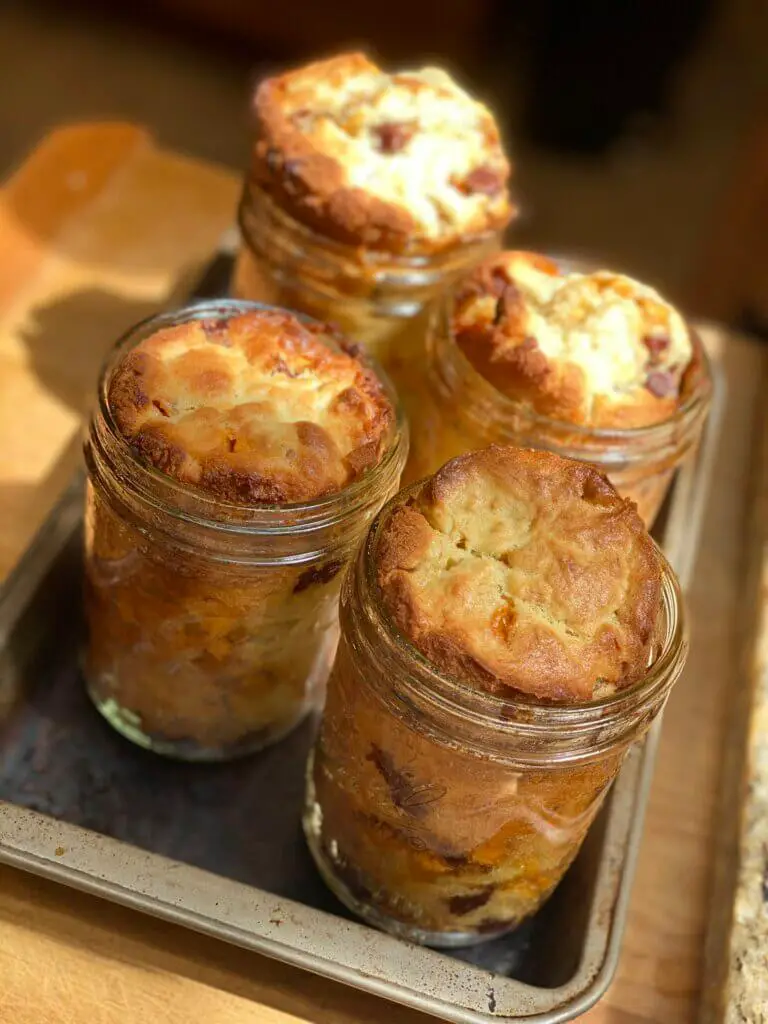
We all know how pesky those overripe bananas can be, right? But instead of tossing them out, let’s transform them into an irresistible treat. This time, our cozy classic banana bread gets a playful, fancy upgrade – we’re baking them in cute jars!
Ready to dive into our step-by-step journey to jarful nirvana? Let’s roll!
Prep Time: 15 minutes
Cook Time: 45 minutes
Total Time: 60 minutes
Ingredients:
- 2/3 cup shortening
- 2 cups granulated sugar
- 4 eggs
- 2 cups of overripe bananas, mashed (that’s where our moist and luscious texture comes from!)
- 2/3 cup water
- 3 ½ cup all-purpose flour
- ½ teaspoon baking powder
- 2 teaspoons baking soda
- 1 teaspoon salt
- 1 teaspoon ground cinnamon (this warming spice is essential to bring out the banana flavor!)
- ½ teaspoon ground cloves (lends a beautiful depth to the taste)
- 2/3 cup pecans, chopped (for that delightful crunch that breaks up the soft texture)
Instructions:
- Begin by preheating your oven to 325F. A steady, moderate temperature is key to baking our banana bread in jars evenly, achieving a lovely golden crust and a perfectly moist interior.
- Get a large baking sheet and line up your jars, giving them a light spray of non-stick cooking oil. This helps ensure that your scrumptious bread slides out effortlessly when you’re ready to devour it.
- In a large bowl, whisk together the shortening and sugar until you achieve a light, airy texture. The airier it gets, the lighter your bread will be – that’s our secret to a fluffy banana bread!
- Incorporate your eggs, mashed bananas, and water into the sugar mixture, ensuring everything is thoroughly combined. This mixture is the heart of our banana bread, promising moistness and bursting flavor.
- In another bowl, combine the flour, baking powder, baking soda, salt, cinnamon, and cloves. These dry ingredients will act as the structure of our bread, and balance the sweet, fruity taste of the batter.
- Slowly introduce the dry mix to your banana concoction, a cup at a time, and mix well after each addition. This step guarantees an even blend of flavors and textures in every bite.
- Now, here comes my favorite part – add the chopped pecans! These crunchy morsels provide a delightful contrast to the moist, soft banana bread.
- Using a small ladle or scoop, fill your jars about halfway with the batter. Make sure to clean any spills off the sides of the jars – a clean jar makes for a more attractive finished product!
- Bake the jars (without their lids) on the baking sheet at 325F for roughly 40-45 minutes. You can confirm if the bread is perfectly baked by inserting a toothpick into it – if it comes out clean, voila!
- While the jars are in the oven, it’s time to sterilize the lids and rings. Boil them for a few minutes and let them cool off while you wait for the bread to bake. This is an important step to guarantee that your bread can be safely stored.
- Once the bread is done, immediately fasten the lids and secure the rings. The cooling process creates a vacuum, which will seal the jars naturally. This ensures your banana bread stays fresh and delicious!
- Let your jars cool down to room temperature. Now comes the hardest part – deciding whether to savor it immediately or store them in the fridge for later! The jarred banana bread can be stored safely in the fridge for up to a week.
Cooking tips:
- Use overripe bananas for moist, flavorful bread.
- Combine wet and dry ingredients separately to prevent over-mixing.
- Fill jars halfway to allow space for bread to rise.
- Sterilize lids and rings during baking for safe storage.
- Seal jars immediately after baking to preserve freshness.
- Test doneness with a toothpick – it should come out clean.
- Allow bread to cool at room temperature before consuming or storing.
Is this text written by Human or AI?