
I mean the kind of dangerous that makes you slice “just a sliver” and then go back for three more slivers that somehow add up to half the pan. You know what I mean? That’s exactly what happened the first time I made this Mississippi Mud Cake, and I haven’t made it without a crowd to feed ever since—because if I’m left alone with it, well… it mysteriously disappears.
This recipe came from one of those rainy afternoons where I was craving something deep, rich, unapologetically chocolatey—and I wanted texture. Not just a plain cake, but something with gooey marshmallows, a glossy fudge frosting, and a cake so moist it borders on scandalous. So I pulled out my grandmother’s old recipe box (the one with chocolate smudges and scribbled notes in the margins), and Mississippi Mud Cake jumped out at me like it knew exactly what my soul needed.
And wow—did it deliver.
✨ Why You’ll Love This Cake
- Here’s why this cake might just ruin you for all other desserts (in the best way possible):
- Lusciously rich chocolate cake that’s soft, dense, and not too sweet.
- Melted marshmallows baked right into the top—warm, gooey, and slightly chewy.
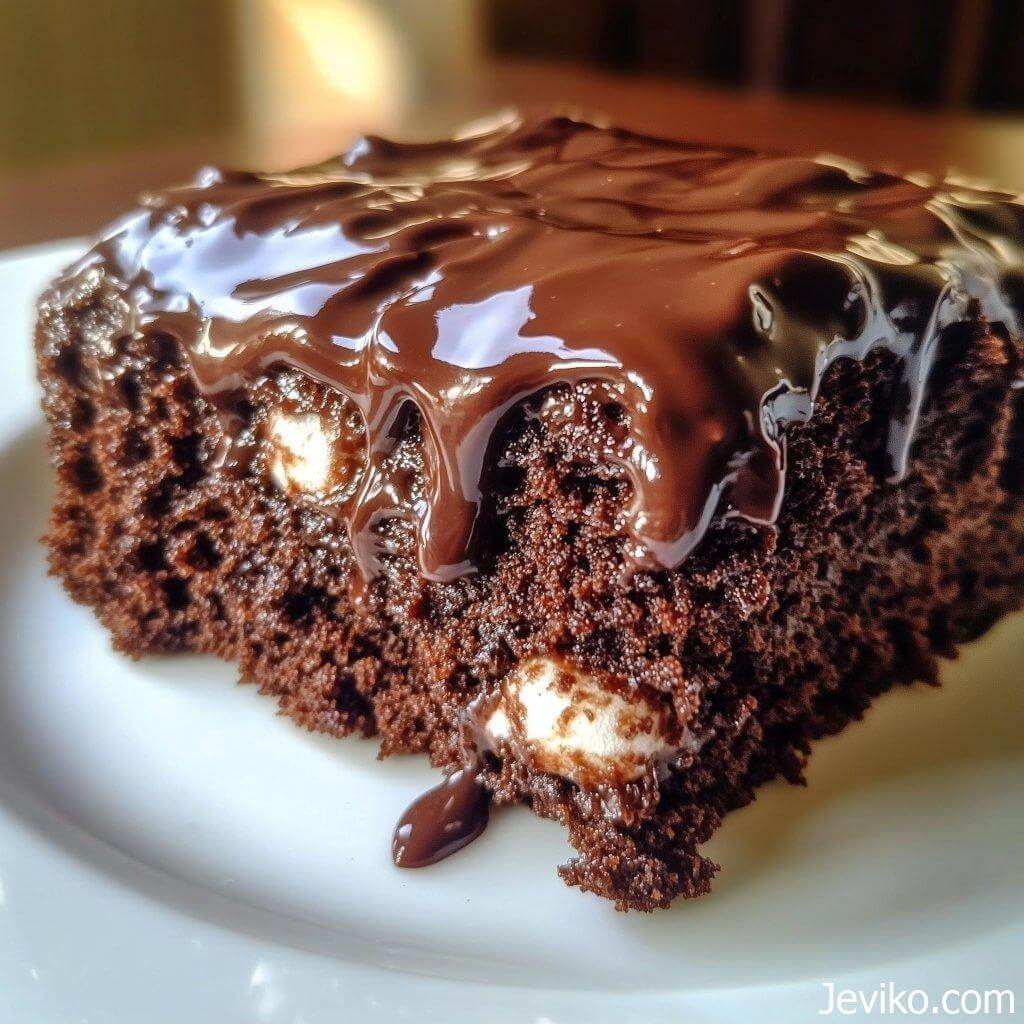
- Silky chocolate fudge icing poured over while everything’s still warm, sinking into the cracks like lava.
- Incredibly easy to make in a single pan—no layers, no frosting bags, no fuss.
- Perfect for crowds—potlucks, birthday parties, church suppers, or any time you want people to swoon.
- Better the next day (if it lasts that long).
Frequently Asked Questions❓
Can I leave out the marshmallows?
You can, but the marshmallow layer is part of what makes this cake a “mud cake.” It melts into the warm cake and creates little gooey pockets that are pure magic. If you’re not a fan of marshmallows, try a layer of chocolate chips or even marshmallow fluff—but I encourage you to give the classic version a try!
Can I make this in advance?
Absolutely! In fact, this cake often tastes even better the next day once the flavors have had time to settle. Make it a day ahead, cover tightly, and slice when you’re ready to serve. It’s perfect for parties and potlucks because it travels well and tastes delicious even at room temp.
Can I add extra toppings?
Of course! Crushed Oreos, toasted coconut, chopped toffee bits, or even a drizzle of peanut butter can take this cake over the top. Just make sure to add toppings after the frosting, while it’s still warm, so they stick.
Ingredients:
Everything here is pantry-friendly, and you probably have most of it already!
For the cake:
- 1 cup (2 sticks) unsalted butter
- ½ cup unsweetened cocoa powder
- 4 large eggs
- 1¾ cups granulated sugar
- 1 cup all-purpose flour
- ½ tsp salt
- 1½ cups chopped pecans or walnuts (optional, but adds an irresistible crunch!)
- 1 tsp vanilla extract
- 3 cups mini marshmallows (or enough to blanket the top of the cake)
For the warm fudge frosting:
- ½ cup (1 stick) unsalted butter
- ⅓ cup whole milk
- ¼ cup unsweetened cocoa powder
- 1 (16 oz) box powdered sugar, sifted (or about 3½ cups)
- 1 tsp vanilla extract
- A pinch of salt (don’t skip—it balances the sweetness beautifully)
Instructions:
- Let’s get baking! You’re only a few simple steps away from chocolate heaven.
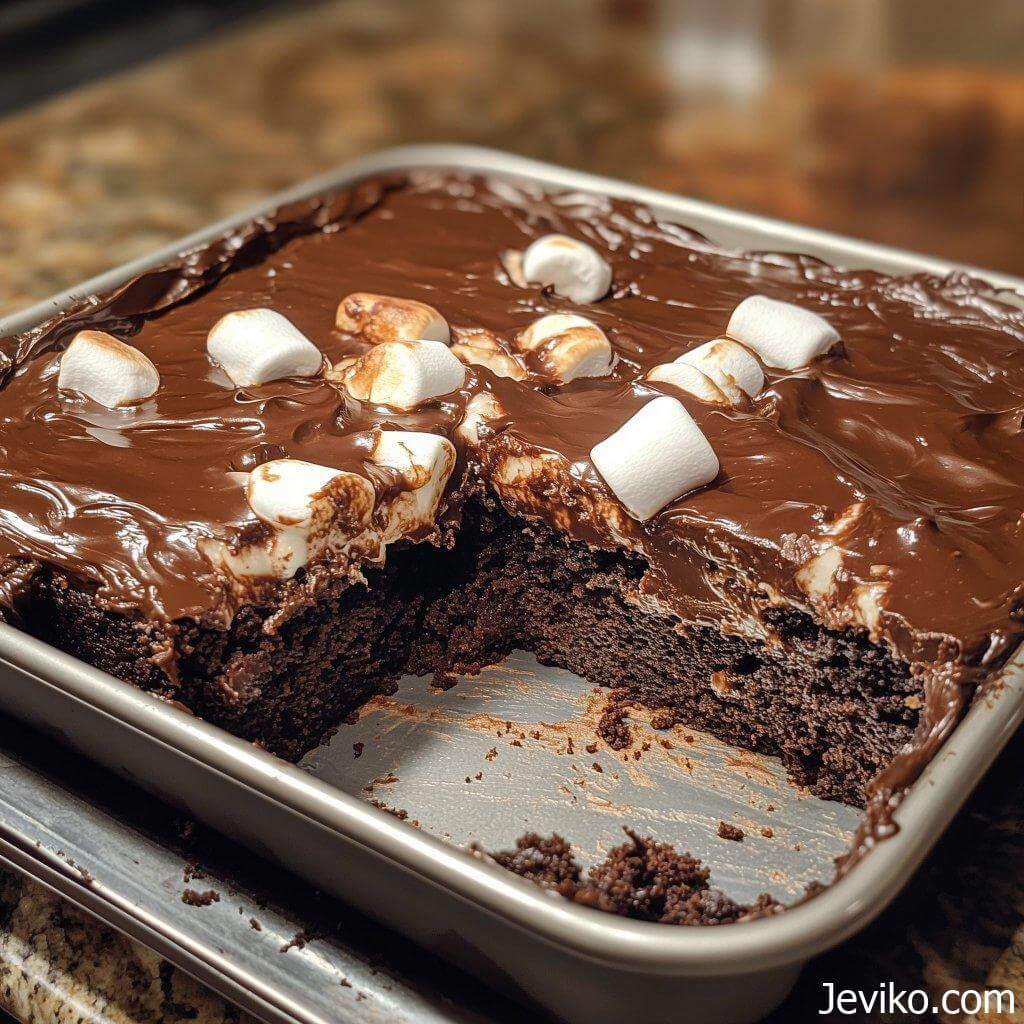
- Preheat your oven to 350°F. Grease a 9×13-inch baking pan (I use a glass dish, but metal works too—just keep an eye on bake time).
- Melt the butter and cocoa: In a medium saucepan, melt the butter over low heat. Stir in the cocoa powder until smooth and glossy. Remove from heat and let it cool slightly.
- Mix wet ingredients: In a large bowl, whisk the eggs and sugar until light and creamy. Slowly add the cooled cocoa-butter mixture, whisking as you go.
- Add dry ingredients: Stir in the flour, salt, vanilla, and chopped nuts (if using). Mix just until everything’s combined—don’t overbeat.
- Bake the cake: Pour the batter into your greased pan and bake for 25–30 minutes, or until a toothpick inserted in the center comes out mostly clean. You want it moist, but not jiggly.
- Top with marshmallows: Immediately after taking the cake out of the oven, sprinkle the mini marshmallows evenly over the hot cake. They’ll soften and begin to melt just slightly from the heat. Set the pan aside while you make the frosting.
- Make the fudge frosting: In a clean saucepan, melt the butter with the milk and cocoa powder over medium heat. Once everything is smooth and steaming, remove from heat and whisk in the sifted powdered sugar, vanilla, and salt. Stir until glossy and pourable.
- Frost the cake while warm: Pour the warm frosting right over the marshmallows. It will ooze into the corners, coat the marshmallows, and start to set into a beautiful, crackly fudge layer.
- Cool and slice: Let the cake sit for about 30 minutes (if you can wait!) before slicing into squares. It’s fantastic warm, but it also slices like a dream once it’s fully cooled.
Pro Tips for the Best Results:
- Use real butter. Trust me—this is not the time for margarine.
- Don’t overbake. Slightly underdone is better than dry. The gooey marshmallow layer and fudgy icing make it forgiving.
- Sift your powdered sugar. It makes the frosting silky instead of lumpy.
- Want extra texture? Add a handful of crushed graham crackers under the marshmallows for a s’mores vibe.
- Chill overnight for neat squares. The flavor deepens and it gets that classic, brownie-fudge texture.
Storage & Serving Suggestions:
- Storage: Cover tightly and keep at room temp for 2–3 days. It stays moist, even uncovered, thanks to all that glorious fudge. For longer storage, refrigerate up to a week—just let it come to room temp before serving, or warm for a few seconds in the microwave.
- Freezing: Yes! Wrap individual slices in parchment and freeze in an airtight container for up to 2 months. Perfect for sneaky midnight snacks. 😉
Serving ideas:
- With a scoop of vanilla bean ice cream
- Drizzled with salted caramel sauce
- Cut into tiny squares for a dessert tray
- Topped with whipped cream and a cherry for a mud pie sundae


