
Oh friends, let me tell you about this one—
Janet’s Strawberry Pie is more than just a dessert. It’s a love letter to summer, to porch swings, and to lazy Sunday afternoons spent barefoot in the backyard. Every bite tastes like sunshine and good memories.
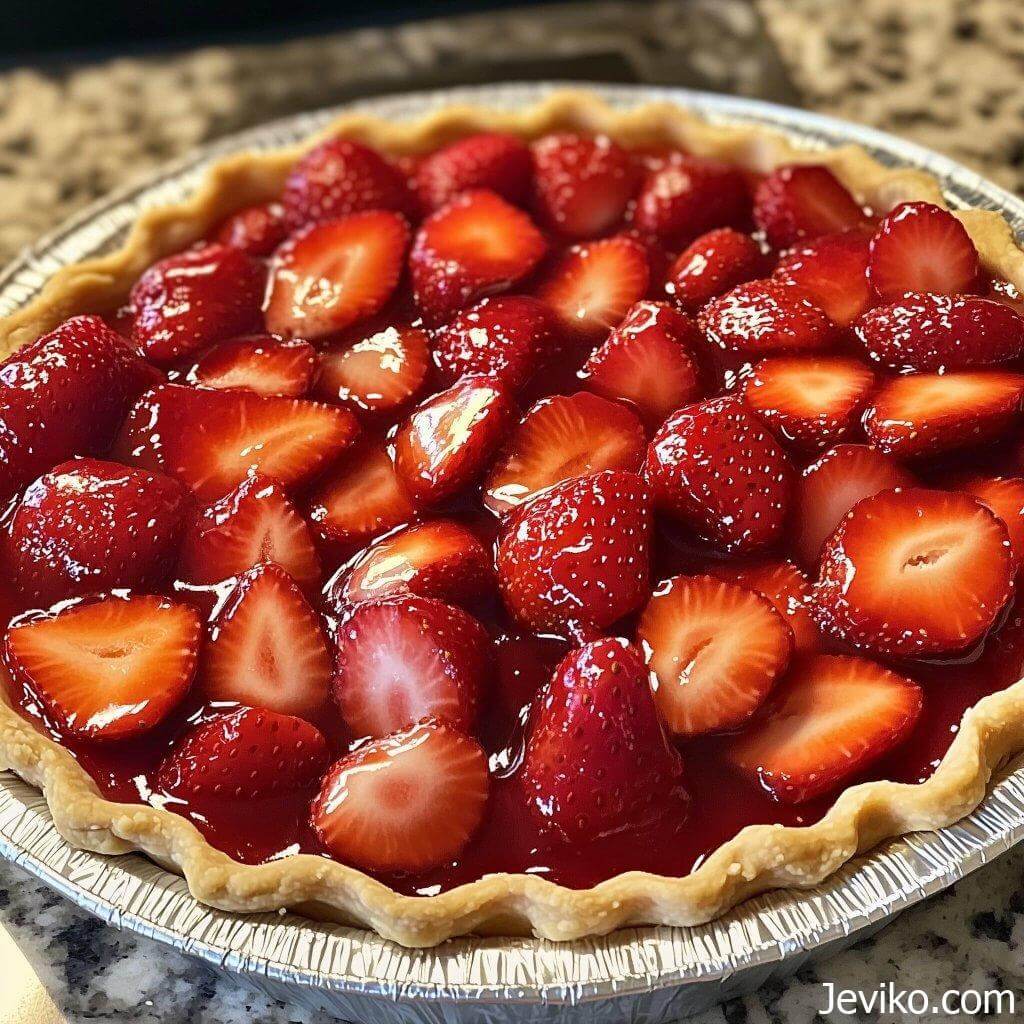
Now, who’s Janet? Well, I’m glad you asked! She’s my neighbor down the road, and if there’s one thing Janet is known for, it’s her legendary strawberry pie. I had my first slice at her Fourth of July cookout years ago, and let me tell you—I’ve never forgotten it. That bright, glossy filling, the mountain of juicy berries, and the flaky crust… I begged her for the recipe and have been making it ever since (with a tiny twist of my own!).
So today, I’m sharing this gem with you, because this pie needs to be part of your life. Whether you’re making it for a family dinner or just because you bought too many strawberries at the farmers’ market (guilty!), this recipe is your new go-to.
Why You’ll Love Janet’s Strawberry Pie
- Fresh, juicy berries: This pie is absolutely packed with ripe strawberries—no gelatin-heavy fillers here!
- Buttery homemade crust: Flaky, golden, and worth every second it takes to make from scratch (though I do give you a shortcut option, don’t worry).
- Light and not too sweet: It lets the strawberries shine.
- Chill and serve: Perfect make-ahead dessert for warm days or when you need something simple but special.
Can I use frozen strawberries?
I really wouldn’t recommend it for this pie. Frozen berries tend to get mushy and watery when thawed, and this pie really depends on that firm, fresh bite.
Can I make this pie ahead?
Yes! It’s actually best made the day before so it has time to chill and set properly.
My glaze got too thick—help!
No worries. Just whisk in a splash of water over low heat until it loosens up again.
Ingredients:
For the crust (or you can use a store-bought 9-inch pie crust if you’re short on time!):
- 1 1/4 cups all-purpose flour
- 1/2 teaspoon salt
- 1 tablespoon granulated sugar
- 1/2 cup cold unsalted butter, cut into cubes
- 3–4 tablespoons ice water
For the filling:
- 4 cups fresh strawberries, hulled and halved (keep a few whole for a pretty top!)
- 3/4 cup granulated sugar (adjust depending on how sweet your berries are)
- 3 tablespoons cornstarch
- 1/2 cup water
- 1 tablespoon lemon juice (adds the perfect brightness)
- 1/2 teaspoon vanilla extract
Optional for serving:
- Fresh whipped cream or a scoop of vanilla ice cream
- A few mint leaves for garnish (just for that little extra ooh la la)
🥣 Step-by-Step Instructions:
- Let’s start with the crust (if making homemade):
In a large bowl, whisk together the flour, salt, and sugar. Add the cold butter and use a pastry cutter (or your fingers!) to work it in until it looks like coarse crumbs. Add ice water, one tablespoon at a time, mixing gently until the dough just comes together. Shape into a disk, wrap it in plastic wrap, and chill in the fridge for at least 30 minutes. - Roll & bake:
Preheat your oven to 375°F. Roll out your dough on a floured surface to about 12 inches, then gently place it into a 9-inch pie dish. Trim and crimp the edges however you like—rustic is beautiful! Prick the bottom with a fork, line with parchment, and fill with pie weights or dried beans. Bake for 15 minutes, remove the weights, then bake another 10–12 minutes until golden. Let it cool completely. - Make that glossy filling:
In a small saucepan, whisk together the sugar and cornstarch. Stir in water and bring to a gentle boil over medium heat, whisking constantly. It’ll thicken fast! Once it’s glossy and coats the back of a spoon, remove from heat and stir in lemon juice and vanilla. - Assemble the magic:
Place half the strawberries into the cooled crust. Pour the warm glaze over them, gently folding with a spatula if needed. Add the remaining berries on top (you can arrange them pretty or go rustic—both are gorgeous!). Chill in the fridge for at least 3 hours, until set. - Serve and swoon:
Right before serving, top with whipped cream or ice cream. I love a little sprig of mint on each slice—it looks so fancy with barely any effort!
💡 Pro Tips for Pie Success:
Use ripe but firm strawberries—too soft and they’ll go mushy, too hard and they won’t absorb the glaze.
Want a shortcut? Store-bought crust totally works. Just make sure it’s baked and cooled before filling.
For extra shine: Brush the top with a little warmed apricot jam after the pie has chilled—just a light swipe!
Need to make it gluten-free? Use a GF pie crust and swap cornstarch with arrowroot or tapioca starch.
🧊 Storage & Serving Suggestions:
Store leftovers (if there are any!) in the fridge, loosely covered, for up to 3 days.
The crust will soften a bit, but the flavors get even better the next day.
Serve chilled with whipped cream or a scoop of vanilla ice cream—heaven!


