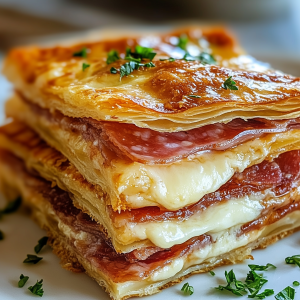
Italian Sub Squares are what you make when you want the flavor of a deli sub, but you also want something you can slice, serve, and walk away from without assembling individual sandwiches. They bake up warm and melty with layers of savory deli meat, stretchy cheese, and a soft, pull-apart bread base that soaks up just enough seasoning to taste bold without turning soggy.
Here’s the best part: they’re built for real life. You can prep them ahead. You can feed a crowd without turning your kitchen into a sandwich shop. And you can keep them mild for picky eaters or add extra bite with pepperoncini, banana peppers, and a quick drizzle of tangy dressing right before serving.
These squares also hit that “party food that still feels like dinner” zone. They’re hearty, they’re satisfying, and they disappear fast once they hit the table. Serve them with chips and a salad for an easy meal. Set them out with dips and crunchy sides for game day. Either way, you’ll end up slicing “just one more piece” because the edges are crisp, the middle is gooey, and the whole pan smells like garlic, oregano, and toasted bread.
This recipe keeps the method simple: build the layers, brush with a buttery herb topping, bake until the cheese is bubbling, then let them rest so they slice clean. No complicated steps. Just a pan of warm, cheesy sub goodness that tastes like it came from your favorite deli counter.
Why You’ll Love This Recipe
-
It feeds a crowd without extra work. One pan, quick slicing, easy serving.
-
Bold deli flavor, baked into every bite. Seasoning in the layers and on top.
-
Crisp edges, melty center. The texture is the whole point.
-
Easy to customize. Swap meats, cheeses, and add-ins based on what you like.
-
Make-ahead friendly. Prep, chill, bake when you’re ready.
Frequently Asked Questions (FAQs)
1) Can I make Italian Sub Squares ahead of time?
Yes. You can assemble the whole pan, cover it tightly, and refrigerate up to 24 hours. When you’re ready to bake, let the pan sit at room temperature for about 15 minutes while the oven heats, then bake as directed. If the bread is very cold, it may need a few extra minutes.
2) How do I keep the bottom from getting soggy?
Two things help most: don’t overdo wet ingredients inside the sandwich (like extra dressing), and bake covered first so the cheese melts and the filling warms without drying the top too quickly. Then uncover at the end to crisp the top. Also, keep juicy toppings (tomatoes, shredded lettuce) for serving, not baking.
3) What meats work best?
Classic deli layers include salami, pepperoni, ham, and capicola, but you can mix and match. Turkey, roast beef, or chicken deli slices work great too. The key is thin slices layered evenly so every square has a good bite.
4) Can I serve these cold like a regular Italian sub?
You can, but they’re best warm. If you want a cold-sub vibe, bake them as directed, cool, then chill. Add fresh shredded lettuce, tomato, and a drizzle of Italian dressing right before serving.
TABLE OF CONTENTS
Ingredients
Instructions
What makes these “Italian sub” squares
Bread options that work
Cheese and meat combinations
How to avoid sogginess
Make-ahead and party tips
Variations
What to serve with Italian Sub Squares
Storage and reheating
Freezing notes
Recipe card
Short version (Recipe WP Maker plugin)
Ingredients
I’ve included notes and descriptions below for each ingredient in this recipe. For the exact ingredient measurements, jump to the recipe card at the bottom of this post.
Bread
Sheet rolls, slider rolls, or a slab-style sandwich bread
Soft slider rolls are the easiest because they’re already portion-friendly and they slice into neat squares. Choose sturdy, not ultra airy. A roll that’s too light can collapse once the filling heats up.
Good choices:
-
Hawaiian-style rolls (slightly sweet, very popular)
-
savory slider rolls (my favorite for a true deli taste)
-
dinner rolls connected in a sheet
-
focaccia (more rustic, sturdy, extra flavor)
Cheese
Provolone + mozzarella is the classic combo here. Provolone brings that deli flavor. Mozzarella gives the stretch.
If you only want one cheese, use provolone. It melts smoothly and tastes like a real Italian sub.
Deli meats
This is where you build the “sub shop” flavor. Use a mix of:
-
salami
-
pepperoni
-
ham
-
capicola
-
roast beef
-
turkey
-
chicken deli slices
You don’t have to use everything. Pick two or three and layer generously.
Condiments and add-ins
Roasted red peppers add sweetness and a deli-style finish.
Banana peppers or pepperoncini bring tang and bite.
Red onion (very thinly sliced) adds sharpness.
Dijon or deli mustard gives a subtle kick without overpowering.
Important: Keep wet ingredients controlled. Too much dressing inside can soften the bread.
Butter topping (the “this tastes baked and delicious” part)
Melted butter + herbs + garlic turns these from “stacked sandwiches” into something that tastes intentionally baked.
Key flavors:
-
garlic powder (or minced garlic, used carefully)
-
Italian seasoning (oregano, basil, parsley vibe)
-
parmesan (optional but excellent)
-
a pinch of salt and black pepper
Optional finishing drizzle
A light drizzle of Italian dressing after baking brings that classic sub tang. Keep it light. You can always add more to individual servings.
Instructions
For the full detailed recipe instructions and ingredient quantities, scroll to the recipe card at the bottom of this post.
1) Preheat and prep the pan
Preheat oven to 375°F.
Grease a 9×13-inch baking dish or line it with parchment for easier lift-out and cleaner slices.
2) Slice the rolls
Keeping the rolls connected (if using slider rolls), slice them horizontally like you’re opening a giant sandwich.
Place the bottom slab in the pan.
3) Build the layers
Start layering in this order:
-
Cheese (a thin layer first helps “seal” the bread)
-
Deli meats (even layers, slightly overlapping)
-
Roasted red peppers (pat dry if needed)
-
Banana peppers / pepperoncini (drained)
-
Onion (thin slices, not too thick)
-
More cheese on top
Then place the top slab of rolls on.
4) Mix the buttery herb topping
In a small bowl, mix melted butter with garlic powder, Italian seasoning, black pepper, and parmesan (if using). Taste the mixture quickly. If your butter is unsalted, a small pinch of salt helps.
Brush the topping over the top of the rolls, getting into the corners and edges.
5) Bake covered, then uncovered
Cover the pan loosely with foil and bake for 15 minutes. This melts the cheese and warms the center without drying the bread.
Remove foil and bake another 8–12 minutes, until the top is golden and the edges look crisp.
6) Rest, then slice
Let the pan rest for 5–10 minutes before cutting. This helps the cheese settle so you get neat squares instead of a sliding filling.
Slice into squares and serve warm.
Optional: drizzle lightly with Italian dressing right before serving, or serve dressing on the side for dipping.
What makes these “Italian sub” squares
Italian subs are all about contrast. Savory meats, creamy cheese, tangy peppers, and that familiar oregano-garlic finish. The baked version should still taste like a sub, not just “hot sandwiches.”
That’s why this recipe focuses on three things:
Layering for balance
Cheese goes both under and over the meat. The bottom layer helps protect the bread. The top layer melts into the meat and holds everything together.
Controlled moisture
Italian subs usually get lettuce, tomato, and a generous dressing. Those are great… but not for baking. Here, we use roasted peppers and banana peppers because they add flavor without flooding the bread. Then the “wet” part (dressing) is saved for finishing.
A seasoned top
That buttery herb topping is the difference between bland rolls and something you’d gladly eat on its own. It also makes the whole pan smell like a deli bake.
Bread options that work
Bread choice changes the final feel more than people expect.
Slider rolls
The easiest, most reliable option. Soft inside, crisp edges, easy slicing.
Hawaiian rolls
Slightly sweet. It’s a popular contrast with salty deli meat. If you love the sweet-salty thing, use them.
Hoagie rolls
You can use them, but they don’t sit as neatly in a pan unless you pack them tightly. This recipe is easiest with connected rolls.
Focaccia
Sturdy, flavorful, and less likely to get soggy. If you use focaccia, slice it horizontally and treat it like a giant sandwich base. Watch bake time—focaccia can brown quickly.
Cheese and meat combinations
If you want a classic deli flavor, keep the mix simple and balanced. Too many meats can muddy the taste.
Classic combo
-
provolone
-
salami
-
pepperoni
-
ham
Mild combo
-
provolone
-
turkey
-
chicken deli slices
-
roasted red peppers
Bold combo
-
provolone + mozzarella
-
capicola
-
salami
-
pepperoni
-
banana peppers
Roast beef version
-
provolone
-
roast beef
-
caramelized onions (optional)
-
a little horseradish-style sauce on the side if you like that flavor
How to avoid sogginess
This comes up every time, and it’s worth getting right.
Keep wet ingredients out of the bake
No fresh tomatoes inside. No shredded lettuce inside. No heavy dressing inside.
Add those after baking if you want them.
Drain and pat anything juicy
Roasted red peppers, banana peppers, pepperoncini—drain them well. If they look wet, pat them lightly with a paper towel.
Bake in two stages
Covered first to melt and heat through. Uncovered to crisp the top. That’s the method that keeps the pan balanced.
Rest before slicing
Cut too early and the filling shifts. Resting gives the cheese a chance to settle so you get tidy squares.
Make-ahead and party tips
If you’re serving a group, this recipe makes life easier.
Prep early
Assemble the pan and refrigerate. Brush with butter topping right before baking (or brush earlier if you’re short on time).
Double pan for big groups
One pan goes fast. If you have more than 8–10 people, make two pans. They bake at the same temp, and you can rotate racks halfway through.
Keep warm without drying out
Once baked, cover loosely with foil and keep in a warm oven (around 200°F) for a short time. Don’t leave it for hours in a hot oven or the bread dries out.
If you need a long hold, keep it at room temp and rewarm quickly before serving.
Variations
Italian Sub Squares are flexible. Change the fillings, keep the method.
“Italian Supreme” squares
Add sliced black olives and a thin layer of sautéed mushrooms (cooled) before the top cheese goes on. Keep it light so it doesn’t water down the bread.
Spicy version
Use pepper jack along with provolone, add extra banana peppers, and sprinkle red pepper flakes into the butter topping.
Extra cheesy version
Add a thin layer of shredded mozzarella under the meat and another on top. Don’t go too thick or the center can become overly heavy.
“Cold sub” finish
Bake as directed, then cool slightly. Add shredded lettuce and thin tomato slices on top of each square when serving. Drizzle lightly with dressing and sprinkle with oregano.
Turkey provolone squares
Use turkey, provolone, roasted peppers, and onion. Serve with a side of dressing or a creamy sub sauce.
What to serve with Italian Sub Squares
These are rich and savory, so crisp, fresh sides work well.
-
a simple green salad with a tangy dressing
-
crunchy chips and pickles
-
a chopped Italian-style salad (lettuce, cucumber, olives, pepperoncini)
-
fruit salad if you want something refreshing
-
marinated vegetables (served cold, not baked into the squares)
If you’re doing a party spread, add a couple dips: a simple marinara for dipping, or a creamy pepper spread on the side.
Storage and reheating
Refrigerator
Store leftovers in an airtight container for up to 4 days.
Reheat for best texture
Oven reheat is best:
-
350°F for 8–12 minutes on a baking sheet
This helps re-crisp the bread.
Air fryer works well too:
-
350°F for 3–5 minutes (watch closely)
Microwave is fastest, but the bread softens more. Still tasty, just less crisp.
A quick leftover tip
If you know you’ll have leftovers, keep dressing on the side. Squares that are drenched in dressing don’t reheat as nicely.
Freezing notes
You can freeze them, but bread texture changes slightly. Best approach:
-
bake first
-
cool completely
-
slice
-
wrap individual squares
-
freeze up to 2 months
Reheat from thawed in the oven for best results. If you reheat from frozen, cover with foil for the first part so the center warms before the top dries out.
Italian Sub Squares
Ingredients
- 12 slider rolls connected sheet, sliced horizontally
- 8 slices provolone cheese
- 1 cup shredded mozzarella cheese
- 6 –8 oz sliced salami or preferred deli meat
- 6 –8 oz sliced ham or turkey/chicken deli slices
- 3 –4 oz sliced pepperoni optional
- ½ cup roasted red peppers drained and patted dry
- ⅓ cup banana pepper rings or pepperoncini drained
- ¼ small red onion very thinly sliced
- 2 tablespoons mayonnaise optional, thin spread on bottom bread
- 1 tablespoon Dijon or deli mustard optional
Buttery Herb Topping
- 6 tablespoons unsalted butter melted
- 1 teaspoon Italian seasoning
- 1 teaspoon garlic powder
- 2 tablespoons grated parmesan optional
- ¼ teaspoon black pepper
- Pinch of salt optional, to taste
Optional for serving
- Italian dressing light drizzle or for dipping
Instructions
- Preheat oven to 375°F. Grease a 9x13-inch baking dish.
- Slice rolls horizontally and place bottom slab in the pan.
- (Optional) Spread a thin layer of mayonnaise and/or mustard on the bottom bread.
- Layer provolone, deli meats, roasted red peppers, banana peppers, onion, then mozzarella. Add the top bread slab.
- Mix melted butter with Italian seasoning, garlic powder, parmesan (optional), pepper, and a pinch of salt if needed. Brush over the tops.
- Cover loosely with foil and bake 15 minutes.
- Remove foil and bake 8–12 minutes until golden and melty.
- Rest 5–10 minutes, slice into squares, and serve. Optional: drizzle lightly with Italian dressing.