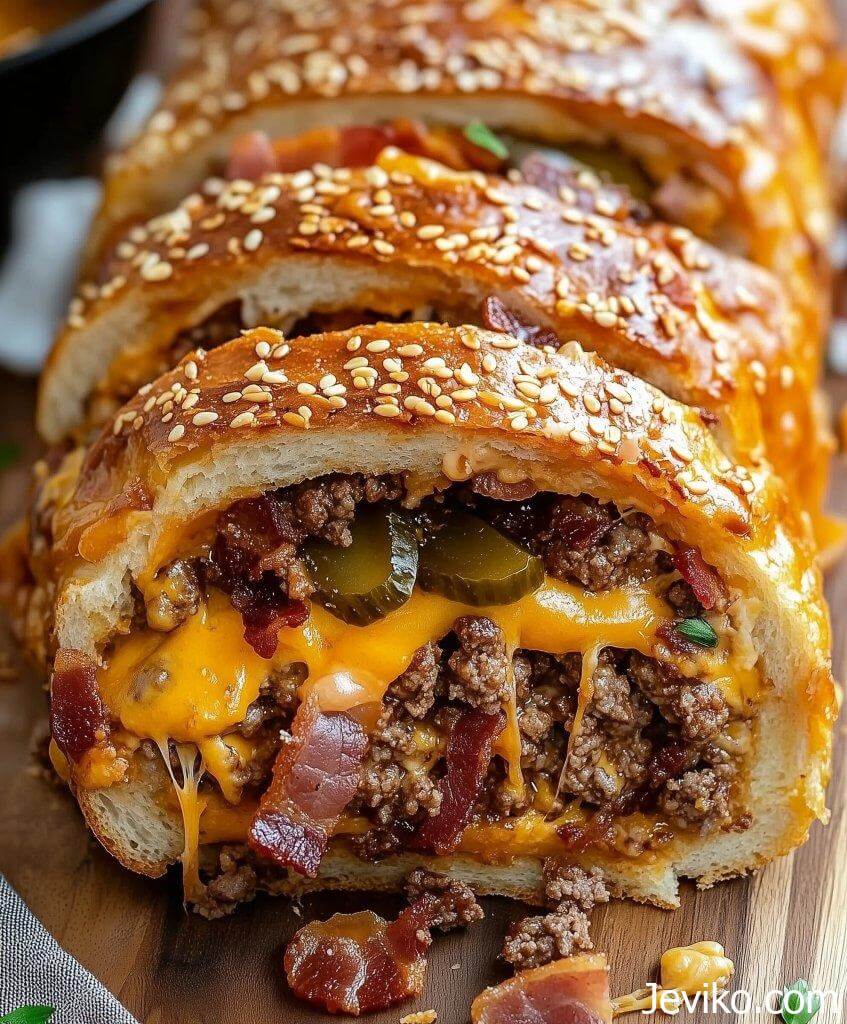
Hello friends, do I have a story for you! Last Tuesday, I stood in front of my fridge, staring at all those random leftovers – you know the scene, right? Half a package of bacon from Sunday brunch, some lonely bell peppers threatening to wrinkle, and cheese bits from taco night. That’s when magic happened in my kitchen, and I perfected what my family now calls “The Greatest Garbage Bread in History!”
You might be thinking, “Jeviko, garbage bread doesn’t sound appetizing!” But trust me, this recipe transforms ordinary leftovers into a golden, crusty, cheese-oozing masterpiece that’ll make your family think you’ve been secretly taking culinary classes. Every time I bring this to our neighborhood potlucks, it disappears faster than my kids’ clean room on a weekend!
Quick Facts
Five Burning Questions About Garbage Bread
What exactly is Garbage Bread, and why should I make it?
Think of it as the superhero of leftover recipes! It’s a rolled-up feast of whatever delicious ingredients you have hanging out in your fridge, all wrapped in pizza dough and baked to golden perfection. I started making this when my grocery budget got tight, and now my kids actually get excited when they see me clearing out the fridge!
Can I really use any ingredients?
Almost! My golden rule is: if it tastes good separately and isn’t too wet, it’ll probably work great in garbage bread. The magic comes from balancing your flavors – some protein, some veggies, and definitely cheese. Last week, I threw in leftover Korean BBQ chicken, and my husband declared it the best version yet!
I’m not great at baking – can I mess this up?
Here’s what I love about this recipe – it’s practically goof-proof! Even when my teenager tried making it and rolled it a bit wonky, it still tasted amazing. The key is just making sure your seams are sealed before baking. That’s it!
Can I make it ahead of time?
You bet! I often prep it in the morning, wrap it in plastic wrap, and keep it in the fridge until dinner time. Just add an extra 5 minutes to the baking time if you’re starting from cold. It’s perfect for busy weeknights!
How do I store leftovers?
If you actually have any leftovers (which rarely happens in my house!), wrap them tightly in foil and refrigerate for up to 3 days. A quick 10-minute warm-up in the oven at 350°F brings back that fresh-baked crispiness!
Prep Time: 15 minutes
Cook Time: 25-30 minutes
Total Time: 45 minutes
Serves: 8-10 hungry folks
Ingredients:
- 1 package (16 oz) refrigerated pizza dough
- 8 oz shredded mozzarella cheese
- 4 oz cooked, crumbled bacon (about 6 slices)
- 4 oz diced bell peppers (about 1 medium pepper)
- 2 oz sliced black olives (about ¼ cup)
- 2 oz sliced green onions (about 4 stalks)
- 1 oz grated Parmesan (about ¼ cup)
- 2 oz mayonnaise or ranch dressing
- 1 tablespoon Italian seasoning
- 1 large egg (for the egg wash)
- Garlic powder and salt to taste
The Magic Method:
- Fire up your oven to 375°F. Trust me, proper preheating is crucial for that gorgeous golden crust!
- Mix your filling ingredients in a large bowl. I like to pretend I’m conducting an orchestra – everything needs to harmonize perfectly!
- Roll out that pizza dough into a rectangle about 12×16 inches. Don’t stress about perfect shapes – we’re going for rustic charm here!
- Spread your filling mixture evenly, leaving a 1-inch border. Think of it like making the world’s most amazing savory cinnamon roll!
- Here comes the fun part – roll it up like a jelly roll, starting from the long side. Keep it tight but gentle… no filling explosions allowed!
- Place it seam-side down on your baking sheet and brush with beaten egg. This is what gives it that Instagram-worthy golden glow!
- Pop it in the oven for 25-30 minutes until it’s gloriously golden brown and making your kitchen smell like heaven.
My Secret Pro Tips:
- Cold dough is easier to work with! If it’s getting too soft, pop it in the fridge for 10 minutes.
- Want extra cheesy goodness? Sprinkle some more cheese on top before the egg wash.
- Got picky eaters? Divide the dough in half and make two smaller rolls with different fillings!
- The egg wash is non-negotiable – it’s what gives you that beautiful bakery-style finish.
- Let it rest for 5 minutes before slicing. I know it’s torture, but your fingers will thank me!
- Serve with warm marinara sauce on the side for dipping – game changer!

