Hey there, cookie lovers! Jeviko here, and I’m about to share something that completely changed my holiday baking game. You know those moments when your kids announce “Mom, I need cookies for tomorrow’s school party” at 9 PM? Or when unexpected holiday guests are heading your way? Well, these magical cake mix Christmas cookies have saved my sanity more times than I can count!
Last Christmas, these cookies actually earned me the “Holiday Baking Queen” title at our neighborhood cookie exchange. Nobody believed me when I revealed my secret weapon – a humble box of cake mix! The looks on their faces were priceless when I shared how quickly these come together. Since then, this recipe has become my most-requested holiday treat, and today, I’m letting you in on all my tricks!
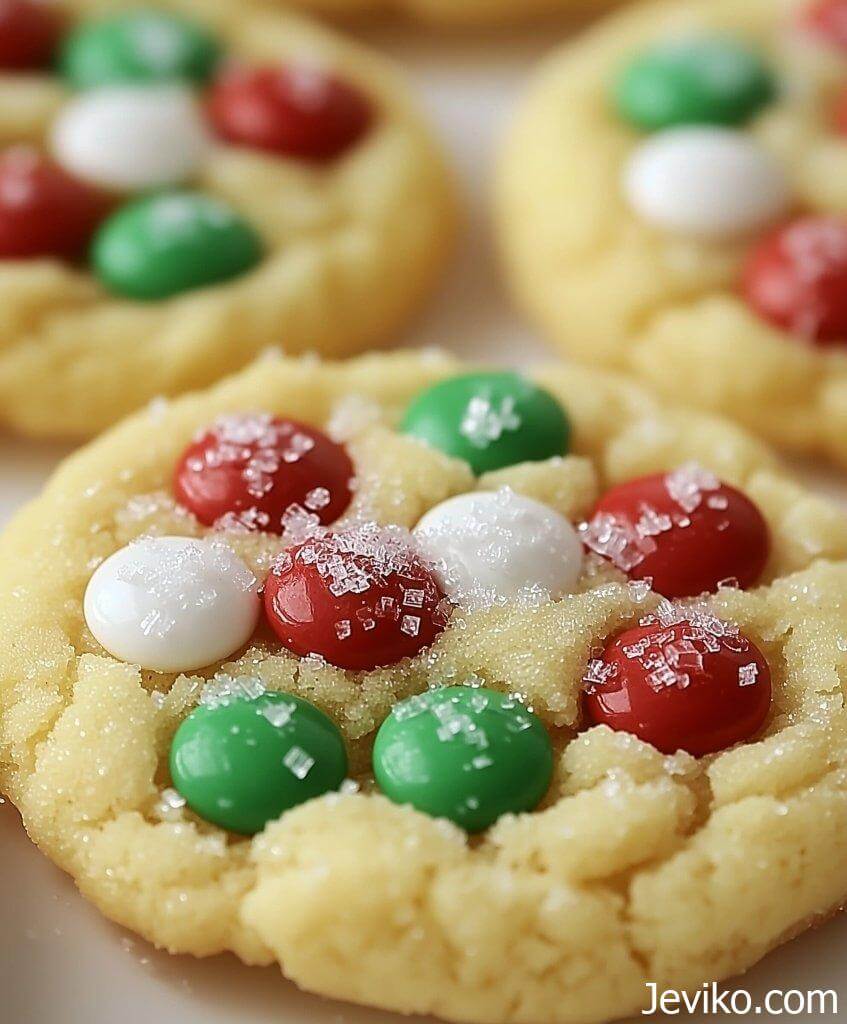
What makes these cookies extra special? They’re incredibly soft and chewy, with that perfect bakery-style texture we all crave. Plus, the festive sprinkles make them totally Instagram-worthy (trust me, my feed explodes every time I post these beauties!). The best part? You’ll spend more time enjoying these cookies than making them!
Let’s start with the FAQs:
Can I make these cookies ahead of the holiday rush?
You bet! I make several batches in early December and freeze them. They stay perfect for up to 3 months in the freezer. Just pop them in an airtight container with wax paper between layers. When you’re ready, thaw them at room temperature for about an hour.
My cookies always turn out hard – what’s the secret to keeping them soft?
The magic lies in the timing! Pull them out when they still look slightly underbaked in the middle – trust me on this one. They’ll continue cooking on the hot baking sheet. Also, my secret weapon? Pop a slice of bread in the storage container. It keeps them soft and chewy for days!
Can I make these fancier for a cookie exchange?
Absolutely! My favorite upgrade is adding white chocolate chips and crushed candy canes. For an elegant touch, try drizzling melted chocolate over the cooled cookies. I’ve won three cookie exchanges with these variations!
What if I’m baking for someone with allergies?
I’ve got you covered! My niece has celiac disease, so I often make these with gluten-free cake mix. They turn out just as amazing. Just double-check that your sprinkles are also allergy-friendly if needed.
Which cake mix brand works best?
Here’s the honest truth – I’ve tried fancy brands and store brands, and they all work beautifully. Just make sure it’s a 15.25 oz box, and you’re golden!
Time Breakdown
Prep Time: 5 minutes
Cook Time: 8-10 minutes
Total Time: 15 minutes
Yield: 24 heavenly cookies
Ingridients:
- 1 box (15.25 oz) vanilla cake mix
- 2 large eggs
- ⅓ cup vegetable oil (2.7 fl oz)
- 1 teaspoon pure vanilla extract
- ½ cup holiday sprinkles (2.5 oz)
Instructions:
- Crank that oven up to 350°F. Line your cookie sheets with parchment paper (no stuck cookies on our watch!).
- Grab your largest mixing bowl and dump in the cake mix. Make a well in the center – think volcano-style!
- Add your eggs, oil, and vanilla to the crater. Mix everything until you get a thick, slightly sticky dough. Don’t panic if it seems too thick at first – that’s exactly what we want!
- Now for the fun part – fold in those festive sprinkles! This is where my kids usually “help” by spilling half the sprinkles on the floor. 😅
- Using a tablespoon or cookie scoop, roll the dough into 1-inch balls. Space them about 2 inches apart on your baking sheets.
- Pop them in the oven for 8-10 minutes. Here’s the crucial part: they should look slightly underbaked in the middle when you take them out!
- Let them hang out on the baking sheet for 5 minutes before moving them to a cooling rack. This rest time is non-negotiable for achieving that perfect texture!
My Top 6 Pro Tips:
- Room temperature eggs blend easier, but if you forgot (like I always do), just pop them in warm water for 5 minutes.
- Want extra sparkle? Press a few additional sprinkles on top of each dough ball before baking.
- No cookie scoop? No problem! Use a tablespoon and aim for about 1.5 tablespoons of dough per cookie.
- For picture-perfect cookies, give the baking sheet a quick tap on the counter after pulling them out of the oven. This helps them settle into that beautiful, even shape.
- These cookies freeze beautifully! I often make a double batch and freeze half for emergency cookie situations (you know the ones I mean!).
- Want to make them extra special? Try my “cookie sandwich” variation – spread a little vanilla frosting between two cookies. My kids go crazy for these!

