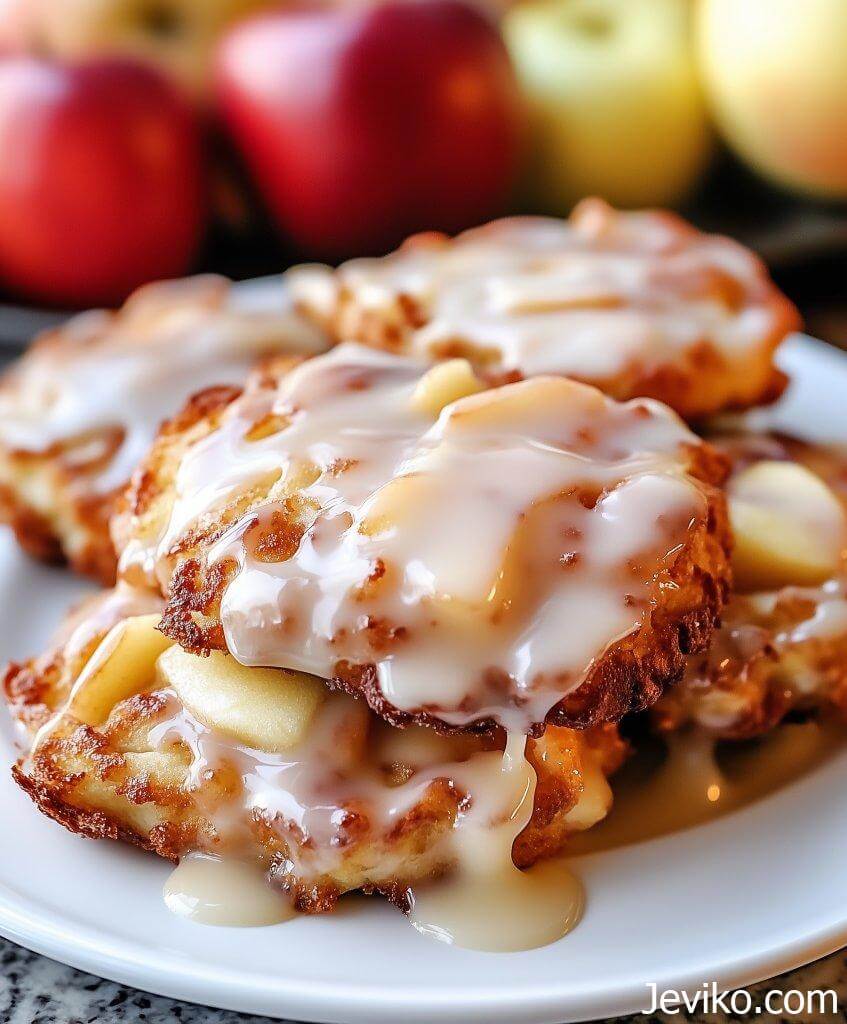
Oh my goodness, friends! happy dance I cannot wait to share this recipe with you! You know those mouthwatering apple fritters from fancy bakeries? Well, I’ve cracked the code to make them at home – and get this – they’re BAKED, not fried! 🍎
Last weekend, while sorting through my grandmother’s recipe box, I found her old apple fritter recipe. But since we’re all trying to make healthier choices (while still indulging in the good stuff!), I transformed it into this incredible baked version. My kitchen smelled like a fall festival, and my family literally couldn’t wait for them to cool down before diving in!
Why These Fritters Will Change Your Life
- No hot oil splatter (keep those PJ’s clean!)
- Healthier than traditional fried versions
- Perfect crispy outside, fluffy inside
- Makes your house smell like heaven
- They’re basically breakfast food (apples = healthy, right? 😉)
Which apples work best in this recipe?
Here’s the scoop – I’m obsessed with using Honeycrisp apples because they hold their shape and have the perfect sweet-tart balance. But honestly? Granny Smith gives you that amazing tartness, while Fuji brings the sweetness. It’s like choosing your favorite child – they’re all good! Just avoid Red Delicious (they turn to mush faster than ice cream on a summer day!).
Can I make these ahead of time?
You bet your apples you can! The batter can be prepped the night before – just keep it covered in the fridge. But here’s the real tea: these babies taste absolutely MAGICAL fresh out of the oven. If you’re making them ahead, skip the glaze until just before serving. Nobody likes soggy fritters (trust me, I learned this the hard way! 😅).
My fritters spread too much while baking. What went wrong?
Sounds like your batter might have been a bit too loose! Think of it like this – you want your batter thick enough that it gives the apples a big warm hug. If it’s runny, the fritters will try to escape and spread all over your baking sheet. Adding an extra tablespoon or two of flour usually does the trick!
The Time Breakdown
Prep Time: 20 minutes
Rest Time: 10 minutes
Bake Time: 18-20 minutes
Total Time: About 50 minutes of pure joy
Ingredients:
For the Fritters:
- 2 cups all-purpose flour
- 2 tablespoons melted butter
- 1/4 teaspoon nutmeg
- 1 tablespoon baking powder
- 1 cup whole milk
- 1 teaspoon cinnamon
- 1/4 cup granulated sugar
- 1/2 teaspoon salt
- 2 large eggs
- 2 teaspoons vanilla extract
- 3 medium apples, diced small (about 3 cups)
- 1 tablespoon lemon juice
For the Heavenly Glaze:
- 2 cups powdered sugar
- 1/4 cup milk
- 1/2 teaspoon vanilla extract
- Pinch of salt
Instructions:
- Preheat your oven to 375°F (190°C). Line two baking sheets with parchment paper and give them a light spritz of cooking spray. (Yes, both the paper and spray are necessary – trust your girl on this one!)
- Toss your diced apples with lemon juice in a bowl. This keeps them from turning brown faster than a teenager’s mood swing!
- In a large bowl, whisk together flour, sugar, baking powder, cinnamon, nutmeg, and salt. Think of this as building your flavor foundation!
- In another bowl, beat eggs, milk, melted butter, and vanilla until they’re besties (well combined).
- Pour the wet ingredients into the dry ingredients. Mix until JUST combined – we’re making fritters, not rubber bands! A few lumps are your friends here.
- Fold in those apple pieces like they’re precious gems. Because they are!
- Let the batter rest for 10 minutes. (Perfect time to scroll through Instagram or do a quick kitchen dance!)
- Drop 1/4 cup portions of batter onto your prepared baking sheets. Leave space between them – these babies need their personal space!
- Bake for 18-20 minutes, rotating pans halfway through, until they’re golden brown and gorgeous.
My Secret Tips:
- Dice those apples SMALL (like, really small). Big chunks make your fritters fall apart faster than my New Year’s resolutions!
- Cold ingredients? Nope! Room temperature eggs and milk make for fluffier fritters.
- Use an ice cream scoop for perfectly sized portions. Game changer!
- The batter should be thick – if it’s not, add flour 1 tablespoon at a time.
- Want extra crispiness? Give them a quick spritz of cooking spray before baking.
- Don’t skip the parchment paper unless you enjoy scrubbing baking sheets!
Storage and Serving Suggestions:
These are best enjoyed the same day (like, within hours if possible!). But if you must store them, keep them in an airtight container at room temperature for up to 2 days. Pro tip: 10 seconds in the microwave brings back that fresh-baked magic!
Serve them:
- Warm with coffee (breakfast of champions!)
- With a scoop of vanilla ice cream
- Alongside hot apple cider
- As is – because perfection needs no accompaniment!
Want to make them extra special? Drizzle with caramel sauce or dust with cinnamon sugar instead of the glaze. I won’t tell if you don’t!

