
Walking tacos are one of those “everybody’s happy” meals. Crunchy chips, seasoned meat, melty cheese, and whatever toppings you love piled high. It’s casual, filling, and never feels like a chore to eat.
This casserole takes that same idea and makes it easier to serve to a group. No individual chip bags. No balancing acts. Just one pan that hits the table hot, bubbly, and ready for scooping.
The best part is how it fits real life. You can cook the meat mixture ahead of time. You can stretch it with beans and corn. You can keep it mild for picky eaters or turn it up with jalapeños and hot sauce on the side. And the topping bar moment? That’s where everyone gets exactly what they want without you doing extra work.
The only thing to respect is the crunch. Chips go soft if you bury them too early. So we layer them in a way that keeps texture where it matters, and we bake just long enough to melt the cheese and bring everything together.
It’s messy in the best way. Comfort food with a little attitude.
Why You’ll Love This Recipe
-
One pan, big payoff. Brown the beef, stir the sauce, layer, bake. Done.
-
That perfect contrast. Warm, saucy filling + crunchy chips + melted cheese.
-
Feeds a crowd without drama. Great for family dinner, potlucks, and game day.
-
Topping bar friendly. Everyone builds their own bowl the way they like it.
-
Flexible and forgiving. Swap the meat, add beans, use different chips, adjust the heat.
Frequently Asked Questions (FAQs)
1) What chips work best for walking taco casserole?
Corn chips and sturdy tortilla chips work best because they hold up under heat. Fritos-style corn chips give the most classic “walking taco” flavor, while thick tortilla chips add bigger crunch. Avoid thin restaurant-style chips—they break down fast.
2) How do I keep the chips from getting soggy?
Don’t mix chips into the filling. Layer them and bake briefly, just until the cheese melts. Also, serve it right after baking and let people add cold toppings (lettuce, tomatoes) to their own bowls instead of baking them into the dish.
3) Can I make this ahead of time?
Yes. Make the meat mixture up to 2 days ahead and store it in the fridge. When you’re ready to bake, warm the mixture slightly so it spreads easily, then layer with chips and cheese and bake.
4) Is this spicy?
Not unless you make it spicy. Use mild taco seasoning and mild diced chiles for a gentle version. For heat, add jalapeños, hot Rotel-style tomatoes, a pinch of cayenne, or pepper jack cheese.
Ingredients
I’ve included notes and descriptions below for each ingredient in this recipe. For the exact ingredient measurements, jump to the recipe card at the bottom of this post.
Ground beef
I like 80/20 ground beef for flavor. If you prefer a lighter version, ground turkey works great. If you use very lean meat, add a tablespoon of oil so it doesn’t cook up dry.
Onion + garlic
These build the base. Nothing fancy. Just enough to make the meat taste seasoned all the way through, not just “taco seasoning dumped in.”
Taco seasoning
Homemade or store-bought both work. If your seasoning packet is salty, go easy on extra salt until the end.
Tomato + green chiles (canned)
This adds a little zip and keeps the filling saucy. If you’re cooking for sensitive eaters, choose mild. If you love heat, choose hot.
Beans
Black beans or pinto beans both fit. Beans stretch the casserole, add protein, and make it more filling.
Corn
Frozen corn is easy. Canned works too—just drain it well.
Cream cheese or sour cream (optional)
This is optional, but it gives the filling a creamy, scoopable texture that feels extra comforting. Cream cheese makes it richer. Sour cream makes it lighter and tangy.
Salsa (or tomato sauce)
A little salsa helps the mixture stay saucy and flavorful. If you want a smoother texture, use tomato sauce and add a pinch more seasoning.
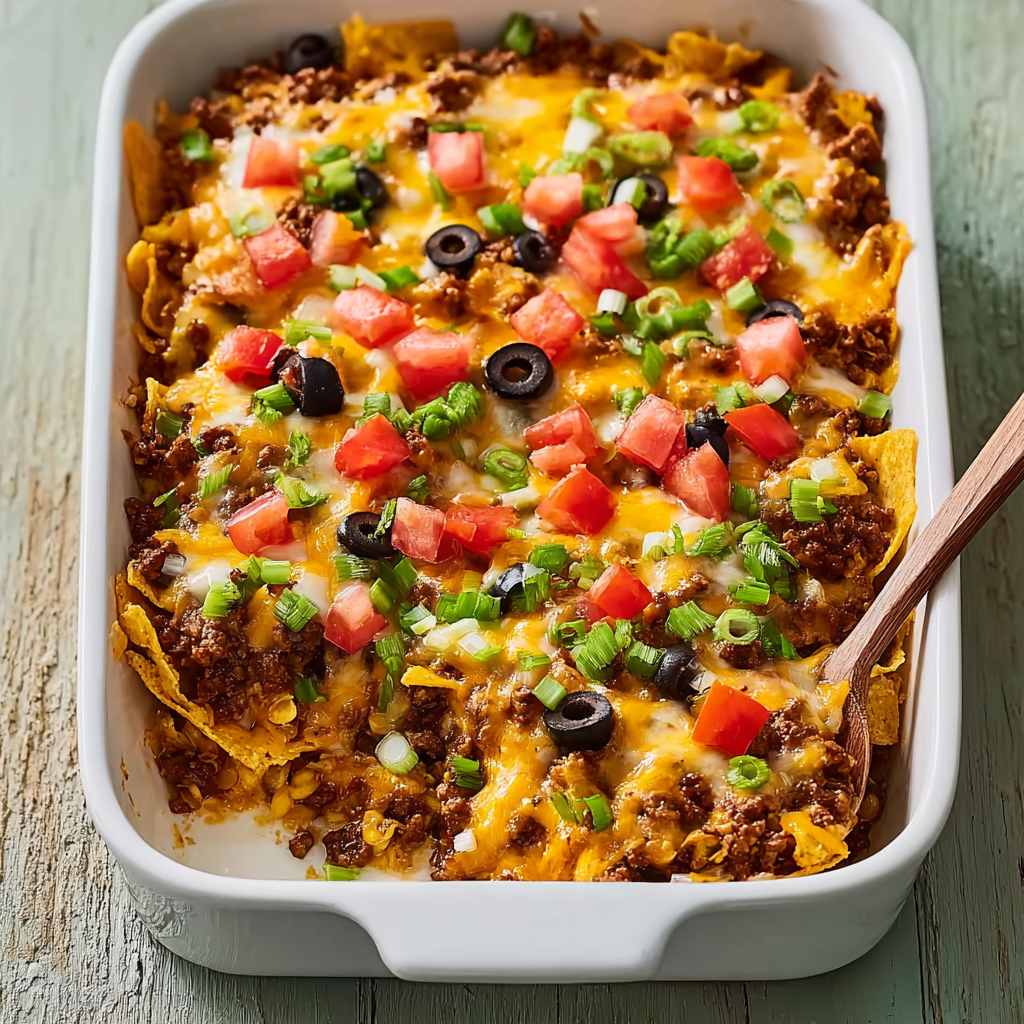
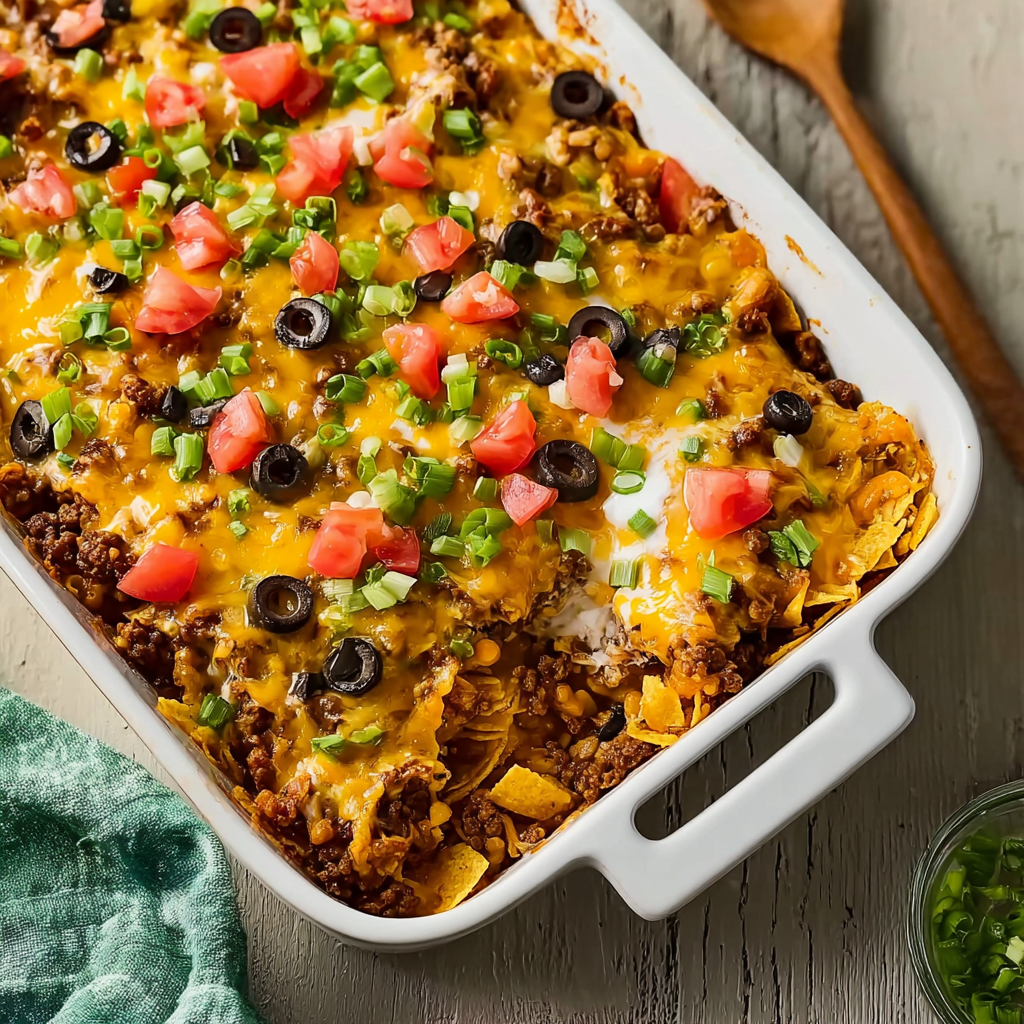
Cheese
Cheddar is classic. Monterey Jack melts beautifully. Pepper jack adds heat. I like a mix for best flavor and melt.
Chips
Corn chips or thick tortilla chips. You’ll crush some for the base, then sprinkle more on top right before baking so you keep crunch.
Optional toppings
Shredded lettuce, diced tomatoes, sliced olives, jalapeños, avocado, cilantro, green onions, sour cream, salsa, hot sauce… keep it simple or go big.
Instructions
For the full detailed recipe instructions and ingredient quantities, scroll to the recipe card at the bottom of this post.
1) Preheat and prep
Preheat the oven to 375°F.
Lightly grease a 9×13-inch baking dish. If you want easy cleanup, line it with parchment, then grease lightly.
2) Brown the beef
Place a large skillet on the stove over medium-high heat.
Add the ground beef and cook 6–8 minutes, breaking it up as it browns. Drain excess grease if needed, leaving a little behind for flavor.
3) Add onion and garlic
Add the diced onion to the beef and cook 3–4 minutes, until softened.
Add the garlic and cook 30 seconds, just until it smells fragrant.
4) Season and build the filling
Stir in taco seasoning and cook 30 seconds. This wakes up the spices.
Add the canned tomatoes with green chiles, beans, corn, and salsa. Stir.
Let it simmer 4–5 minutes so it thickens slightly and the flavors come together.
If using cream cheese, add it now and stir until melted and creamy.
Taste and adjust:
-
more salt, if needed
-
a squeeze of lime, if you want it brighter
-
a pinch of cayenne, if you want heat
5) Layer the casserole
Add a layer of crushed chips to the bottom of the baking dish. Don’t powder them—just crush into bite-size pieces.
Spoon the hot beef mixture evenly over the chips.
Sprinkle cheese over the top.
Add a light layer of chips on top (a handful is enough). Then sprinkle a little more cheese over the chips. This helps the top chips cling and crisp.
6) Bake
Bake uncovered for 12–15 minutes, just until the cheese is melted and bubbly.
If you want extra color, broil on low for 1–2 minutes at the end. Watch closely.
7) Rest, scoop, top, eat
Let the casserole rest 5–10 minutes so it settles slightly.
Scoop into bowls and let everyone add toppings. Cold toppings on a hot casserole are the whole point.
What makes this casserole work
This recipe is simple, but the order matters.
You brown the meat properly, so it tastes rich instead of boiled. You cook the onion until it softens, so the base tastes sweet and savory, not sharp. You simmer the mixture so it thickens—because watery filling ruins chip crunch fast.
Then you layer chips in a way that gives you both comfort and texture:
-
chips underneath to give structure
-
cheese in the middle to glue everything together
-
fresh chips on top so there’s still crunch when it hits the table
It’s not complicated. It’s just smart.
Best chips to use
Chips are the identity here, so choose well.
Corn chips (classic)
If you want the most “walking taco” flavor, this is it. They hold up under heat and keep that toasted corn taste even after baking.
Thick tortilla chips
Great crunch. Bigger chips mean a more “nacho casserole” feel. They’re sturdy, which helps.
Flavored chips
Chili-lime or spicy chips can be fun, but they can also fight with taco seasoning. If you try them, keep the seasoning mild and let the chips do some of the work.
Chips to avoid
Thin chips. They break down fast. You end up with crumbs instead of scoops.
Topping ideas that actually fit
Walking tacos are all about toppings, but not every topping belongs inside the bake. Some things should stay cold and fresh.
Best cold toppings
-
shredded lettuce
-
diced tomatoes
-
sour cream
-
guacamole or avocado
-
salsa or pico de gallo
-
cilantro
-
green onions
These keep the bowl bright and fresh.
Best warm add-ins (stir into the filling)
-
beans
-
corn
-
sautéed bell peppers
-
diced green chiles
-
a little extra cheese
Warm add-ins should be things that don’t turn watery.
Crunch add-ons
-
extra chips on top after baking
-
crushed chips sprinkled over each bowl
-
toasted pepitas (surprisingly good)
If you want maximum crunch, serve extra chips on the side and let people pile them on.
Recipe tips
Keep the filling thick
If the mixture looks thin in the skillet, simmer it a few minutes longer. A thicker filling keeps the casserole scoopable and protects chip texture.
Don’t bake too long
This isn’t lasagna. You’re not baking to “cook” the dish. You’re baking to melt cheese and warm the layers together.
Long bake = soft chips.
Use cheese in two spots
Cheese in the middle makes the scoop cohesive. Cheese on top gives that melty finish everyone expects.
Season after simmering
Tomatoes and beans change the salt balance. Taste after everything is in the pan, not before.
Make it kid-friendly without making it bland
Use mild seasoning, keep toppings on the side, and let each bowl be customized. That way the base stays tasty.
Variations
Chicken version
Swap ground beef for ground chicken or shredded cooked chicken. Add an extra tablespoon of oil if using ground chicken so it stays juicy.
Turkey version
Ground turkey works great. Add 1 tablespoon olive oil and don’t overcook it. Turkey dries out faster than beef.
Extra veggie version
Add sautéed bell peppers and zucchini to the meat mixture. Cook them first so they don’t release water into the casserole.
Creamy “queso” vibe
Use cream cheese and swap half the shredded cheese for Velveeta-style melting cheese if you like that ultra-creamy finish.
Spicy version
Use hot diced tomatoes with chiles, pepper jack cheese, and sliced jalapeños on top. Add hot sauce at serving.
Crunch-max version
Bake the casserole without top chips, then add fresh chips on top right when it comes out of the oven. More crunch, less softness.
What to serve with it
This casserole is filling, so sides should be fresh and simple.
-
a green salad with lime dressing
-
sliced cucumbers with salt and lemon
-
fruit salad
-
roasted corn or street-corn style salad
-
simple black bean salad
If you’re feeding a crowd, set out toppings and one big salad. That’s enough.
Storage and reheating
Refrigerator
Store leftovers in an airtight container for up to 4 days.
The chips will soften over time. Still delicious, just less crunchy.
Reheat in the oven (best)
Place leftovers in a baking dish, cover loosely with foil, and reheat at 350°F for 15–20 minutes.
Add fresh chips on top after reheating to bring back crunch.
Reheat in the microwave (fast)
Microwave portions in 45-second bursts until hot.
Again, add fresh chips after reheating if you want texture.
Freezing and make-ahead
Make-ahead (best option)
Make the beef mixture up to 2 days ahead and refrigerate. When ready, warm it slightly, layer with chips and cheese, and bake.
Freezing (not my favorite, but doable)
Freeze the meat mixture only for up to 2 months. Thaw in the fridge overnight, warm on the stove, then assemble fresh with chips and cheese.
Freezing a fully assembled casserole works, but chips get very soft. If texture matters to you, freeze the filling only.

Walking Taco Casserole
Ingredients
- 2 pounds ground beef or turkey
- 1 medium onion diced
- 3 cloves garlic minced
- 2 tablespoons taco seasoning or 1 packet
- 1 can 10 oz diced tomatoes with green chiles
- 1 can 15 oz black beans, drained and rinsed
- 1 ½ cups frozen corn or 1 can drained
- ½ cup salsa mild or hot
- 4 ounces cream cheese cubed (optional)
- 3 cups shredded cheese cheddar, Monterey Jack, or a mix, divided
- 6 –7 cups corn chips or thick tortilla chips lightly crushed (save some whole for topping)
- Optional toppings: shredded lettuce diced tomatoes, sour cream, jalapeños, avocado, cilantro, green onions, salsa, hot sauce.
Instructions
- Preheat oven to 375°F and grease a 9x13-inch baking dish.
- Brown ground beef in a skillet over medium-high heat 6–8 minutes; drain excess grease.
- Add onion and cook 3–4 minutes. Add garlic 30 seconds.
- Stir in taco seasoning. Add tomatoes with chiles, beans, corn, and salsa. Simmer 4–5 minutes. Stir in cream cheese if using.
- Layer crushed chips in the baking dish. Spoon beef mixture over chips. Top with 2 cups cheese. Add a light layer of chips, then top with remaining 1 cup cheese.
- Bake uncovered 12–15 minutes until cheese is melted and bubbly.
- Rest 5–10 minutes. Scoop into bowls and add toppings.
Notes


Yummy