
Comfort food with a caramelized twist that’ll steal the spotlight at any table!
Welcome to My Cozy Kitchen!
Oh friend, let me tell you—this Sweet Onion Casserole has been a sleeper hit in my house for years, and I can’t believe I haven’t shared it with you yet! It all started one summer evening when we had more Vidalia onions than we knew what to do with (thanks, farmer’s market bounty). I needed something quick, comforting, and just a little different from our usual sides—and boom, this little beauty was born.
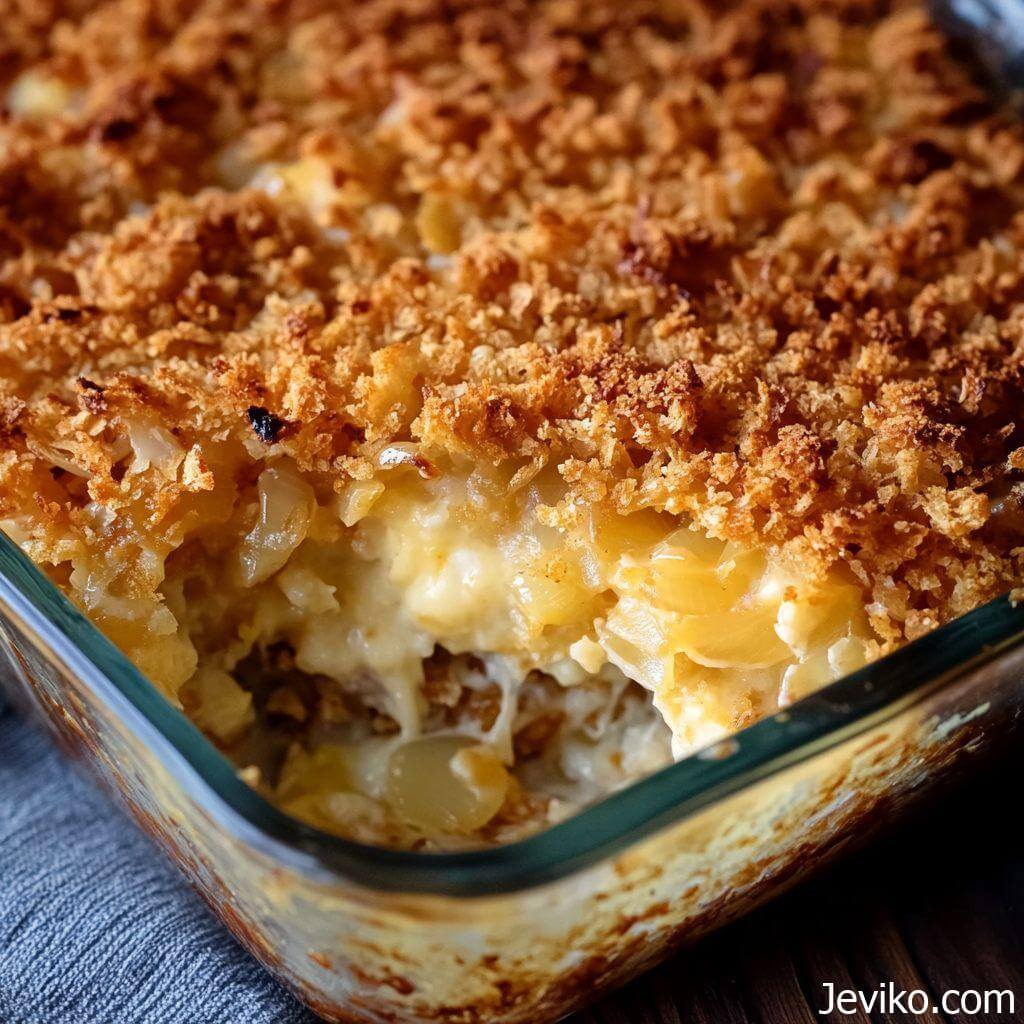
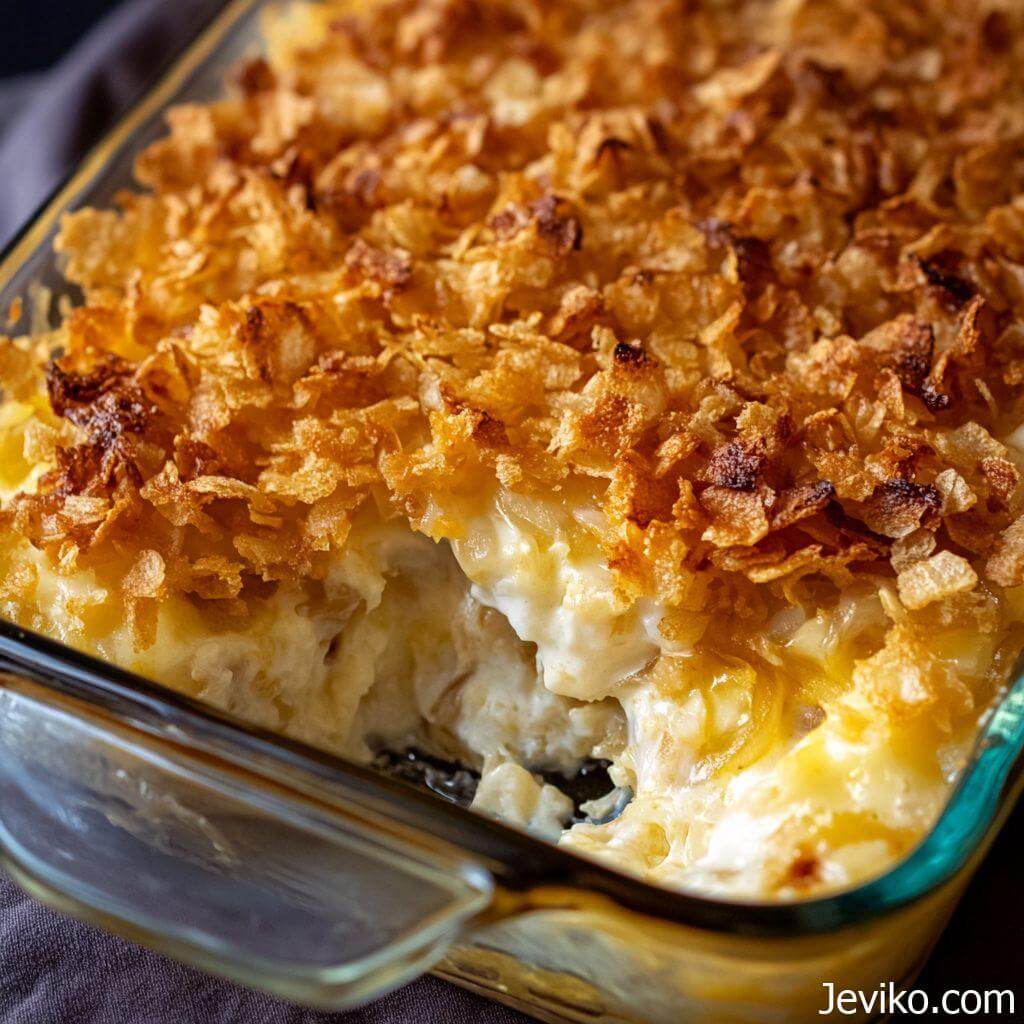
The scent alone is worth making it. Imagine sweet onions slowly caramelizing in butter, then blanketed in a rich, creamy sauce and baked under a golden, cheesy crust with a crisp cracker topping. The kind of dish that has you sneaking spoonfuls from the corner while everyone’s still at the table. Yes, I’ve done it—no regrets.
This casserole is warm, savory-sweet, and completely comforting—the kind of dish that doesn’t scream for attention but always ends up being the first one scraped clean.
Why You’ll Love This Sweet Onion Casserole:
- Sweet & Savory Perfection – The natural sugars in the onions caramelize beautifully, balancing out the creaminess and the sharpness from the cheese.
- Simple Ingredients, Big Flavor – No fancy tricks here. Just honest-to-goodness pantry staples turned into something magical.
- Versatile Side Dish – Perfect with grilled meats in summer or alongside a roast in the fall. It’s timeless.
- Crowd Favorite – I promise someone will ask you for the recipe.
Can I make this ahead of time?
Yes, and it works beautifully as a make-ahead dish—perfect for holidays or when you’re hosting and want to keep your kitchen chaos to a minimum! Here’s how I usually do it:
Prepare the casserole up until the point where you’d add the cracker topping. Go ahead and caramelize the onions, mix everything together, and spread it into your baking dish. Then cover the dish tightly with plastic wrap or foil and pop it in the fridge. It’ll keep just fine for up to 24 hours.
When you’re ready to bake, take it out of the fridge about 30 minutes ahead of time so it can lose some of the chill. (Putting a super cold dish straight into a hot oven can sometimes cause uneven baking or even crack glass bakeware—learned that the hard way.) Right before baking, add your buttery cracker topping so it stays nice and crispy. Then bake as usual.
Can I freeze it?
I totally understand the desire to batch-cook or save leftovers, but this isn’t one of those freezer-friendly casseroles, sadly. Because the base is so creamy and the onions are already quite soft, freezing and thawing tends to make it a little too watery and mushy. The cracker topping also loses its crunch after being frozen.
If you absolutely need to freeze it, you can try freezing it before baking and without the topping—but be aware that the texture won’t be quite the same. I’d recommend enjoying it fresh or storing it in the fridge for up to 4 days instead. It reheats beautifully!
Can I use Greek yogurt instead of sour cream?
Yes, you sure can! If you’re looking for a slightly lighter version or just don’t have sour cream on hand, full-fat plain Greek yogurt is a great substitute. It gives the casserole that same creamy body, with a bit more tang.
A few things to keep in mind:
Stick to full-fat Greek yogurt for best texture. Non-fat versions tend to be too watery and can cause the casserole to break or become runny.
Expect a slightly sharper flavor profile—some folks actually prefer it that way!
If you’re worried about it being too tangy, you can do a half-and-half mix of Greek yogurt and mayo to soften the flavor.
Ingredients:
Here’s everything you need to bring this dreamy casserole to life:
- 4 large Vidalia onions (or any sweet onion), thinly sliced
- They shrink down, so don’t skimp!
- 3 tablespoons unsalted butter
- For caramelizing and adding rich depth.
- 1/2 teaspoon kosher salt
- Just enough to balance the sweetness.
- 1/2 teaspoon black pepper
- Adds a little warmth.
- 1/4 teaspoon garlic powder
- Optional, but I love the extra layer of flavor.
- 1/2 cup sour cream
- Makes it oh-so-creamy.
- 1/2 cup mayonnaise
- Trust me on this. It adds richness and helps bind everything together.
- 1 cup shredded sharp cheddar cheese
- For that gooey, cheesy comfort.
- 1 sleeve buttery round crackers (like Ritz), crushed
- That perfect crispy, golden topping.
- 2 tablespoons melted butter
- Because everything’s better with butter.
Step-by-Step: Let’s Make It Together!
1-Preheat and prep
Set your oven to 350°F and lightly grease a 9×9-inch baking dish (or any medium casserole dish you have).
2-Caramelize those onions
In a large skillet, melt the butter over medium heat. Add your thinly sliced onions, sprinkle in the salt, pepper, and garlic powder. Let them cook down slowly—this takes about 20-25 minutes. Stir occasionally. You’re looking for a deep golden color and that irresistible sweet aroma. Don’t rush this step—it’s the heart of the dish.
3-Mix the creamy base
In a large bowl, combine sour cream, mayo, and shredded cheddar. Once the onions are golden and slightly cooled, gently stir them into this mixture. It should be thick and glorious.
4-Assemble the casserole
Spoon the onion mixture into your prepared dish, spreading it evenly.
5-Make the topping
Toss the crushed crackers with the melted butter until everything’s coated and happy. Sprinkle it all over the casserole.
6-Bake to golden perfection
Pop it in the oven for 25–30 minutes, until the top is golden brown and the edges are bubbling like a cozy hot tub.
Pro Tips for the Best Sweet Onion Casserole:
- Use sweet onions only – Vidalia, Walla Walla, or Texas Sweets are perfect. Regular yellow onions just don’t have the same magic.
- Low and slow wins the flavor race – Rushing the onions on high heat will burn them before they can caramelize.
- Freshly shredded cheese melts better – Pre-shredded is okay in a pinch, but if you’ve got the time, grate it yourself.
- Add a protein twist – Crumbled bacon or diced ham makes this a full meal. Just mix it in with the onions before baking!
Storage and Serving Suggestions:
Storage: Let any leftovers cool completely, then store them in an airtight container in the fridge for up to 4 days. (Honestly, good luck having leftovers.)
Reheating: Warm it up in the oven at 325°F for about 15 minutes, or microwave individual portions for 60–90 seconds.
Serving Ideas:
- Pairs beautifully with roasted chicken, pork chops, or grilled steak.
- Try it as a side dish for Thanksgiving or Easter—you’ll be shocked how fast it disappears.
- Add a small green salad and turn it into a light supper!


Wonderful!