

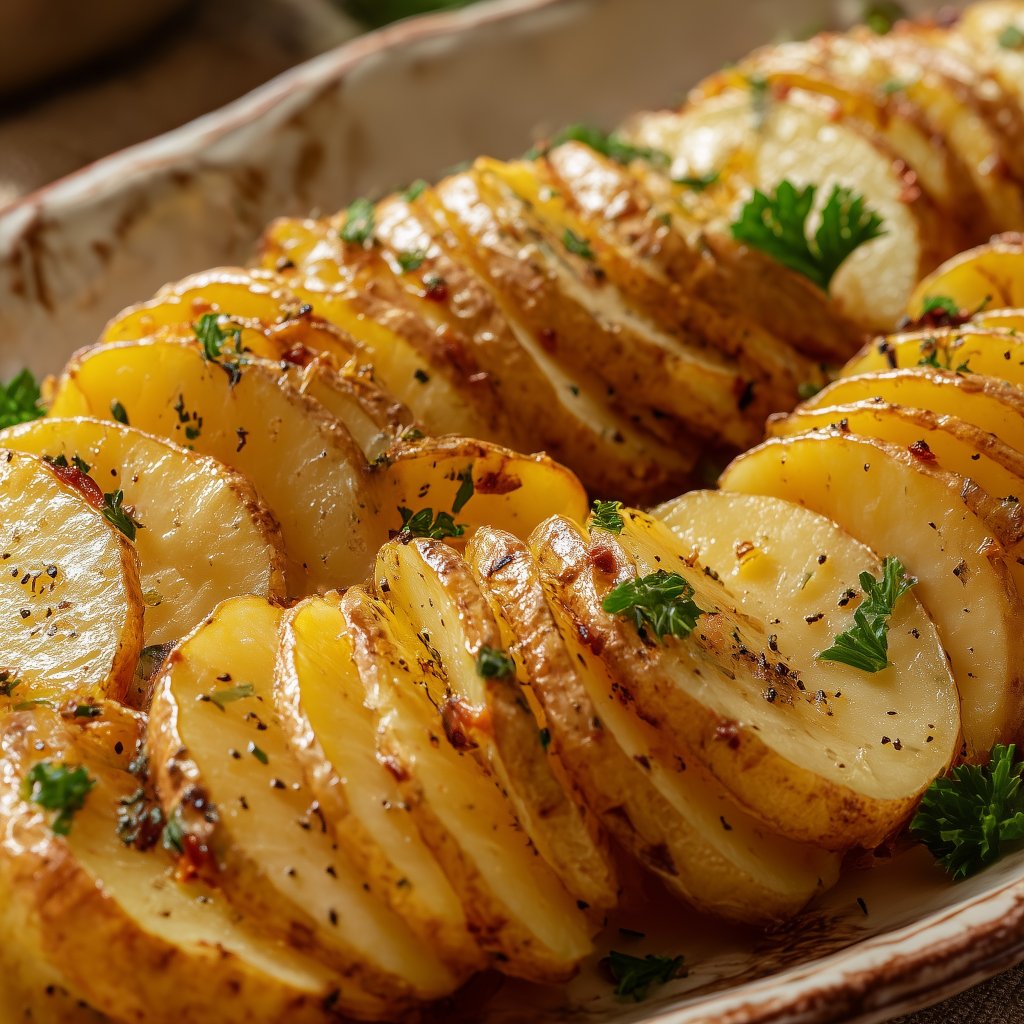
Sliced baked potatoes are what I make when I want that baked-potato comfort, but I also want crispy edges. Not fries. Not a heavy casserole. Just thin potato slices that roast into golden layers with little crunchy tips and a tender middle that still tastes like an actual potato.
They’re simple, but they don’t taste plain. The slices pick up seasoning in every bite. The outside gets browned and salty. The inside stays soft. And when you finish them with a quick garlic-butter drizzle and a shower of parmesan, the whole pan smells like a side dish you’d happily build dinner around.
This recipe is built for real life. It works on a sheet pan. No special bakeware needed. It’s flexible enough to go with burgers, chicken, steak, fish, or a bowl of soup. It’s also one of those dishes that looks like you tried harder than you did, especially when the slices curl and crisp at the edges.
Here’s the one thing that matters most: moisture control. Potatoes carry a lot of water. If you slice them, season them, and throw them straight into the oven while they’re still wet, they’ll roast… but they’ll lean soft instead of crisp. The trick is fast and not complicated. Rinse or soak briefly, then dry them really well. That’s it. After that, hot oven, enough space on the pan, and a flip halfway through.
You’ll end up with sliced potatoes that hit all the right notes—salty, crisp, buttery, and still fluffy where it counts.
Why You’ll Love This Recipe
-
Crispy edges, tender centers. The best combo on a potato pan.
-
Big flavor from basic ingredients. Garlic, butter, parmesan, and a good seasoning blend.
-
Sheet-pan simple. Minimal cleanup, no fussy steps.
-
Easy to switch up. Make them cheesy, herby, spicy, or extra garlicky.
-
Great for feeding a crowd. Double the batch and bake on two pans.
Frequently Asked Questions (FAQs)
1) What potatoes work best for sliced baked potatoes?
Yukon Gold potatoes are my favorite because they get creamy inside and still brown well. Russets also work and can get extra crisp, but they’re a little drier and can break more easily if sliced very thin. Red potatoes are fine too, especially if you like a firmer bite.
2) Do I need a mandoline to slice the potatoes?
No, but it helps. A sharp knife works perfectly. The goal is even thickness so they cook at the same pace. If some slices are paper-thin and others are thick, the thin ones will brown fast while the thick ones stay underdone.
3) How do I keep them from sticking to the pan?
Use parchment paper or a well-oiled pan. Also, don’t try to flip too early. Once the bottoms brown, they naturally release. If you rush it, you’ll tear the slices and lose those crisp edges.
4) Can I make these ahead of time?
You can slice the potatoes a few hours ahead and store them in cold water in the fridge. Dry them extremely well before seasoning and baking. For fully cooked leftovers, reheat in a hot oven or air fryer to bring the crisp back.
Ingredients
Here I explain the best ingredients for this sliced baked potatoes recipe, what each one does, and substitution options. For the exact ingredient measurements, see the recipe card at the bottom of this post.
Potatoes
Use medium potatoes so you get slices that feel like full bites. Tiny potatoes work, but the slices can be too small and cook too fast.
-
Yukon Gold: creamy centers, great flavor
-
Russet: crispier edges, drier inside
-
Red potatoes: firmer texture, still tasty
Olive oil
Oil helps browning and keeps the potatoes from drying out. You don’t need a lot, but you do need enough to lightly coat each slice.
Avocado oil works too.
Butter
Butter is the finishing touch. You can roast with butter, but butter can brown quickly at high heat. I like using oil for roasting, then melted butter at the end for flavor.
Garlic
Fresh garlic can burn if it’s on the pan the whole time. That’s why it goes into the butter at the end. You get the garlic flavor without bitter bits.
If you want a stronger garlic flavor without the risk, garlic powder in the seasoning mix is perfect.
Parmesan cheese
Parmesan adds salty, nutty flavor and encourages browning. Freshly grated melts better, but the shaker-style works if that’s what you have.
Seasoning
This is the base blend I like for classic roasted potato flavor:
-
salt
-
black pepper
-
garlic powder
-
smoked paprika (or regular paprika)
-
a pinch of onion powder (optional)
Fresh herbs (optional)
Parsley is an easy finish. Rosemary or thyme taste amazing too, but use a light hand—those herbs can take over fast.
Optional extras
These are not required, but they’re great when you want to change the vibe:
-
shredded cheddar or Monterey Jack
-
chili flakes or cayenne
-
ranch seasoning
-
lemon zest (for a brighter finish)
-
green onions
Instructions
I’ve included step-by-step directions below to make this recipe easy to follow at home. For the full detailed recipe instructions and ingredient quantities, scroll to the recipe card at the bottom of this post.
Step 1: Preheat the oven and prep the pan
Preheat the oven to 425°F (220°C).
Line a large sheet pan with parchment paper or lightly oil it. If you want stronger browning, use a bare metal pan with oil, but parchment makes flipping easier and keeps cleanup simple.
Step 2: Slice the potatoes evenly
Scrub the potatoes clean. You can peel them or leave the skins on—both work.
Slice into ⅛-inch to ¼-inch rounds. Thinner slices get crispier. Slightly thicker slices stay more tender in the middle. Either way is good. Just keep them consistent.
Step 3: Rinse or soak briefly, then dry really well
Place the slices in a bowl of cold water and swish them around. This knocks off surface starch, which helps crisping.
Drain the water. Spread the slices on a clean kitchen towel and pat dry. Then pat again. You want them dry enough that they don’t look shiny or wet.
This step is where most “why aren’t these crispy?” problems start. Dry slices roast. Wet slices steam.
Step 4: Season the slices
Add the potatoes to a large bowl.
Drizzle with olive oil and sprinkle with salt, pepper, garlic powder, and paprika. Toss until every slice is lightly coated.
Add parmesan and toss again. The parmesan should cling to the oil.
Step 5: Arrange on the sheet pan
Lay the slices in a single layer if you want maximum crisp. A tiny bit of overlap is fine, but heavy overlap traps steam and softens the texture.
If you’re making a big batch, use two pans. Crowding is the quickest way to lose crisp edges.
Step 6: Bake, flip, and finish
Bake for 18–22 minutes, then flip the slices.
Bake another 12–18 minutes, or until the edges are golden brown and crisp.
Every oven is different, and slice thickness matters. Watch the color. When the edges look browned and the centers look tender, you’re there.
Step 7: Add garlic butter and herbs
While the potatoes are hot, melt butter and stir in minced garlic. Let it sit for 30 seconds so the garlic softens.
Drizzle over the potatoes. Toss gently on the pan.
Finish with chopped parsley and an extra pinch of salt if needed.
Serve immediately.
Best Potatoes to Use
If you’re choosing potatoes just for this recipe, here’s how I’d decide.
Yukon Gold
This is the “best all-around” choice. The slices bake up tender with a buttery potato flavor, and they still brown nicely. Great if you want a soft center and crisp edges.
Russet
Russets can get extra crisp, which is great, but they can also feel a little drier inside. If you love crunch, they’re a solid pick.
Red potatoes
They hold their shape well and have a slightly waxier bite. The crisp factor can be a little lower than russets, but they’re still delicious, especially with garlic butter.
If you’re cooking for picky eaters, Yukon Gold is usually the safest choice.
How Thin to Slice Them
Thickness changes everything.
-
⅛-inch: crispier, faster cooking, more “chip-like” edges
-
¼-inch: tender center, sturdy slices, still crisp around the edges
-
Thicker than ¼-inch: starts moving toward “roasted potato coins,” which are tasty, but less crisp overall
If you’re slicing by hand and your thickness varies a little, aim closer to ¼-inch. It’s more forgiving.
If you’re using a mandoline and you can get consistent thin slices, go for ⅛-inch and enjoy the crunch.
How to Get Them Extra Crispy
If your dream is maximum crunch, these tips help.
Dry the slices aggressively
This is the main thing. Don’t rush it. If the slices feel damp, they’re not ready.
Use enough oil
Not a deep-fry amount. Just enough to coat. Dry spots bake up pale and tough.
Give them space
Crowding traps steam. Steam is the enemy of crisp.
Bake hot
425°F is the sweet spot. Lower temps can cook the potatoes through, but the edges won’t crisp as well.
Flip halfway
Flipping helps both sides brown and keeps the bottom from getting soft.
Finish with a quick broil (optional)
If you want extra color on top, broil for 1–2 minutes at the end. Stay close. Thin slices go from golden to overdone fast.
Seasoning Ideas and Variations
This recipe is a great base. Here are ways to change it without turning it into a totally different project.
Cheesy baked potato slices
Bake as written. During the last 5 minutes, sprinkle with shredded cheddar or Monterey Jack. Let it melt and bubble.
Finish with green onions if you want the full loaded vibe.
Ranch-style
Swap the seasoning blend for ranch seasoning (start with 1–2 tablespoons depending on your salt preference). Add parmesan as usual.
Serve with a cool dip.
Spicy version
Add chili flakes or a pinch of cayenne to the seasoning. Finish with a squeeze of lime if you like a brighter heat.
Herb and lemon
Use thyme or rosemary (lightly). Finish with lemon zest and parsley. This version is excellent with chicken or fish.
Taco-style
Use taco seasoning instead of paprika/garlic powder, and finish with a little lime juice and chopped cilantro. Great as a side for taco night.
Garlic-lover version
Add garlic powder to the seasoning, then still finish with garlic butter. Two layers of garlic, but it doesn’t taste harsh because the roasted potato softens it.
Toppings and Dipping Sauces
These potatoes can go straight to the plate, but they also love a dip.
Classic dips
-
sour cream with chives
-
plain Greek yogurt with a pinch of salt and lemon
-
ranch dressing
-
chipotle mayo
-
garlic aioli
Toppings that work well
-
chopped green onions
-
crispy onions (if you want crunch on crunch)
-
shredded cheese
-
a spoon of salsa
-
chopped pickled jalapeños
-
fresh herbs
If you’re serving these at a gathering, put out two dips. One creamy, one spicy. People will mix and match.
What to Serve With Sliced Baked Potatoes
They’re flexible, which is part of the appeal.
With grilled or roasted meats
-
steak bites
-
roasted chicken thighs
-
burgers or sliders
-
pork chops
-
meatloaf
With lighter dinners
-
baked fish
-
big salads
-
soup and sandwich nights
-
veggie bowls
With breakfast or brunch
-
fried or scrambled eggs
-
breakfast sausage
-
sautéed spinach
-
fresh fruit on the side
If you’re building a full plate, add something fresh and crunchy. A simple salad or sliced cucumbers helps balance the richness of butter and parmesan.
Make-Ahead Tips
If you want to get a head start, you can.
Slice and soak ahead
Slice the potatoes and keep them in cold water in the fridge for up to 6 hours.
When you’re ready to cook, drain, rinse once more, and dry extremely well before seasoning. Wet potatoes won’t crisp, even in a hot oven.
Seasoning ahead
I don’t recommend seasoning the slices early unless you’re baking right away. Salt pulls moisture out, and moisture fights crispness. Season close to bake time.
Storage and Reheating
Refrigerator
Store leftovers in an airtight container for up to 4 days.
Best way to reheat (for crisp edges)
-
Oven: 425°F for 8–12 minutes on a sheet pan
-
Air fryer: 380°F for 5–7 minutes, shaking once
Microwave
It will warm them, but it softens the edges. If crisp texture matters, use oven or air fryer.
Freezing Notes
You can freeze them, but they won’t be exactly the same. The texture tends to soften a bit after thawing.
If you want to freeze:
-
Cool completely.
-
Freeze in a single layer on a sheet pan.
-
Transfer to a freezer-safe bag.
-
Reheat from frozen in a hot oven (425°F) until crisped again.
They’re still tasty. Just expect “roasted potato” texture more than “crispy edge” texture.
Troubleshooting
“They’re not crispy.”
Most often: the slices weren’t dry enough, the pan was crowded, or the oven wasn’t hot. Dry more, space out, bake hot.
“Some burned and some are pale.”
Uneven slice thickness. Try to keep slices consistent. A mandoline helps, but careful knife work can do it too.
“They stuck to the pan.”
Not enough oil, or you tried to flip too early. Let them brown first. Once browned, they release more easily.
“They’re crisp but too dry.”
Slice slightly thicker next time (closer to ¼-inch). Also, don’t skip the butter finish—fat helps the texture feel rich instead of dry.
Recipe Notes
-
Dry potatoes = crisp potatoes. It’s the step that pays you back.
-
If you like extra browning, use a dark metal sheet pan and skip parchment (oil the pan well).
-
Parmesan browns quickly. If your oven runs hot, add parmesan halfway through baking instead of at the start.
-
Finish seasoning after baking if needed. Different parmesan brands vary in saltiness.
Sliced Baked Potatoes
Ingredients
- 2 ½ pounds Yukon Gold potatoes or russet, scrubbed clean
- 3 tablespoons olive oil
- 1 ½ teaspoons salt plus more to taste
- 1 teaspoon black pepper
- 1 ½ teaspoons garlic powder
- 1 teaspoon smoked paprika or regular paprika
- ½ teaspoon onion powder optional
- ½ cup grated parmesan cheese
- 3 tablespoons unsalted butter melted
- 3 garlic cloves minced
- 2 tablespoons chopped fresh parsley optional
- Optional add-ons: shredded cheddar chili flakes, ranch seasoning, green onions, lemon zest
Instructions
- Preheat the oven to 425°F (220°C). Line a sheet pan with parchment paper or lightly oil it.
- Slice the potatoes into ⅛-inch to ¼-inch rounds.
- Rinse or soak the slices in cold water for 2–3 minutes, then drain. Pat very dry with a clean towel.
- Toss potatoes with olive oil, salt, pepper, garlic powder, paprika, and onion powder (optional).
- Toss in parmesan until it clings to the slices.
- Arrange slices on the sheet pan in a mostly single layer (light overlap is okay).
- Bake 18–22 minutes, flip, then bake 12–18 minutes more until golden and crisp at the edges.
- Stir minced garlic into melted butter. Drizzle over hot potatoes and toss gently.
- Finish with parsley and serve immediately.
Notes


