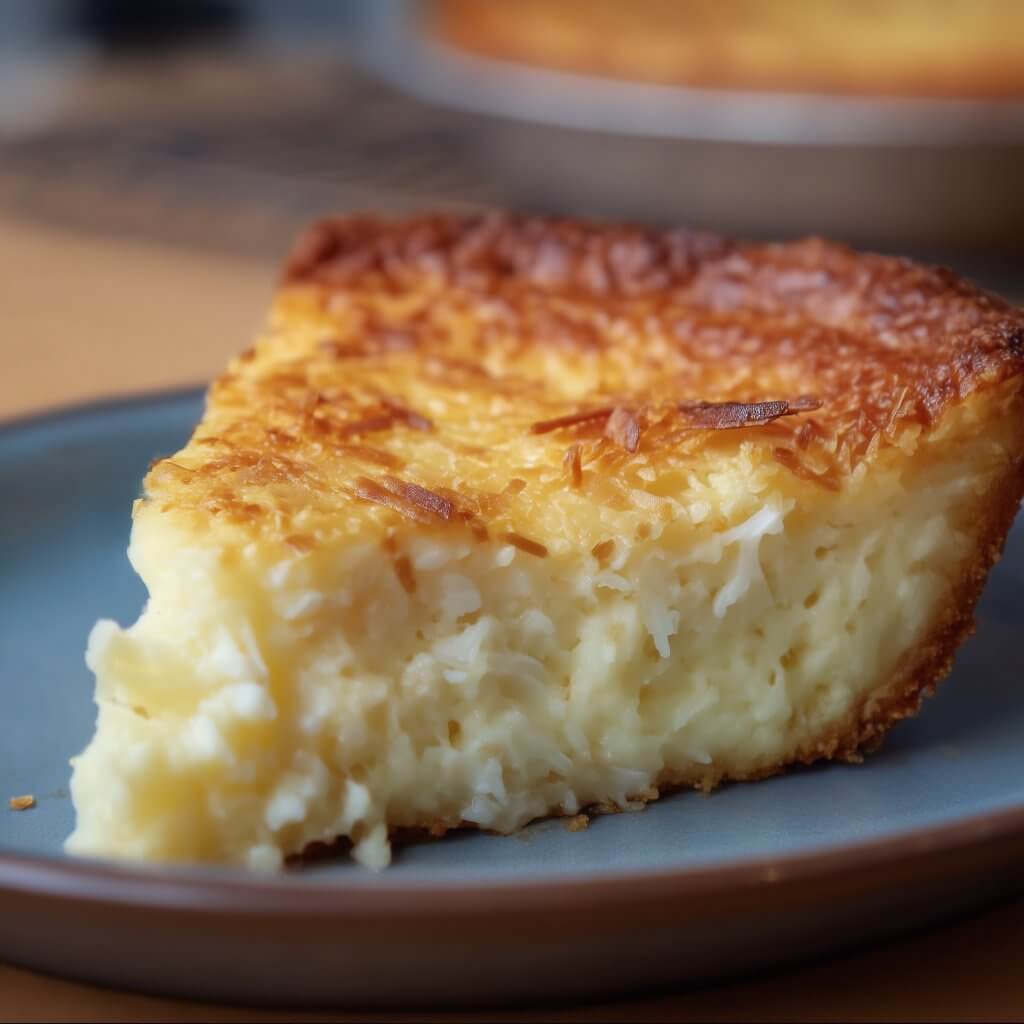
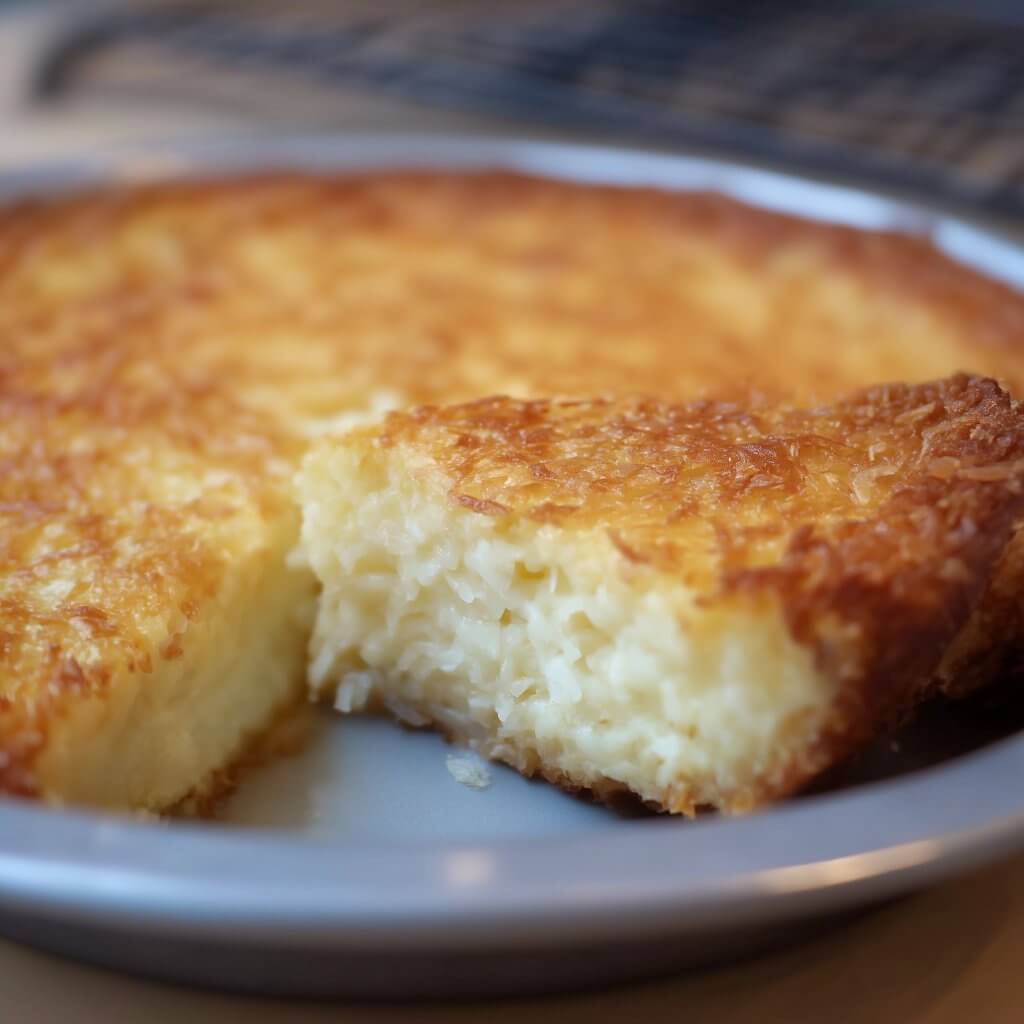
Impossible Coconut Pie is the kind of dessert that looks like you fussed… but it’s really just a quick batter, one bowl, and a pie plate. While it bakes, it separates into dreamy layers all on its own. A lightly golden top. A soft, custardy center. And a sweet coconut layer that gives you that “crust-like” bite without rolling dough.
It’s the perfect pie for potlucks, holiday tables, and anytime you want something classic and comforting without pulling out the mixer and making a mess.
If you love coconut custard pie, this one’s going to feel familiar. Just easier.
Why you’ll want this recipe
It’s truly simple. One bowl, a whisk, and ingredients you probably already have.
No crust to roll. The batter bakes into layers, so you still get that pie experience without the extra step.
The texture is the best part. Soft custard, chewy coconut, and a lightly set base that slices clean.
It’s make-ahead friendly. This pie actually improves after chilling, which makes it great for planning ahead.
It’s flexible. Sweetened or unsweetened coconut, dairy swaps, gluten-free baking mix options, fun flavor twists. You’ve got choices.
And if you’ve ever made a custard pie that turned out watery, cracked, or rubbery… don’t worry. This recipe is forgiving, and I’ll walk you through the small details that make it set up perfectly.
Frequently asked questions
Why is it called “impossible” coconut pie?
Because it bakes into layers that look like they shouldn’t happen without effort. You pour in one batter, but it comes out with a custard center and a coconut layer that feels like a crust. It’s not magic. It’s just how the ingredients settle and bake.
Do I have to use Bisquick?
No. A baking mix is traditional, but you can also use a homemade baking mix (I include an easy swap in the ingredients section). If you prefer a flour + baking powder version, that works too.
Can I use unsweetened coconut?
Yes. The pie will be a little less sweet and the coconut flavor will taste more “pure.” If you want the sweetness closer to the classic version, add 2–3 extra tablespoons of sugar.
Can I use canned coconut milk?
You can, but the texture changes. Canned coconut milk makes the pie richer and slightly denser. It’s delicious, just different. If you do this, use full-fat canned coconut milk and whisk it well before measuring (it separates in the can).
How do I know it’s done?
The edges should look set, and the center should have a gentle jiggle—like set gelatin, not like liquid. If you insert a knife about 1 inch from the center, it should come out mostly clean. A little moisture is fine. It keeps setting as it cools.
Why did my pie crack?
Usually from baking a little too long or baking at too high of a temperature. Custard doesn’t love intense heat. Don’t stress, though. It still tastes great, and whipped topping covers everything.
Can I double the recipe?
Not in one pie plate. But you can make two pies side by side. If you’re baking two at once, rotate the pans halfway through for even baking.
Does it need to be refrigerated?
Yes. Once cooled, store it in the fridge. The custard stays safe and the slices get cleaner after chilling.
Ingredients
Here I explain the best ingredients for this impossible coconut pie, what each one does, and substitution options. For the exact ingredient measurements, jump to the recipe card at the bottom of this post.
The basics
Eggs
Eggs set the custard and give the pie structure. Room-temperature eggs blend more smoothly, but cold eggs still work.
Milk
This is your custard base. Whole milk gives the best classic texture. 2% works too. Half-and-half makes it richer.
Butter
Melted butter adds flavor and helps the pie bake into soft, tender layers. Let it cool for a minute before whisking it in so it doesn’t scramble the eggs.
Sugar
Sweetens the custard and balances the coconut. Granulated sugar is the classic choice.
Vanilla extract
Rounds out the flavor and keeps the pie from tasting one-note. Coconut + vanilla is a perfect combo.
Salt
A small amount makes the sweetness taste cleaner and brings out coconut flavor.
The “impossible” part
Baking mix (Bisquick-style)
This is what helps the batter set and form layers. It also gives the pie a light structure that feels slightly “crust-like” without being bready.
No baking mix? Use this easy substitute for the amount needed in the recipe card:
-
all-purpose flour + baking powder + a pinch of salt
(It works well and keeps the texture very close.)
The star
Shredded coconut
Sweetened shredded coconut is the classic version. It gives you chewy texture and that sweet coconut bite that people expect.
Options that work:
-
Sweetened shredded coconut: classic, slightly chewy, sweeter
-
Unsweetened shredded coconut: less sweet, stronger coconut flavor
-
Flaked coconut: larger pieces, more texture (still good, just chunkier)
Avoid finely shredded “desiccated” coconut if you can. It can drink up too much liquid and make the pie feel dry.
What makes this pie “impossible”
This is worth explaining once, because it helps you trust the process.
You’re pouring in a thin batter. It won’t look like a pie filling at first. And that’s normal.
As it bakes:
-
the eggs set into a custard
-
the coconut naturally rises and toasts lightly on top
-
the baking mix settles and gives the base enough structure to slice
So you end up with distinct layers without doing anything fancy. No crust. No blind baking. No separate custard cooking step.
Just bake it and let the oven do its job.
Instructions
For the full detailed recipe instructions, scroll to the recipe card at the bottom of this post.
This is a simple batter-style pie. The biggest keys are: mix until smooth, pour into a well-greased dish, and don’t overbake.
Step 1: Preheat the oven
Preheat the oven to 350°F.
Grease a 9-inch pie plate really well with butter or nonstick spray. Get the sides too. Custard pies like to cling.
Step 2: Mix the batter
In a large bowl, whisk together the eggs and sugar until the mixture looks smooth and slightly lighter.
Whisk in:
-
milk
-
melted butter (slightly cooled)
-
vanilla
-
salt
Then whisk in the baking mix until the batter is smooth. A few tiny lumps are okay, but aim for mostly smooth.
Step 3: Add the coconut
Stir in the shredded coconut.
The batter will look loose. That’s exactly right.
Step 4: Bake
Pour the batter into the greased pie plate.
Bake for 45–55 minutes, or until the edges are set and the center has a gentle jiggle.
If the top is browning too fast, loosely cover with foil for the last 10 minutes.
Step 5: Cool, then chill
Let the pie cool on the counter for at least 30–45 minutes.
For the cleanest slices, refrigerate it for 2–4 hours before serving. The custard firms up and the layers settle beautifully.
How to get clean slices (and avoid a watery pie)
Custard pies are all about timing and temperature.
Don’t rush the cooling.
If you slice too soon, the center can look soft and the pieces won’t hold their shape. Let it cool, then chill.
Use the jiggle test.
The center should jiggle slightly, not slosh. If it looks wet in the middle, it needs more time.
Measure coconut correctly.
If you pack coconut tightly into the measuring cup, you can accidentally add too much. Use a light scoop and level it off.
Grease the dish well.
That “crust-like” bottom releases easier when the pan is properly greased.
Chill before serving.
This pie is good warm, but it slices best cold. If you’re serving for guests, chilling is the move.
Flavor tips that make it taste bakery-level
This pie is simple. Which means small details matter.
Toast the coconut (optional, but so good).
If you have 5 minutes, toast ½ cup of the coconut in a dry skillet until lightly golden, then stir it into the batter with the rest. It deepens the coconut flavor.
Add a tiny almond extract splash.
Just ¼ teaspoon alongside vanilla. It doesn’t taste like almond pie. It adds a warm, nostalgic bakery note.
Finish with a little brightness.
A teaspoon of lemon zest in the batter makes the coconut taste fresher and keeps the sweetness balanced. Not lemony. Just brighter.
Top it simply.
Whipped topping, toasted coconut, and a light dusting of powdered sugar looks classic and clean.
Optional additions and variations
Pineapple coconut pie
Stir ½ cup well-drained crushed pineapple into the batter with the coconut. Drain it very well or the pie can get too soft.
Coconut cream version
Replace ½ cup of the milk with ½ cup half-and-half for a richer custard. You can also add 2 tablespoons of cream cheese (softened) whisked into the batter for a slightly thicker, creamier center.
Chocolate chip coconut pie
Add ½ cup mini chocolate chips. Mini chips work best because they distribute evenly and don’t sink as much.
Lime coconut pie
Add 1 teaspoon lime zest and 1 tablespoon lime juice. The lime lifts the coconut flavor and makes the pie taste a little lighter.
Gluten-free option
Use a gluten-free baking mix that’s meant to replace Bisquick-style baking mix. If you’re using a flour + baking powder swap, use a gluten-free all-purpose blend and add the baking powder as written.
Dairy-free option
Use unsweetened almond milk or oat milk and replace the butter with melted coconut oil. The flavor is fantastic. The texture will be slightly different, but still sliceable and delicious.
Serving ideas
This pie is great all on its own, chilled straight from the fridge. But if you want to make it feel extra special, these toppings work beautifully:
-
whipped topping or whipped cream
-
toasted coconut
-
a dusting of powdered sugar
-
fresh berries on the side
-
a drizzle of caramel sauce (light drizzle, not a flood)
If you’re serving it for a holiday or a potluck, toasted coconut on top makes it look polished without any effort.
Make-ahead tips
This is one of the best make-ahead desserts because it actually benefits from chilling.
Make it the day before.
Bake, cool, refrigerate overnight. The flavor settles and the custard slices even cleaner.
Transport tip.
Chill the pie fully before moving it. A cold custard pie travels much better than a warm one.
If you need to serve it same-day…
Give it at least 2 hours in the fridge. You’ll still get nice slices.
Storage and reheating
Refrigerator: Store covered in the refrigerator for up to 4 days.
Freezer: You can freeze it, but custard pies sometimes change texture slightly after thawing. If you freeze it, wrap slices individually and freeze for up to 2 months. Thaw overnight in the fridge.
Reheating: This pie is usually served chilled. If you want it slightly warm, microwave a slice for 10–15 seconds. Don’t overdo it or it can soften too much.

IMPOSSIBLE COCONUT PIE
Ingredients
- 4 large eggs
- ¾ cup granulated sugar
- 2 cups whole milk or 2%
- ¼ cup unsalted butter melted and slightly cooled
- 1 tablespoon vanilla extract
- ¼ teaspoon salt
- ½ cup baking mix Bisquick-style
- 1 ⅓ cups sweetened shredded coconut
Optional (for extra flavor)
- ¼ teaspoon almond extract
- 1 teaspoon lemon zest
For serving (optional)
- whipped topping or whipped cream
- toasted coconut
- powdered sugar
Instructions
- Preheat the oven to 350°F. Grease a 9-inch pie plate well with butter or nonstick spray.
- In a large bowl, whisk the eggs and sugar until smooth.
- Whisk in the milk, melted butter, vanilla, and salt.
- Whisk in the baking mix until mostly smooth.
- Stir in the shredded coconut (and optional almond extract or lemon zest, if using).
- Pour the batter into the greased pie plate.
- Bake for 45–55 minutes, until the edges are set and the center has a gentle jiggle. If the top browns too quickly, loosely cover with foil near the end.
- Cool on the counter for 30–45 minutes, then refrigerate for 2–4 hours for the cleanest slices.
- Slice and serve chilled, topped with whipped cream and toasted coconut if desired.
Notes